
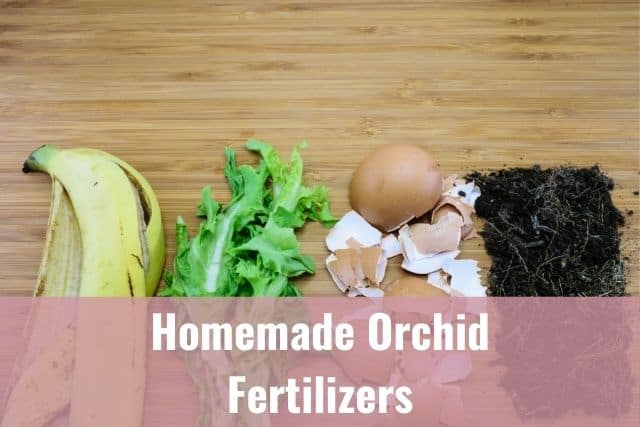
Commercially sold orchid fertilizers can be costly, but as an alternative, did you know you can make your own homemade orchid fertilizer for just pennies? However you choose to feed your orchids, regular fertilization is essential to keep them healthy and help them rebloom. With the right skills and some homemade orchid fertilizer, you can keep your orchids thriving. Let’s talk about how to make homemade orchid fertilizers.
You can make homemade orchid fertilizer out of used coffee grounds, tea bags, crushed eggshells, and crushed oyster shells. Brewing liquid fertilizer and spraying the orchids with this is the most efficient way to tap the fertilizer’s rich mineral content. Brewing homemade fertilizer also saves time by accelerating the mineral leaching process.
Let’s look at some of the key factors for successfully growing orchids. You’ll learn some of the best ways to care for orchids, including how to fertilize your orchids and how often. Plus, you’ll learn how to make different types of homemade fertilizers to keep your orchids growing and blooming all year round.
Please note that these links are affiliate links and as an Amazon Associate, I earn from qualifying purchases. Purchases made through affiliate links in this post may generate commissions at no additional cost to you. Use this link for a discounted Amazon Prime trial. Thank you for your support!
Table of Contents
Crucial Factors for Orchid Growth

- Light: Many orchids require 12 to 14 hours of light daily, all year round, to thrive. In a temperate climate, you will need to supplement with artificial light to keep them healthy. Orchids thrive when placed near east and south-facing windows, but you can substitute this with a full-spectrum light bulb if your windows or home will not allow for such placement.
- Growing medium: The ideal orchid growing medium provides excellent air circulation and allows water to drain away quickly. The medium should also help to anchor the roots and support the plant. Popular growth media include rock wool, dry fern roots, fir bark, stone, and peat moss.
- Watering: Most orchids are highly intolerant to overwatering. Without adequate air circulation in the roots, orchids end up with root rot and die. Typically, you should water orchids once a week at most to allow the growing medium to dry out between waterings. If you want to learn more, read this guide about how to water orchids the right way.
- Humidity: Tropical orchids are accustomed to humidity levels in the 50 to 80% range. In winter, the humidity levels in most homes drop to 30%, which affects orchid growth. Using a humidifier, humidity trays, or increasing ambient humidity in other ways can solve this problem.
- Fertilizer: Most orchid growing mediums are nutrient-poor and cannot sustain the healthy growth of the plants. Applying a liquid fertilizer is a great way to ensure your orchids have sufficient nutrients and micronutrients. However, you should primarily fertilize orchids during the active growth phase.
Orchid Fertilizers
Liquid orchid fertilizer is readily available on the market, and it comes in various formulations. Some growers prefer a 30-10-10 formulation, while others use a 20-20-20 formulation because it includes trace elements.
Regardless of the formulation you pick, you should ensure that it does not contain urea, which can be harmful for your orchid. I go over more about that in this article about how to fertilize your orchids. If you prefer, you can create homemade orchid fertilizers and ensure it’s free of toxic substances.
Here are some ways to create nutrient-rich homemade orchid fertilizers to save on cost and ensure your orchid plants thrive and bloom:
How to Use Coffee Grounds to Fertilize Orchids

When used coffee grounds are first added to the soil in your garden, they can increase the amount of organic matter available while enhancing water retention, soil aeration, and drainage. As time goes on, the microbes in the soils will begin to breakdown the coffee grounds, releasing the nutrients inside.
Coffee grounds contain several minerals essential to plant growth, including nitrogen, potassium, iron, calcium, magnesium, phosphorus, and chromium.
The rich mineral resources underpin the popularity of coffee grounds as a mineral soil amendment. However, the availability of some minerals such as nitrogen, zinc, calcium, iron, and manganese are so low that coffee grounds will not help address a deficiency.
However, potassium, phosphorus, copper, and magnesium are readily available, and the use of coffee grounds as fertilizer can positively impact the soil in the garden.
A cubic yard of coffee grounds contains 10 pounds (4.5 kg) of nitrogen, but only 0.1% of it is available for plant use. The nitrogen bound in the grounds is unavailable for plant use until it is broken down by micro-organisms.
Bacteria and fungus gradually convert the nitrogen into forms that are readily absorbed by plants. This allows coffee grounds to be a slow-release nitrogen fertilizer.
How does this translate into using coffee grounds as an orchid fertilizer? Let’s talk about that next.
How to Fertilize Orchids With Coffee Grounds
The slow release of bound nitrogen in the presence of microbes makes coffee grounds an ideal fertilizer for orchids, which grow in bacteria-rich media.
You have three options when using coffee grounds to fertilize your orchids:
- Composting: Compost with 5- 20% coffee grounds makes an excellent fertilizer for terrestrial orchids such as Cymbidiums and Paphiopedilums. However, it is best to balance the grounds with carbon-rich materials such as wood chips, dry leaves, or newspapers. You can dilute the resulting compost “tea” with some water and apply it to your orchid during the growing phase.
- Make a liquid fertilizer: Also known as “coffee ground tea”, this is the best way to use coffee grounds to fertilize orchids. You should dilute one part of coffee ground tea with three parts of water and only apply it once or twice a month during the orchid’s growth phase. Be careful not to get any on the leaves. Continue reading below to find out how to make and prepare this liquid fertilizer using coffee grounds.
Can I Put Coffee Grounds on All My Plants?
The effect of coffee grounds on plants and seed growth is variable, which makes it unsuitable for all plants. The grounds are known to enhance the development of some plants while inhibiting growth in others.
For example, used coffee grounds can inhibit the germination rate of alfalfa and red and white clovers. They can also inhibit the growth of Italian ryegrass, Chinese mustard, asparagus fern, and inch plant.
Researchers speculate that decomposing coffee grounds release substances that cause this inhibitory effect.
Conversely, coffee ground mulches and composts improve the germination rate of sugar beet seeds. They also improve the growth and yield of soybean and cabbages.
Decomposing coffee grounds are associated with disease suppression of fungal rots and wilts. Researchers suggest that the fungal and bacterial species found on decomposing coffee grounds suppress pathogenic fungal and bacterial species.
Used coffee grounds have also demonstrated disease suppression in vegetables such as cucumber, beans, tomato, and spinach. However, the efficacy levels in gardens and landscape remain unknown as the results were only achieved in a controlled environment.
Unbrewed coffee grounds are slightly acidic and positively affect the growth of various acid-loving plants. Rhododendrons, hydrangeas, lily of the valley, azaleas, radishes, and carrots thrive in the presence of unbrewed coffee grounds.
How to Make Orchid Fertilizer From Used Coffee Grounds
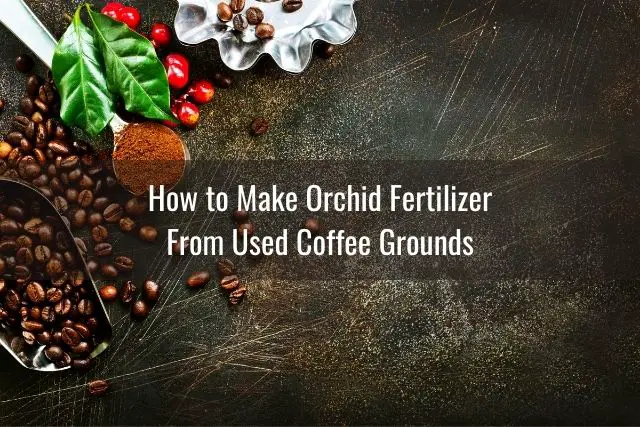
Since most orchid species are epiphytes and their roots are adapted to obtain nutrition and moisture from the air and surrounding environment, you can spray a mist of diluted nutrient-rich fertilizer on their roots.
Liquid fertilizer is the best choice since it is easy to dilute and apply directly on the bark and roots while avoiding the leaves.
To make “coffee ground tea,” here are the things you will need:
- 2 cups of used coffee grounds
- 5-gallon bucket with water
To make orchid fertilizer from coffee grounds, follow these steps:
- Place the used coffee grounds in the bucket.
- Fill the bucket with clean, soft water, just enough to cover the coffee grounds.
- Let the mixture sit for 24 hours.
- Filter out the grounds from the nutrient-rich coffee ground tea.
- Put the coffee ground tea in a closed jar and keep it in the fridge.
Dilute one part coffee ground tea with three parts water and use it to fertilize your orchids once a month during the growth phase.
Will Coffee Grounds Harm the Plant?
When used in large quantities, coffee grounds can have a disastrous effect on plants. This harmful effect is attributed to caffeine, a growth suppressant found in the coffee beans.
The amount of caffeine in used coffee grounds depends on the brewing method and ranges from 3.59 to 8.09 mg of caffeine per gram of coffee grounds.
Caffeine has an allelopathic effect on plants, as in, it curtails their germination to lessen the coffee plant’s competition in the growing field.
When coffee leaves drop on the ground, they contaminate the soils around the coffee tree. Since spent coffee grounds have high caffeine residual, they can have the same effect when used in soil amendment.
When a plant absorbs caffeine, it exhibits phytotoxic qualities and begins to kill and distort plant cells, leading to stunted growth or death.
That said, coffee grounds will only harm the plant if used in large quantities. In small amounts, coffee grounds can improve soil structure and water holding capacity. They will also increase the amount of nitrogen in the soils.
What Is Coffee Ground Tea?
“Coffee ground tea” is a coffee solution made from soaking used coffee grounds in water for up to 24 hours. Soaking the grounds in water over an extended period helps to leach some of the locked nutrients in the coffee grounds. This makes them readily available for plant use.
Like many seeds, coffee beans have nitrogen-rich proteins to aid seed germination and growth. They also have a low carbon-to-nitrogen ratio, which is ideal for plant and soil nutrition.
The brewing process uses water to extract coffee, leaving numerous hydrophobic compounds such as triglycerides, oils, lipids, and fatty acids in the ground. Insoluble carbohydrates, structural lignin, indigestible sugars, phenolic compounds, and essential oils also remain behind.
Typically, these nutrients become available in the soil after the coffee grounds start to decay. Such a recycling process favors the terrestrial plants and excludes aerial plants or epiphytes.
Soaking coffee in water extracts some of these compounds while skipping the decomposition stage. The resultant tea makes a nutrient-rich fertilizer for all orchid species.
What Are the Benefits of Coffee Ground Tea for Orchids?
The most apparent benefit of coffee ground tea is its rich profile of nutrients to the orchids. Since most orchids grow on air, they cannot harvest nutrients from coffee grounds.
Coffee tea makes excellent liquid fertilizer, which is the best way to supply orchids with the nutrients they need during their growth and blooming stages.
Although the composition will vary, the coffee tea contains essential nutrients necessary for orchids to thrive. It provides a cheaper alternative to the commercial liquid orchid fertilizers found on the market.
Since it is in a liquid form, coffee ground tea is easy to dilute and distribute to the orchid plants. You can easily fertilize the orchids by pouring directly on the bark while avoiding the leaves.
Using Tea Bags to Fertilize Orchids

But what if you are a tea drinker, not a coffee drinker? Well, you are in luck. It just so happens that you can also use tea bags to fertilize your orchids. So save those tea bags after you’ve already brewed your cup of tea, and read on.
Tea bags are an excellent orchid fertilizer because tea increases the amount of nitrogen available in a potting medium. Tea is comprised of 5% nitrogen, 0.5% magnesium, 2.5% potassium, 0.8% phosphorus, and 0.6% calcium.
The high nitrogen levels in tea are sufficient to meet the growing needs of your orchid plants. Popular orchid growth mediums such as pine or fir bark are prone to bacteria, directly competing with the orchid for available nitrogen.
Teabag supplements the growth medium’s nitrogen levels, ensuring that there is enough left for the orchids. Orchids also like the high concentration of tannic acid and tannins found in tea.
In nature, raindrops trickling down the tree pass over many objects, including twigs, fruits, leaves, animal droppings, and tree sap. That helps to build high levels of tannic acid on tree barks.
Since orchids thrive in an environment with high tannic acid and tannins, adding tea bags to the potting medium simulates the orchid’s natural growing environment.
Types of Tea
Processing tea entails subjecting raw tea leaves to an oxidation process and producing six major tea types that differ in aroma, color, strength, and taste.
The oxidation time determines the kind of tea produced—white tea has the shortest oxidation time while black tea has the longest. While all teas have the same minerals and chemicals, the amount and concentration differ among the six different types.
Therefore, the type of tea used to fertilize your orchids matters. Black, green, and herbal tea are the most popular for fertilizing orchids. Considering your orchid’s preferred pH level lets you pick the best option between the three types:
- Black tea is acidic and has a pH range of 5.0 to 5.5. It’s the perfect fertilizer for growing orchids because it helps to lower the water pH.
- Green tea, with a pH of 7 to 10, is perfect for terrestrial orchids such as Paphiopedilum, which prefer an alkaline growing medium.
- Herbal tea is neutral and is an excellent choice when you are unsure of the orchid’s species or pH preference.
How to Fertilize Orchids With Tea Bags
You have three options when using tea bags to fertilize your orchids or as a supplement.
Soak Orchid Roots in Tea
If your orchids are severely dehydrated and in dire need of water, soaking the roots in diluted tea provides a quick nitrogen fix. Clean out the old potting medium but leave the healthy green roots.
- Fill a vase with water, then add a tea bag and leave it just long enough to change the water’s color to brown. You do not need a strong concentration.
- Soak the orchid in the tea during the day and remove it at night to air dry the roots. Repeat the process every day for three weeks but change the water every three to four days.
Within a few weeks, the orchid will start to develop healthy green roots, which will help it overcome the severe dehydration and become vibrant again.
Water Orchids Using Tea With Lemon
Place a used tea bag in water, add a slice of lemon, and let it rest for a while before using it to water your plants. Watering your orchids with diluted tea increases the tannic acid, lowers the potting medium’s pH, and boosts nitrogen concentration in the bark. The lemon helps lower the pH of the water.
Place the Tea Bag Over the Potting Medium
Place a used wet tea bag over the potting media. This method delivers a high concentration of nutrients in one go. Additionally, the orchids will get some extra nitrogen and tannins with each watering session.
Never cut open a tea bag and spread the tea leaves on the potting media. It would be impossible to scrape off the tiny tea leaves off the roots and potting medium. Over time, the tannins in the tea leaves will cause the bark to break down, causing irreparable damage.
Are Tea Bags Good for Potted Plants?
While the tea is a source of nourishment for the orchids, the bags themselves can be a point of concern. Teabags are made from three different materials—paper, silk, or polypropylene. While paper and silk are biodegradable and can become part of the potting media, polypropylene is plastic and does not disintegrate.
Therefore, you should be aware of the material that a tea bag is made of when shopping for tea.
Use Crushed Eggshells to Fertilize Orchids
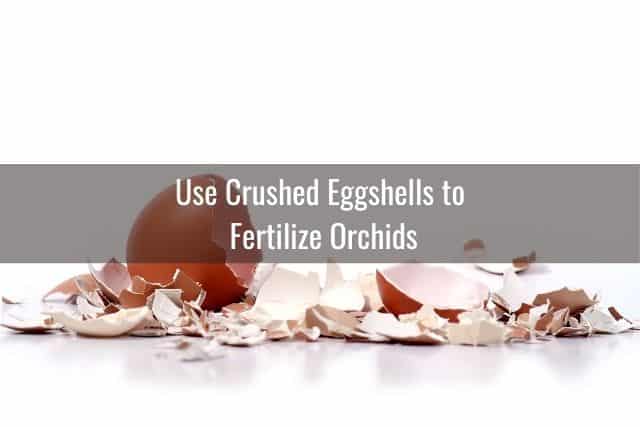
Eggshells are entirely made of calcium carbonate, which promotes healthy plant growth. Plants, including orchids, use calcium for the cell membrane and cell walls. Adequate calcium levels promote vibrant growth during the growing seasons.
Calcium deficiency in plants results in tip burns, blossom end rot, death of growing points, and premature shedding of buds and blossoms.
If dealing with terrestrial orchids, you can add crushed eggshells into your compost or crumble the shells into the soil before planting the orchids.
With time, the calcium carbonate and small amounts of phosphorus and potassium will breakdown into the soil and be absorbed by the roots. Naturally, this method takes a long time to deliver the nutrients to the plants.
How To Make Orchid Fertilizer From Crushed Eggshells
A faster way to boost your orchids with the minerals from crushed eggshells would be to use eggshell tea. This involves soaking the crushed eggshells in hot water and using the resultant nutrient-rich liquid as fertilizer.
Here are the things you will need:
- Clean and dry crushed eggshells
- A container
- Hot boiling water
To use crushed eggshells to fertilize your orchids, follow these steps:
- Clean the eggshells to remove the sticky egg whites, then leave them out to dry. You can speed up the process by drying them out in the microwave.
- Crumble the shells by hand, with a mortar and pestle, or in a blender.
- Put the finely crushed eggshells in a temperature safe container.
- Bring a pot of water to boil.
- Pour the boiling water into the container with the eggshells.
- Let the mixture steep until the water cools down to room temperature.
- Strain the eggshells from the tea.
- Leave the mixture to cool, then spray it on your orchids. Be careful not to get the liquid fertilizer on the leaves.
Use Crushed Oyster Shells to Fertilize Orchids
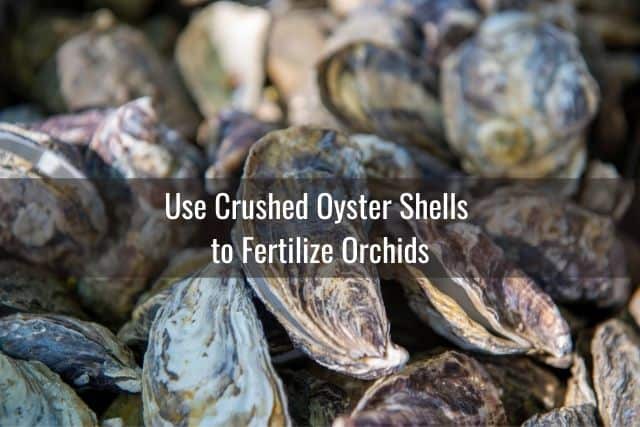
Oyster shells are the protective exoskeleton of a diverse range of mollusks that live in a brackish or saltwater environment. Oyster shells contain 96% calcium carbonate, which makes them superior soil additives. Crushed shells create a slow-release fertilizer and helps regulate the pH level in the soil.
The calcium in oyster shells strengthens plant cell walls, boosts nitrate intake, and helps enzyme formation. Adding a crushed fertilizer will increase the growth and vitality of your orchids.
While you can compost crushed oyster shells or add them directly to the potting media or soil around terrestrial orchids, brewing oyster shell tea is the most effective way to fertilize orchids.
How To Make Fertilizer From Crushed Oyster Shells
Here the things you will need:
- Oyster shells
- Apple cider vinegar
- A hammer or mallet
- A container with a lid
- An old towel or towel
- Plastic bag
To use crushed oyster shells to fertilize orchids, follow these steps:
- Clean and boil the oyster shells to remove any crusted sea salt.
- Remove the clean shells from the boiling water
- Place the shells in a sturdy plastic bag and wrap that bag in an old cloth.
- Use a hammer or mallet to crush the oyster shells into a powder. Alternatively, you can just buy crushed oyster shell flour to avoid crushing them yourself.
- Soak the oyster shell powder in apple cider vinegar. Mix three parts apple cider to one part oyster shells.
- Leave the mixture to steep for two to three weeks.
- Dilute a quarter cup of the oyster shell tea in a gallon of water and use it to fertilize your orchids.
Since apple cider vinegar is a weak acid, steeping the crushed oyster shell helps pull out the calcium carbonate. Crushing the shells to fine powder boosts the speed at which reaction occurs.
When and How Often Should You Fertilize Your Orchid?
As a rule of thumb, you should fertilize orchids “weekly, weakly.” It is better to use too little fertilizer when you feed your plants rather than over-fertilizing.
Over-fertilizing the orchid may lead to a build up of mineral salts in the orchid potting media and pot, which in the long term, can damage the plant. Over-fertilizing the orchid may also cause it to grow too quickly, leading to a weaker plant and less impressive blooms. When in doubt, fertilize with less, and less often.
Once you have decided on which fertilizer you would like to use, dilute it by using one part fertilizer to three parts water, and apply this mixture to your orchids each time you water them.
Why You Should Fertilize Regularly
Since most cultivated orchids are tropical plants, they require more nutrients than are available in most home environments. Fertilizing provides orchids with the additional nutrients found in their natural habitat and the energy they need to rebloom. It also replenishes the nutrients in the potting media.
How To Fertilize
In order to avoid burning the orchid roots with the fertilizer, be sure you water your orchid first, then apply the diluted fertilizer. Use a 30-10-10 (ratios of nitrogen, phosphorus and potassium) fertilizer concentration during the peak growth period but dilute it to half strength before application. As the orchids approach their blooming period, you can use a more balanced formula such as 20-20-20.
When To Fertilize
Most orchids enter the dormancy phase during winter. You can stop or reduce the fertilizing frequency during this period to allow them to grow leaves and strengthen the rooting system. It also enables the orchids to stockpile energy for the next bloom and growth spurt.
Instead, focus your fertilizing efforts on your orchid in the spring, summer and fall months. If you are curious to learn more, you can read about how to fertilize your orchids.
Final Thoughts
You can create nutrient-rich homemade orchid fertilizers from used coffee grounds, eggshells, tea, and crushed oyster shells. Brewing a liquid fertilizer is the most effective way to harvest the nutrients and make them available to the plants.
Homemade orchid fertilizer is easy and cheap to make and provides a host of essential nutrients to produce vibrant and healthy orchids with beautiful blooms. You can try out different homemade fertilizers and find the one that works best for your orchids. Happy orchid growing!
If you enjoyed this article, please pin it and share!


Recent Posts
Fusarium wilt in orchids is, unfortunately, a problem that you may encounter at one point or another. It is caused by the Fusarium pathogen and this kind of infection can be hard to identify at...
When it comes to choosing an orchid potting mix and knowing what kind of orchid soil is best, the decision can feel daunting. After all, there is a huge variety of options out there, from orchid bark...
