
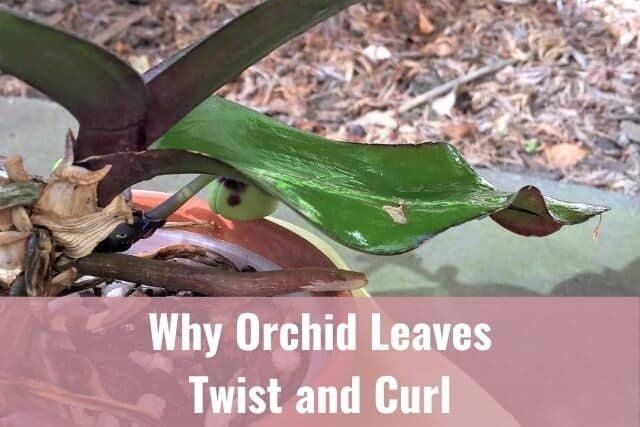
Ever wonder why your orchid leaves become twisted, curled or wavy? Orchid leaves will normally gently slope outward and downward, but on occasion, orchid leaves will become twisted and appear deformed. There are a number of reasons why this happens and I’ll go into the reasons below.
Your orchid leaf may twist or curl due to inadequate or directional lighting, as well as irregular watering or low humidity. Obstructions, pests, infections and genetics are some other reasons why orchid leaves become misshapen. Fortunately, most of the reasons why orchid leaves curl can be easily solved with a few interventions and changes in orchid care.
In this article, I will go in depth about the various reasons why orchid leaves may end up twisted or curled. There are solutions to almost every orchid problem, and this is no exception.
Most of these reasons for orchid leaf curl can be fixed with some quick changes to your orchid care. If you catch it when the leaf is still young, there is a chance that your orchid’s leaf can straighten back out as it grows. Even if it doesn’t though, you don’t need to worry as long as your orchid is healthy. Keep reading to find out more.
Please note that these links are affiliate links and as an Amazon Associate, I earn from qualifying purchases. Purchases made through affiliate links in this post may generate commissions at no additional cost to you. Use this link for a discounted Amazon Prime trial. Thank you for your support!
Table of Contents
Reasons Why Orchid Leaves Twist and Curl
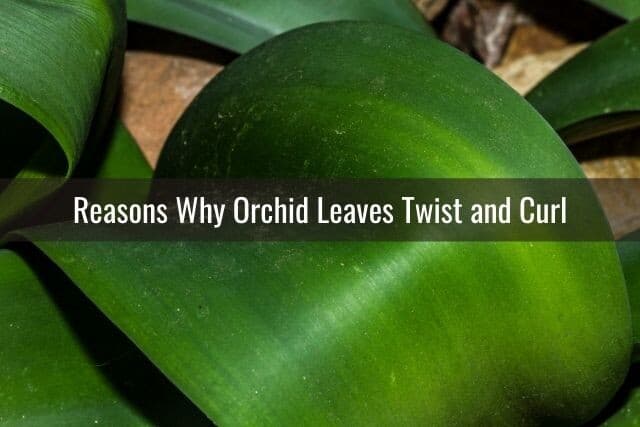
There are a number of reasons why orchid leaves can end up wavy, twisted, or curled. Sometimes, it is due to poor orchid care practices. Other times, it can be due to an infection, nutrient deficiency, or a pest infestation. I’ll talk more about these reasons below. I will also give you some interventions and tips on what you can do to fix this.
Inadequate Lighting
If there are inadequate lighting conditions, orchid leaves may start twisting and curling up or around to find the light. If the newer leaves (top layer of leaves) are thinner than the older leaves at the bottom, then you may have an issue with lighting. Some leaves can twist or curl as they try to grow up out of the shadow of other, more mature leaves.
Directional Light

Similar to how orchid leaves may twist and curl to find more light, this may also happen if their light source is only coming from one distinct direction. Orchid leaves can twist or curl in relation to where the light is coming from. Namely, the leaves facing away from the light may appear to twist or curl towards the light source on the other side.
Likewise, if you move your orchid frequently, you may find that the orchid leaves will twist or curl in relation to where the light is. The leaves will follow the sunlight. As they grow and mature, orchid leaves will harden in that twisted shape.
Prevention
To prevent this, try to provide your orchids with balanced light that doesn’t come from just one direction. Make sure all your orchid leaves have exposure to adequate light.
If your home does not have sufficient natural lighting, you can set up artificial lighting for your orchid plants.
One option is to move your orchid to a new location with better lighting. However, I would not recommend that you turn the orchid pot or start rotating it to get more light on the leaves. Once you set your orchid in a spot, do your best to just leave it there.
If you start rotating and turning the orchid pot, the orchid leaves will try to align themselves with the sunlight. As a result, they might end up becoming more curled or twisted. Orchid flower spikes and buds may also twist towards the light.
Unfortunately, once the orchid leaf matures, it will remain twisted, wavy, or curled. As long as the rest of the orchid plant is healthy, continues to bloom and grows new leaves and roots, I would not worry about the misshapen leaf. Once the leaf is mature, there isn’t much you can do to straighten it out. I do have an older orchid whose leaf has been slightly curled and twisted as long as I can remember. The orchid doesn’t seem to be struggling or unhealthy though. At this point, it is more of an aesthetic issue than anything.
Inadequate Watering

Inadequate watering practices can result in orchid leaves twisting and curling. Initially, when the orchid is lacking water, the leaves will become limp and dehydrated. Then, watering will cause a sudden influx of water into the plant cells, expanding them quickly. As the orchid becomes rehydrated, the leaf may change shape if rehydration across the leaf is uneven.
On the same note, younger or newer orchid leaves may start out twisted or curled if there is inadequate watering.
There are several ways you can tell if your orchid needs water. The easiest way is to just pick up the orchid pot or put your finger in the potting media. If the pot is light or the potting media is dry, then your orchid needs water. If you’d like to learn more, check out this resource on how to water your orchid.
If you have an orchid with pseudobulbs, such as an Oncidium, take a look at the pseudobulbs. Thin, wrinkled pseudobulbs may indicate that the orchid has been using up the water and nutrients held in this storage organ. This orchid is in need of more water.
If you have been watering your orchid regularly and the pseudobulbs still look this way, then you likely have a problem with water uptake. You will need to check the root system for rot or dead roots, which would impair your orchid’s ability to absorb water.
Treatment
Besides initiating a regular watering schedule for your orchids, you can also use Epsom salt to rehydrate your orchid roots. Basically, you can dissolve 1 Tablespoon of Epsom salt in 1 gallon of water. Use this Epsom salt solution to soak your dried orchid roots for up to three hours. Do this only as needed, and no more than a handful times throughout the year.
Depending on your orchid species, you may need to water more or less frequently. Oncidium orchids, in particular, prefer high humidity and moisture. If the potting media is dry, that means your Oncidium is past due for watering.
In the future, keep your Oncidium orchid on a regular watering schedule. Don’t let the potting media completely dry out. In the summer, these orchids may need to be watered several times a week if temperatures are high.
If an orchid leaf has curled due to inadequate watering practices, it will take several weeks of regular watering to get it back on track. If you caught it early, it may be possible for the leaf to straighten out over time.
However, it is also possible that the leaf may stay curled or twisted. In an otherwise healthy orchid, this is not a problem. As long as you are providing proper orchid care and your orchid is healthy, don’t worry about twisted or curled orchid leaves.
Low Humidity Levels

As I’ve mentioned, water stress and irregular watering habits can lead to deformed, twisted or curled orchid leaves. Likewise, low humidity levels can lead to structural changes in the orchid leaf. Most orchid plants prefer humidity levels between 40-80%. Your orchid plant’s preference and humidity needs will vary according to its species. Low humidity levels will result in dehydrated plants or orchids with dried aerial roots.
In addition, as orchid leaves age, they can curl due to low humidity levels. Some orchids, such as Oncidiums, love high humidity levels. Their leaves will start curling if the humidity levels are low or the lighting is inadequate.
Treatment
You can use a hygrometer to help you monitor humidity levels around your orchid. Another option is to set up a cool-mist humidifier in the same room as your orchid.
You can also use a humidity tray under your orchid pot. If you prefer not to buy one, a humidity tray is simple and inexpensive to make. All you need is a tray and gravel or river rocks.
Line the tray with gravel or river rocks and add water until it is partway up the rocks. Set your orchid pot on top of the rocks, making sure that the water does not actually touch the pot. As the water evaporates, this will provide some ambient humidity around your orchid plant.
If your orchids need extra humidity added to their growing environment, check out this helpful article with ideas on how you can increase humidity for your orchids.
Obstructions
It may sound silly, but yes, if there is something blocking your orchid’s leaf as it grows, it may become twisted or curled. For example, if your orchid is next to a windowpane or wall and the orchid leaf is up against that surface as it grows, it may end up malformed and misshapen. If no action is taken to move the orchid, the orchid leaf will remain in this shape as it matures.
Prevention
The easiest and best solution would be to move your orchid to another location. Do this as soon as you notice that there is an obstruction blocking your growing orchid leaf. If you take action early enough, there is a chance the orchid leaf will straighten itself out as it continues to grow.
Pests
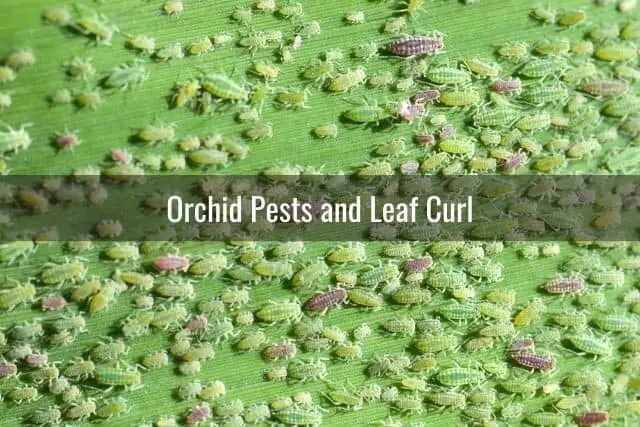
Sometimes pests or a pest infestation can cause an orchid leaf to curl or become deformed. Sap-sucking insects such as aphids, mealybugs, or scale can be blamed for this. As the insects suck out the sap and nutrients from the orchid leaf, the cell walls of the plant cell collapse. This leads to the dehydration and a loss of structural support in the leaf. As a result, the orchid leaf will be curled or sunken.
Treatment
Pest infestations in orchids can be a pain, but it is best to deal with it as soon as you realize what is happening. You can identify and treat these orchid pests using a few simple methods. Check out my resource about orchid pests for more information. You will get some concrete ideas on how to get rid of aphids, mealybugs and scale from your orchids.
As soon as you identify a pest infestation on your orchids, you will need to isolate the infected orchid from your other plants. This is so the pests don’t have a chance to spread to your other orchids.
Aphids can be removed from orchids using a strong spray of water, insecticides, horticultural oils such as neem oil, or ladybugs, the natural predator of aphids.
Mealybugs can also be dealt with using pesticides. However, I’ve found that the simplest and best way to remove mealybugs is with a q-tip soaked in rubbing alcohol. Just use the q-tip to get into all the crevices and areas where you see mealybugs–the rubbing alcohol kills them on the spot. You can also deal with orchid scale using rubbing alcohol or soap.
Prevention
At some point or another, you will encounter pests on your orchid plant. That goes without saying. The best thing you can do is regularly inspect your orchids for any pests (or diseases) and perform routine maintenance. Routine maintenance would involve pruning of orchids and removing dead plant material. Doing so would decrease the opportunity for pests and bugs to hide in the decaying material.
If you are purchasing a new orchid plant, it may be wise to set it in a location away from your other orchids, at least for the first two weeks. You never know–sometimes pests, bacteria, mold, or fungal disease can be hidden in the store-bought orchid. Before housing it with your other plants, make sure that it is free of pests and disease.
Fusarium Wilt
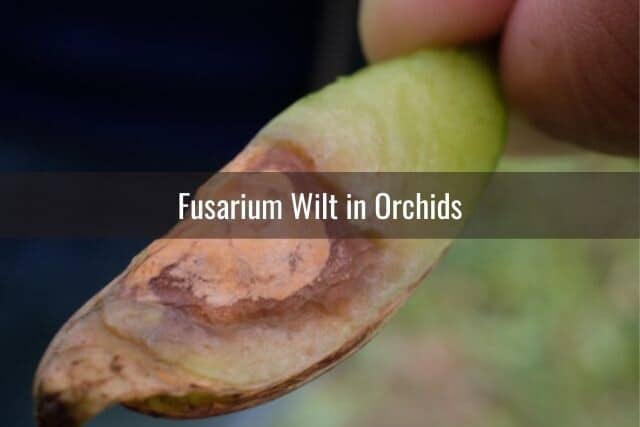
Fusarium wilt is a fungal infection that is passed onto orchids through infected pruning tools. Improper cleaning of these gardening tools allows the fungus to stay on the gardening shears and infect other plants. This is why it is so important to sterilize your pruning tools before you repot or prune your orchids.
In Fusarium wilt, the fungus attacks your orchid and causes rot. The root rot and rot throughout the orchid prevents the plant from properly absorbing water. Even as you continue to water the orchid, it will appear dehydrated. The leaves will start wilting and curling inward. You will be able to tell that something is wrong because the leaves will also become thinner and yellow as they curl inward.
Treatment
As soon as you identify Fusarium wilt and isolate your orchid, you will need to cut away all the infected parts. Using a sterilized blade, cut away all the infected parts of the orchid. This might be the leaves, roots, stem, or canes.
It is important to sterilize your blade again after each cut you make. That way, you will prevent further spreading the fungus to healthy parts of the orchid. You can use a 10% bleach solution to sterilize your cutting tools or rubbing alcohol.
After you cut off all the infected parts of the orchid, put them in a bag, seal it and throw it away. You will need to follow up with a fungicide treatment. An example of a fungicidal treatment used for orchids would be Physan 20 (follow product instructions) or Thiomyl (dissolve 2 teaspoons of Thiomyl in 1 gallon of water). Keep your orchid isolated and repeat treatment if necessary. Don’t put your orchid back with your other plants until you are sure the fungal infection is gone.
Genetics
Finally, another reason why orchid leaves may twist, curl or become wavy is genetics. Some orchid species are more prone to leaf curling than others. Examples of this include Cattleya and Oncidium orchids.
Some Cattleya hybrids in particular have a tendency towards leaf curling. This does not imply poor orchid care or health problems. It may be more prevalent or noticeable though if your orchid’s lighting and watering conditions are irregular or inadequate. If you see this in your orchid and you are doing everything else right and the orchid is healthy, then the leaf curl is likely due to genetics.
Final Thoughts
As you can see, there are a number of reasons why your orchids leaves may be twisting or curling. You can address most of the reasons for leaf curl quickly and easily. If you have an otherwise healthy orchid, orchid leaves that are curled or twisted are generally not something to be concerned about. It may have been an issue when that orchid leaf was growing that is now resolved, but the leaf shape has stuck.
If you enjoyed this article, please pin it and share!

Recent Posts
Fusarium wilt in orchids is, unfortunately, a problem that you may encounter at one point or another. It is caused by the Fusarium pathogen and this kind of infection can be hard to identify at...
When it comes to choosing an orchid potting mix and knowing what kind of orchid soil is best, the decision can feel daunting. After all, there is a huge variety of options out there, from orchid bark...
