
Fall, otherwise known as autumn, is the time that many orchids lose their blooms and enter a stage of dormancy. However, this doesn’t mean that orchid care stops. In fact, there are specific things you should do for your orchids to keep them healthy and alive during the autumn months.
During the fall months of September to November, you will need to adjust your orchid care practices to account for the orchid’s transition into dormancy. Prune your orchid, reduce watering and fertilization and delay repotting until the spring. Continue to give your orchid lots of bright, indirect light. When you do fertilize, use a bloom booster orchid fertilizer to ensure abundant blooms in the late winter and early spring.

As you know, the temperature starts to drop in the fall and the days get shorter. The actions you take during this time of transition will help support your orchids and allow them to rebloom the following season. Keep reading to learn what key things you need to do for your orchid this autumn.
Please note that these links are affiliate links and as an Amazon Associate, I earn from qualifying purchases. Purchases made through affiliate links in this post may generate commissions at no additional cost to you. Use this link for a discounted Amazon Prime trial. Thank you for your support!
Table of Contents
Orchid Fall Maintenance and Care

During the cooler fall (and winter) months, orchid growth will slow down. The orchid is starting to transition into its dormant or resting period. Here are some things to do at the start of fall, and how to adjust your orchid care practices to match the orchid’s needs during this season.
Prune Your Orchid
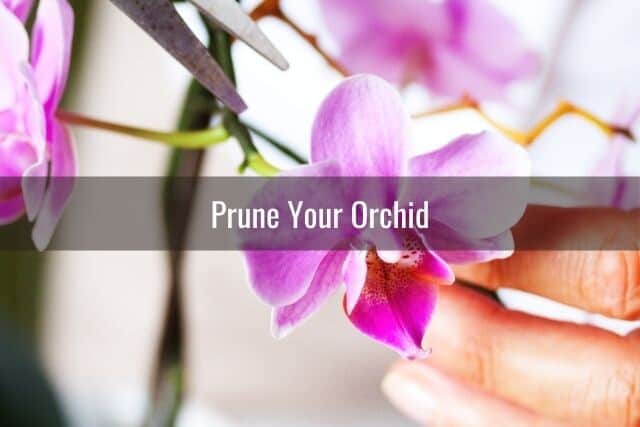
Once the spent orchid blooms start to wilt and fall off your orchid, you may notice that the flower spike starts to change color and wither. Prune off any dead flower spikes or leaves using a pair of sterilized gardening scissors. To prevent infection and seal the wound, dab some ground cinnamon powder on the cut end of the orchid stem.
It is important to get rid of any dead or decaying tissue on the orchid and prune your orchid as needed. Decaying or dead plant matter provides a home for orchid pests and can lead to the growth of bacteria, fungus and mold.
If you would like more guidance on pruning orchids, check out this resource on how to prune an orchid.
Orchid Lighting Needs in the Fall

In general, an orchid needs about 12 to 14 hours of bright, indirect sunlight each day. Different orchid species may need high levels of light while others do better in low light.
As the months turn cooler, there will be naturally less hours of daylight each day. To maximize the amount and quality of lighting your orchid receives, place your orchid near an east-facing window.
If you are using artificial lights to grow your orchids, keep the decreasing amount of daylight hours in mind. Adjust the artificial lights to mimic the changing season.
In other words, do not leave the lights on for 16 hours a day, year round. In the summer months, 16 hours of artificial lighting would have been fine.
However, during the fall, change the artificial light settings so that the orchids get no more than 15 hours of light a day. As the fall months move into winter, you will need to reduce the artificial lighting exposure even more. If you would like to learn more, check out my guide on how to set up artificial lighting for your orchids.
Watering Your Orchid in the Fall
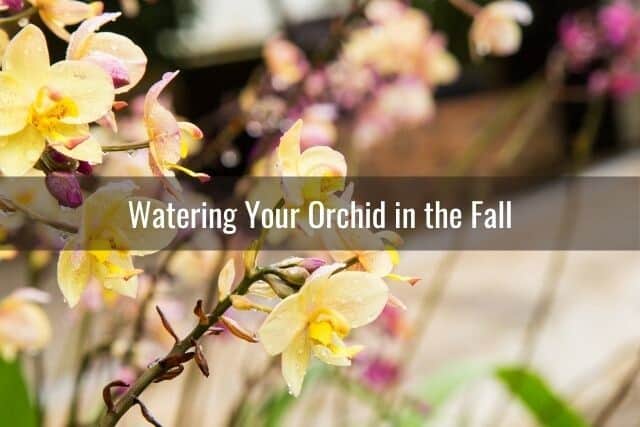
As the orchid transitions into a period of dormancy and reduced growth, it will not need as much water.
In addition, the cooler fall temperatures result in slower drying of the wet orchid potting media. The potting media may stay damp longer between waterings. Less frequent watering during this season can help prevent root rot.
Instead of watering your orchid weekly or even twice a week as you had in the summer months, water your orchid about once every 10 days.
Before you water your orchid, check the potting media first. If it is still damp, wait another day or two and check the potting media again before you water. If it is nearly dry, go ahead and water your orchid.
As always, try to water your orchid in the early morning so that the excess water and moisture can drain from the potting media before nightfall. Empty water from the trays and saucers under the orchid pots to prevent bacterial growth and disease.
Continue to provide good air circulation around your orchid to maintain root health and prevent mold or disease. You can use a circulating fan set on the lowest setting to create air movement in the room. Never point the fan directly at the orchid.
Manage Indoor Humidity Levels

Humidity levels in homes are typically low. In the cooler fall months, as people start to turn on space heaters or central heating systems, the indoor humidity levels can drop even lower.
Use a hygrometer to monitor your home’s humidity levels. Proper humidity levels are key to an orchid’s health. You can learn more about why humidity is so important to orchids here.
Most orchids prefer humidity levels ranging from 40-70%. Since the natural humidity levels in many homes is not this high, orchids will need supplemental humidity by means of a humidifier or humidity tray.
When choosing a humidifier for your orchid, use a cool-mist humidifier. This is safer, especially if you have children or pets. Hot water or steam from a warm-mist humidifier can cause burns if a child gets too close or if the device gets knocked over and the water spills.
Cool-mist humidifiers use a fan to evaporate water into the air and are safer to use. I use a larger cool-mist humidifier such as this humidifier by Vicks to humidify the room for my orchids.
Alternatively, you can buy a portable mini humidifier if you just have one or two orchids or want something more discreet.
The downside of these cool-mist humidifiers is that bacteria and mold can accumulate and grow rapidly if the humidifier is not maintained. To prevent this, make sure you empty any standing water when the humidifier is not in use. Also, be sure you clean your humidifier regularly.
Another way you can provide humidity for your orchids is by using a humidity tray under the orchid pots. You can make one yourself using a tray lined with rocks and a small amount of water at the bottom. Or you can buy a ready-to-go tray with decorative rocks or a Humidgro tray.
Orchid Fertilizer Needs in the Fall
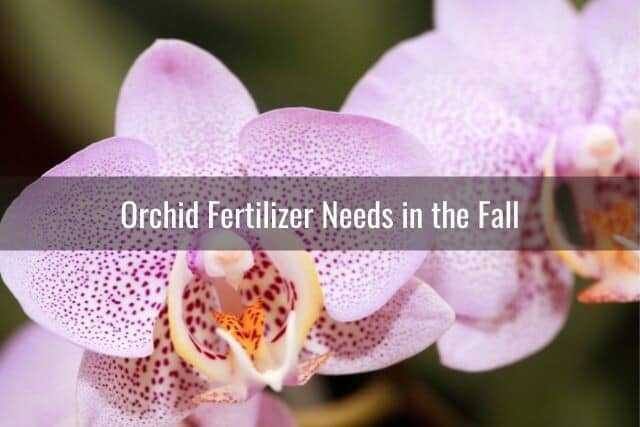
During the cooler fall and winter months, many orchids enter a resting phase and some orchid species even become completely dormant. When this happens, orchids do not need to be fertilized frequently, or in some cases, at all.
In the fall, similar to watering, fertilization during this time will be infrequent. When you do fertilize your orchids, you can fertilize once a month using a diluted orchid specific bloom booster fertilizer.
When choosing a bloom booster orchid fertilizer, look for one with an NPK of 10-40-10 or 5-25-5 or a formula where the middle number (phosphorus) is the largest number. The higher phosphorus levels will help trigger flower production in your orchid.
Choose a bloom booster orchid fertilizer such as SunBulb’s bloom booster fertilizer, or JR Peter’s liquid concentrate bloom booster orchid fertilizer. Both of these fertilizers have good reviews, and more importantly, have lower nitrogen and higher phosphorus concentrations. Follow the product instructions for preparing and diluting the fertilizer.
If you would like to learn more about orchid fertilization, you can check out my guide on how to fertilize your orchid.
Stake Your Orchid’s Flower Spikes
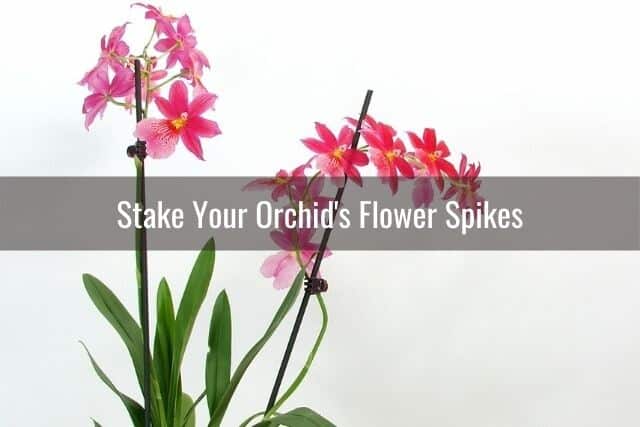
One of the ways to get an orchid to rebloom is to give your orchid a day/night temperature difference of 20 degrees Fahrenheit. During the cooler fall months, there is naturally a widening gap between daytime highs and nighttime lows. This will help trigger the growth of flower spikes, or inflorescences, on your orchid. Keep an eye out for these.
As you see the flower spikes grow, continue to provide your orchid with lots of bright, indirect light to support its growth and flower production.
When the flower spikes grow longer, at about the 6 to 8 inch mark, you can start providing physical support in the form of staking. You can use orchid flower stakes such as these metal support stakes, or these bamboo orchid stakes, to support your orchid’s top heavy flower spikes.
Repotting Questions

Try to wait until spring or after the next blooming season is done to repot your orchid. Right after the orchid has dropped its blooms in the spring, it enters a growth period and this is typically the best time to repot an orchid.
However, once the orchid enters into the cooler fall months that window of repotting opportunity has closed. When the orchid starts transitioning into a resting or dormant state, you will want to hold off on repotting your orchid.
The only situations where you should repot your orchid during this season would be disease, rot, or some other case where your orchid will not survive until the next growth season unless you repot it now.
Repotting your orchid in the fall can result in unnecessary stress to the orchid and disrupt its attempt to enter dormancy.
During dormancy, the orchid starts to prepare for the next blooming season. Repotting can negatively affect this process. After all, repotting often involves the pruning of dead roots, a change in environment, and oftentimes, drier potting media requiring more frequent watering. This is at a time when watering needs should start to slow down. So, unless its a life-or-death situation, just wait until the next spring to repot your orchid.
Moving Outdoor Orchids In
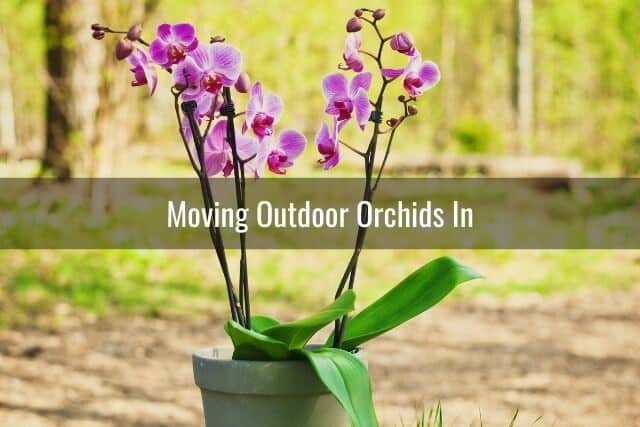
Do you keep your orchids outdoors during the warm summer months? Fall is the time of year when you will need to start thinking about bringing your orchids in and accounting for the cooler nighttime weather.
However, whether you keep your orchids outdoors or start moving them inside during the cooler fall weather will depend on where you live. If you live in a location where the climate is mild year-round and nighttime temperatures don’t drop below 60 degrees Fahrenheit, you can most likely leave your orchids outdoors year-round, depending on the species.
However, if you live in a place where summers are warm and winters are cold and snowy, you will need to start transitioning your orchids indoors in the fall.
Checklist For Moving Orchids Indoors in the Fall
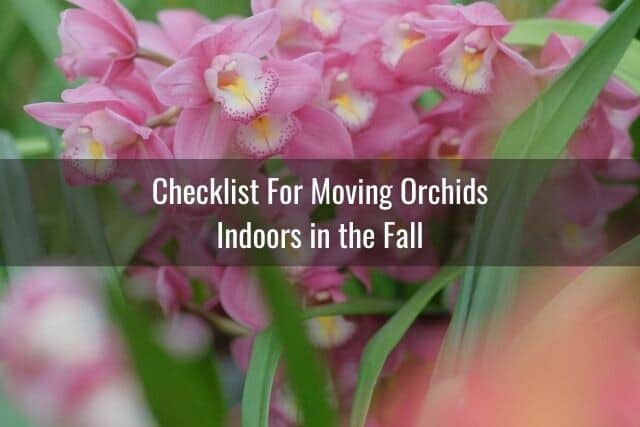
- Research the temperature tolerance range for your specific orchid. This will help guide your decision regarding when to bring your orchids in or know if you can leave them outdoors a little longer. If your region is forecast to experience an early cold snap, start bringing your orchids in early.
- Prepare your indoor orchid space. Give it a good cleaning. Wash nearby windows to maximize the amount of sunlight that can come in. If you will be using heaters, artificial lighting, or humidifiers, make sure nearby electrical outlets are in good working order.
- Select a space inside your home where your orchids will be able to receive lots of bright, indirect light during the winter months. Remember, there are less hours of sunlight during the fall and winter, so you want to put your orchid in a location where it can get as many hours of sunlight as possible.
- You may need to set-up artificial lighting for your orchid if your home doesn’t get natural light. Many orchid growers supplement indoor lighting with artificial lights.
- A quick and easy way to bring orchids indoors is to use a garden wagon or use a wheeled planter stand under your orchid pots (for bigger orchids).
- Before bringing in your orchids, thoroughly check them for any pests or signs of disease. Deal with any problems you find before moving your orchids indoors. I put this last, but it may be quite possibly the most important “to do” on your fall checklist for orchid care.
Final Thoughts
Set your orchid up for success by ensuring it gets the proper care and attention in the fall months. Handling the fall-related orchid care “to do’s” will help ensure a healthy orchid and a prolific flower production come late winter and early spring.
If you would like to learn more about what to do for the next season, please check out my guide on how to take care of orchids in the winter.
As always, happy orchid growing!
If you enjoyed this article, please pin it and share!


Recent Posts
Fusarium wilt in orchids is, unfortunately, a problem that you may encounter at one point or another. It is caused by the Fusarium pathogen and this kind of infection can be hard to identify at...
When it comes to choosing an orchid potting mix and knowing what kind of orchid soil is best, the decision can feel daunting. After all, there is a huge variety of options out there, from orchid bark...
