
Are you curious about how you can take care of your orchid roots? Most orchids are epiphyte plants and do not require soil to grow. Instead, they have unique roots covered in velamen. This allows the plant to absorb water and nutrients from the surrounding environment. Orchids also rely on their roots to anchor themselves to trees, orchid mounts, or their potting media. For these reasons, root health is very important to an orchid’s survival. Keep reading to learn more about how to take care of orchid roots.
You can take care of orchid roots by giving your plant adequate water and removing rotted or diseased roots during repotting to avoid infecting the healthy roots. Keep your orchid safe from fungi and bacteria by allowing for good air circulation around your plants and in your potting media. Be sure your orchid has adequate light and humidity as well.
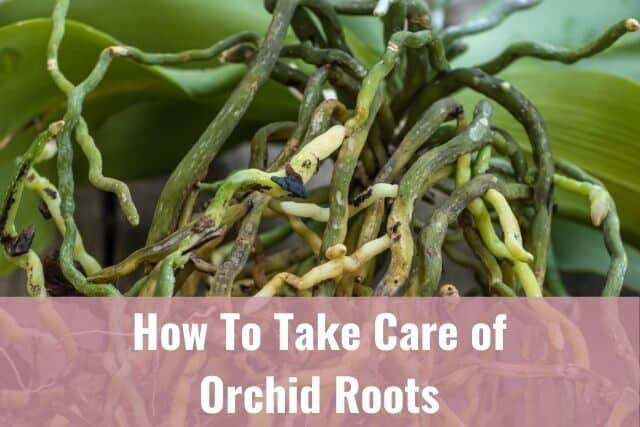
This article will discuss everything you need to know about how to take care of your orchid’s roots. I will go over how various growing conditions can affect the health of your orchid roots. You will also learn about what to do with aerial roots, when and how to trim the roots, and how to safely repot your orchid.
Please note that these links are affiliate links and as an Amazon Associate, I earn from qualifying purchases. Purchases made through affiliate links in this post may generate commissions at no additional cost to you. Use this link for a discounted Amazon Prime trial. Thank you for your support!
Table of Contents
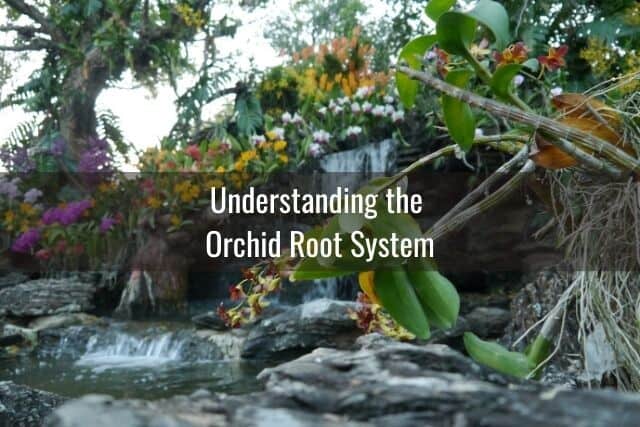
Understanding the Orchid Root System
Functions of Orchid Roots
Orchid roots function similar to the roots of any other plant. Orchid roots are essential for anchoring the plant and keeping the orchid stable. Roots are also important in photosynthesis and helping the orchid absorb nutrients and water. Let’s look into each of these in more detail.
Anchoring and Stability
Just as terrestrial orchids’ roots anchor them to the soil, epiphyte orchid roots anchor the orchid to a tree, rock, or its pot and potting media. Orchid roots attach the plant firmly to surfaces to stabilize the plant. This ability of the roots to attach themselves securely to the orchid’s home helps ensure the plant’s survival.
Water and Nutrient Absorption
In most other plants, the roots absorb water and nutrients from the soil. Orchid roots, however, absorb moisture, nutrients, and carbon dioxide from the air and potting media. The roots then distribute the water and nutrients to the rest of the plant.
Photosynthesis
Orchid roots have a third function that is unique, and that is photosynthesis. While the orchids’ leaves handle the bulk of the photosynthesis for the plant, the roots can also perform this function. Many orchids are epiphytes. In their natural habitat, orchids grow with all the roots exposed. These orchid roots have adopted the ability to photosynthesize for the plant.
The ability of the roots to perform photosynthesis is very useful during critical situations, such as when an orchid loses all its leaves. Even without leaves, an orchid can still survive as long as it still has a functioning root system and the roots have access to adequate sunlight.
Velamen
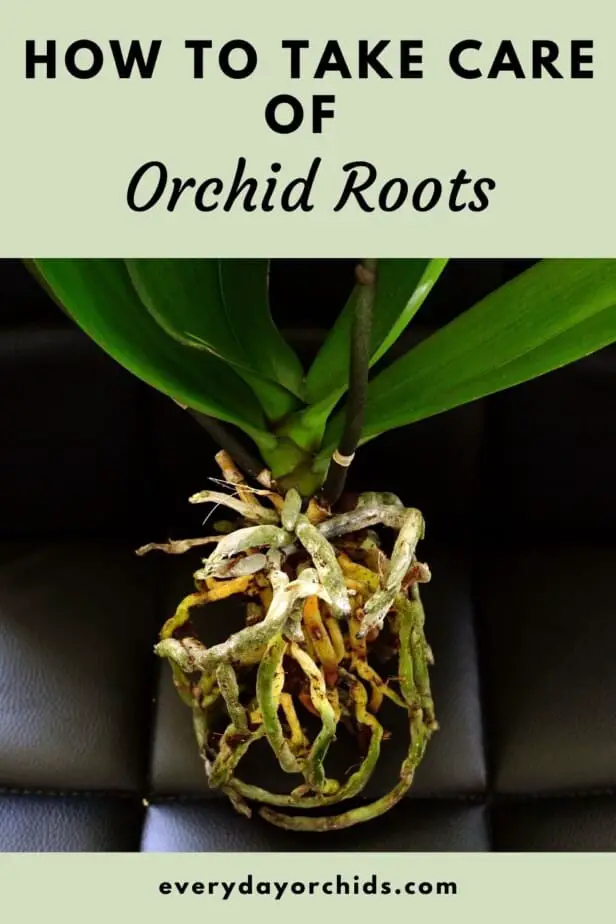
One unique characteristic of orchid roots is that the roots are surrounded by a protective covering called velamen. The velamen acts like a sponge. It has special cells that soak up and store water, then transports the water and nutrients to the stele. The stele functions like the blood vein of the plant, delivering nutrients to the leaves and the pseudobulb.
The velamen makes orchid roots look thicker and fleshier than the roots of most other similar-sized plants. Removing the velamen will show you the actual root, which is thin and string-like in appearance. The velamen is essential to the root’s survival.
In situations such as root rot, you will notice that the velamen is no longer white or fleshy. It can no longer absorb nutrients or water. As a result, the entire root rots and dies.
Aerial Roots
Most orchids are epiphytes, which means that, in their native environment, they grow on trees. Their roots do not burrow down into the soil. Instead, the roots will anchor the plants onto the host by attaching themselves to a rock or tree trunk. These roots will grow in all directions: upwards, downwards, or sideways as they hug the rock or tree.
Epiphyte orchid roots have a natural tendency to reach out into the air instead of digging downwards into their potting media. These roots are naturally inclined to look for a surface to anchor themselves to and absorb moisture and nutrients present in the air around them.
Most growers who plant their orchids in pots use the term “aerial roots” to refer only to the roots that are exposed or that grow outside of the potting media.
Technically, however, all the roots of epiphyte orchids are aerial roots and can grow in the air. So the main difference between normal orchid roots and aerial roots is their location.
What Do Healthy Orchid Roots Look Like?
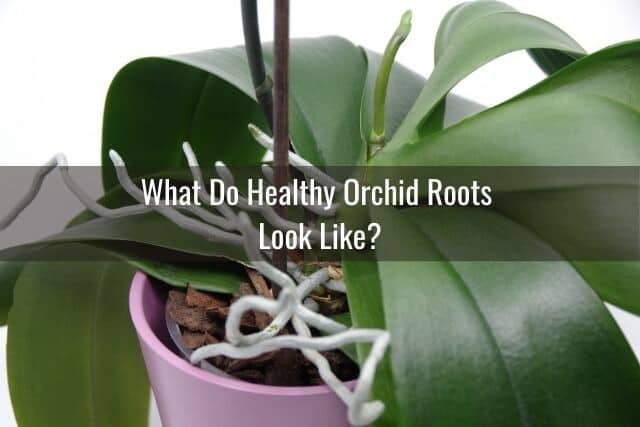
Healthy orchid roots have a silvery-white velamen surrounding the root and are firm to the touch.
Orchid roots can appear bright green right after they have been watered. Once the roots are dry, they revert back to a silvery-white color, which is the color of the velamen’s translucent covering. This covering becomes transparent when it is wet. This ability to turn green also demonstrates the ability of the roots to photosynthesize.
If the roots are always bright green, it could mean that you are overwatering your plant and that the roots are always wet.
If you do not adjust your watering practices in a timely manner, your roots will soon rot and become dark brown or black. These roots, and eventually the plant itself, will die if left untreated.
What About Unhealthy Roots?
To check the firmness and health of the roots, gently press or pinch a root in between the pads of your thumb and index fingers. If the roots are very soft, hollow, or mushy, that means they are rotted and dead. Oftentimes, this is due to overwatering. Rotted roots will also appear dark brown or black instead of bright green or silvery white.
Brittle, thin, dry roots, on the other hand, are a sign that your orchid is underwatered. The roots of your plant will also turn yellow and appear shriveled if you keep it in a low-humidity environment.
How To Care for Your Orchid Roots
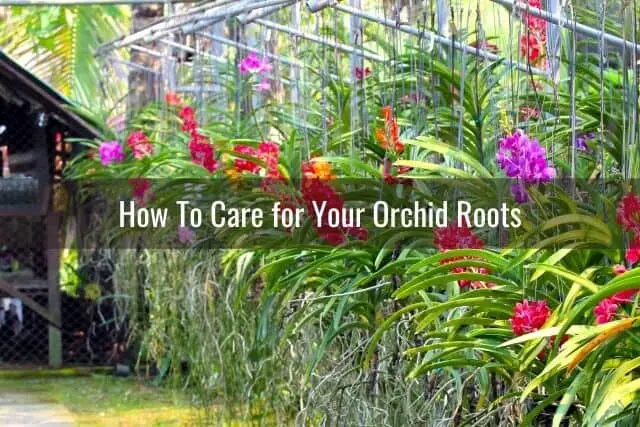
When you take care of your orchid’s roots, you are also taking care of the plant itself. The same is true in reverse. As long as you are following general orchid care guidelines when caring for your orchid, you are, in effect, taking good care of the roots too.
That being said, you can take care of your orchid’s roots by providing the essentials in the right amounts. These include water, sunlight, and humidity. Orchids need the right kind of potting medium and good air circulation. You also need to keep your orchid safe from pests and insects, as well as from diseases caused by fungi and bacteria.
Adequate Water
The frequency of your watering should depend on the orchid varieties you have and on the climate or weather. For example, if you usually water your plant once a week, you may need to water more frequently during the summer and less during the winter.
The type of orchid species is also important. There are orchid species that are drought-tolerant, while other species prefer more frequent watering.
As a rule of thumb, you should allow your potting media to completely dry out between watering sessions. That means you will need to make sure you have a well-draining pot and water your plant in the morning. Check your potting media every few days and wait until it is dry to the touch before you water it again.
Overwatering your orchid increases the chances you will end up with root rot. There are also types of fungi and bacteria that thrive on roots and potting media being constantly moist. These microorganisms can cause root rot and other diseases that could kill your plant.
Underwatering, on the other hand, would cause your roots to dry out and shrivel.
Proper Lighting
Orchids, in general, like bright, indirect light. They need exposure to light for anywhere from 8 to 12 hours a day, depending on the species and time of year. Adequate lighting is not only important to the leaves but to the roots as well. After all, orchid roots can also perform photosynthesis. This is a process by which plants use the energy they get from light to convert carbon dioxide and water into sugars and oxygen.
Good Air Circulation & Ventilation
Orchids need to have free-circulating fresh air in their surroundings. Excellent circulation and proper ventilation help with the evaporation of stagnant water in the pot. This helps prevent fungi and bacteria growth, both of which thrive in moisture and stagnant air. Moreover, ventilation helps the plant tolerate intense light that could otherwise cause sunburn on the leaves.
Good air circulation is not only important in your orchid’s immediate surroundings, but also in its potting media. When potting your orchid plant, make sure you use a pot or container with slits or holes such as this orchid pot by rePotme. This type of pot is specifically designed for orchids.
You will need to place your potting media loosely in the pot around the roots. This allows oxygen and carbon dioxide to circulate freely and keep the roots from rotting. These gaps in the potting media also help ensure that water can drain easily and not get trapped.
Right Amount of Humidity
A large number of orchid species originated from tropical forests with high humidity levels and constant air movement. Humidity is the percentage of water vapor that is present in the air.
Ideally, orchids require humidity levels of at least 45 to 50 percent. Many orchids will be happy with humidity levels between 50 and 80 percent. The recommended humidity level for indoor orchids is between 30 to 50 percent.
Excessively high humidity levels could result in root rot. On the other hand, if humidity levels are too low, the roots could appear dried and shriveled.
If you live in a low-humidity indoor space, there are ways for you to increase humidity levels to keep your orchids healthy and happy. For example, if the air is especially dry during the cold winter months, you can place a cool-mist humidifier by your orchids. You can also create a humidity tray and place it under your orchid pots.
A humidity tray is a tray filled with gravel or rocks and a small amount of water. As the water evaporates, it will help humidify the air around your orchid pots. When filling your humidity tray with water, you want just enough water to reach half way up the gravel or rocks. This is so that the water does not touch the pots. You do not want your orchid pots to sit in a pool of water, since this can lead to other problems.
Also, watering your orchids more often than necessary does not compensate for low humidity levels.
The Right Kind and Right Amount of Fertilizer
You can also take care of your orchid’s roots by using orchid-specific fertilizer and feeding your plant regularly. Orchids have particular nutritional requirements. You should use only orchid-specific formulas to fertilize your orchid. These fertilizers contain the right kinds of nutrients for your orchids and in the right proportions. Other types of fertilizers may contain substances that may not be suitable for your orchid.
Some examples of popular orchid fertilizers are Miracle Gro Orchid Soluble Food, SunBulb’s Bloom Booster Orchid Fertilizer, and rePotme’s Orchid Food fertilizer. Some orchid growers prefer not to use Miracle Gro on their orchids, while others do. I personally have used Miracle Gro orchid fertilizer and didn’t have any problems. There are definitely pros and cons to using Miracle Gro fertilizer on orchids and it is a personal decision to use Miracle Gro or not.
One thing to keep in mind is that it is not advised that you give your orchids full-strength fertilizer. Do not feed it more frequently than what is recommended either. The practice of over-fertilizing could cause fertilizer burn. As such, always follow the instructions stated on the packaging for mixing and diluting your fertilizer.
You can fertilize “weekly, weakly,” using a diluted fertilizer solution during your weekly watering sessions. You can also stop or decrease the frequency of fertilization during your orchid’s dormant season. If you are unsure, you can observe the health and status of your orchid leaves and roots to see if it needs more or less fertilizer.
More specifically, over-fertilizing can cause fertilizer salts to accumulate in the potting media. Orchids will only absorb the nutrients they need and leave the rest unconsumed. This build-up of excess mineral salts can be detrimental to the roots.
To prevent this accumulation of fertilizer salts, after preparing your fertilizer per the package instructions, dilute it even more. You can create a 25% concentration of fertilizer. To do this, take one part of prepared fertilizer solution and add it to three parts of water, mixing to create a 25% concentration of fertilizer.
When you water your orchids, you can also allow the water to run through the potting media. This will rinse out the excess salts. Be sure you water early in the morning to give your orchid potting media ample time to dry out before nightfall.
Safety From Pests and Diseases
Another essential step in caring for your orchids is keeping pests and diseases at bay. Always be on the lookout for pests like aphids, mealybugs, scales, and spider mites. Regularly inspect the leaves of your plants closely. Deal with any pests and bugs before they get to the roots.
You should also protect your orchid from bacteria, fungi, viruses, and molds. These organisms can get to the roots and could be deadly for your plant. As such, check your plants regularly and treat diseases as soon as you spot them before your orchid dies and your other plants get infected.
What You Need To Know About Exposed Orchid Roots
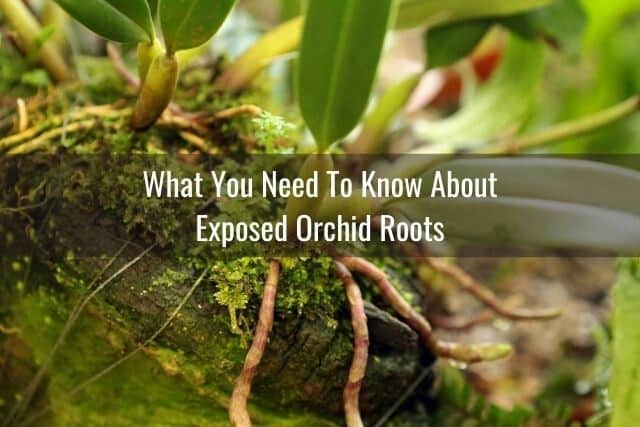
Most orchids have exposed roots or roots that form and grow outside of their potting media. If your orchid is mounted on to a tree trunk or a piece of bark, these exposed roots will grow and attach themselves around the mount.
Here are some of the common questions new growers have about exposed orchid roots or aerial roots.
Should Orchid Roots Be Exposed?
It is natural for roots to grow outside of your plant’s pot and potting media and be exposed. Roots growing very visibly around your orchid mount or pot is normal for orchids. It is a sign that your plant is growing well and thriving. It shows that you are providing your orchid with the growing conditions that are close to its natural habitat.
If anything, aerial roots or exposed roots give your plant another way to absorb moisture and nutrients, as well as another way to anchor and stabilize itself.
As an orchid grower, you should welcome exposed aerial roots as they provide you with a “backup” plan. In case something happens to the roots that are planted in your potting media, your orchid still has a great chance of surviving as long as it has aerial roots to rely on.
How To Take Care of Exposed Air Roots
The best thing about exposed aerial roots is that you can see them. You can quickly assess whether your orchid needs more water or more humidity.
If your aerial roots look dry and wrinkly, you can mist them using a spray bottle or use a humidifier. Just do not raise humidity levels too much, especially indoors. Aerial roots are remarkably adapted to the air. They are also very tolerant of drought and low humidity.
Just remember that dry-looking aerial roots are not an indication that your orchid needs watering. For this, you will need to check or feel your potting media. Only water your plant when the media is dry. If you have dry-looking aerial roots but damp media, you still need to hold off on your watering.
Most orchid growers would say that the best way to take care of aerial roots is to leave them alone and to let them grow as they wish.
Do You Need To Repot Your Orchid When There Are Too Many Exposed Roots?
Having too many exposed roots does not necessarily mean that your orchid needs repotting. Most growers discourage repotting unless there is something wrong with the plant and you suspect that the roots are under stress or have root rot. Planting and hiding the aerial roots in potting media would not promote the best health for your plant.
How To Repot Orchids With Aerial Roots
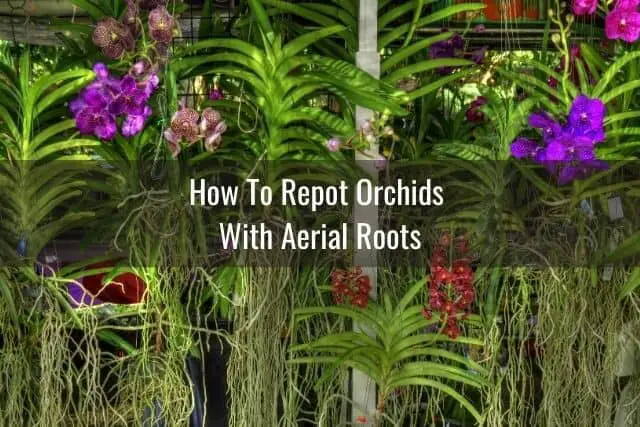
If you just need to contain the aerial roots because you find them getting unruly and unsightly, a better alternative would be to double pot your plant. This just means placing your current pot in a bigger decorative pot to encourage aerial roots to grow down into the space between the pots.
You can also opt to hang your orchid as in the picture above, which would allow the aerial roots to hang down around the orchid and provide them with room to grow.
Of course, you should repot your orchid if you really need to, especially in the event of the potting media decomposing, disease or infection, or root rot. In the case of root rot, you can remove the dead roots with sterilized scissors. Disinfect the plant with a fungicide such as Physan 20, then repot using fresh orchid potting media. Be sure to leave the aerial roots untouched.
Note: If you are using Physan 20, make sure you dilute it first before using it on your orchid. Per their website instructions, for use on orchids, dilute 2 teaspoons Physan 20 in 1 gallon of water.
It is possible to repot your orchid and plant the aerial roots in the potting media together with the normal roots. However, this is not recommended. If you end up potting the aerial roots, do so with caution and awareness that this could negatively impact the health of your plant. This is why it is recommended to leave the aerial roots alone.
Planting your aerial roots in potting media will mean that they have to adjust from a dry environment to a moist one. Naturally, some of these roots will not be able to acclimate and will die off.
What To Do With Aerial Roots When Repotting Your Orchid
If you have decided to pot all of your orchid’s aerial roots into the potting media, you may want to use a media that will not break down over time. One good option is using expanded clay pellets. This material offers excellent drainage and air circulation. It will give your plant an easier time adjusting to its new environment.
This may also be a great time to upsize your pot if the plant looks too snug in the old one. Prepare an orchid pot that is 1-inch bigger in diameter size than the current pot. This is because overcrowded roots may seek space to grow above the potting media’s surface.
After potting your aerial roots, remember to avoid overwatering your plant. If you are keeping the same watering cycle as you have before, remember that the plant will have more water exposure because more roots are now getting watered. There will also be residual water that will stay around the roots for an extended time because they are in a pot full of potting media.
Can an Orchid Survive Without Roots?

Even if all your orchid’s roots have dried off or have rotted and died, there is still hope. Do not throw away your orchid plant yet. You can still save your orchid as long as it still has leaves or if its stem is still alive. In this article, I provide detailed step-by-step instructions on how to save your orchid and regrow new roots.
Even without roots, orchids can still survive and grow new, healthy roots. This is especially true for orchid species with pseudobulbs or storage organs like Dendrobiums, Cymbidiums, and Oncidiums. These pseudobulbs allow the orchid to hold water and nutrients for periods of drought.
Orchids without pseudobulbs can also survive without roots, though for a shorter period of time than orchids with pseudobulbs. Orchids without pseudobulbs, such as Phalaenopsis orchids, will need to grow new roots to sustain life.
In order to help your orchid have the best chance to grow new roots, you will need to clean and repot your plant with sphagnum moss and use a humidity tray.
However, if your orchid has lost all its roots and the rest of the plant is nothing but dead tissue, then unfortunately, the plant is dead and may be impossible to save.
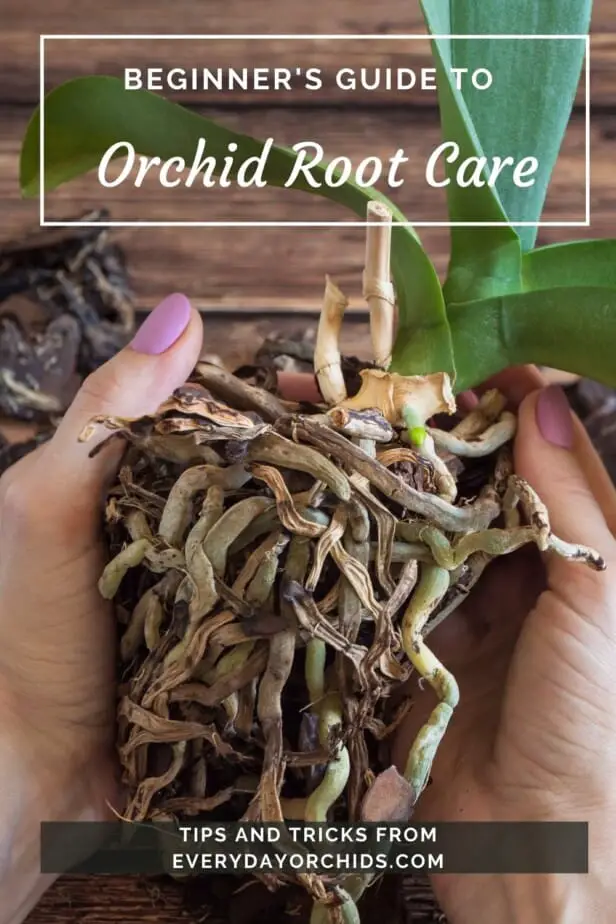
How and When To Trim an Orchid’s Roots
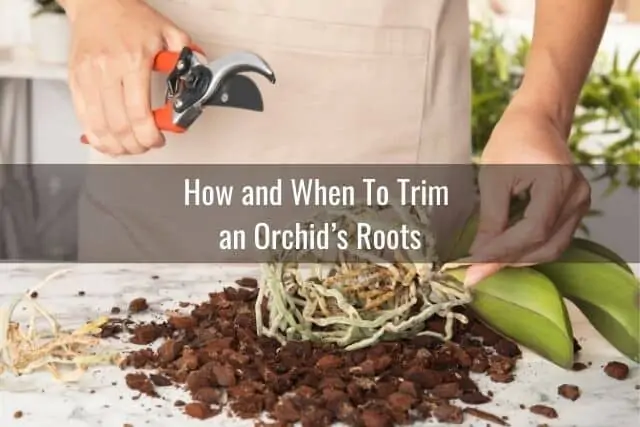
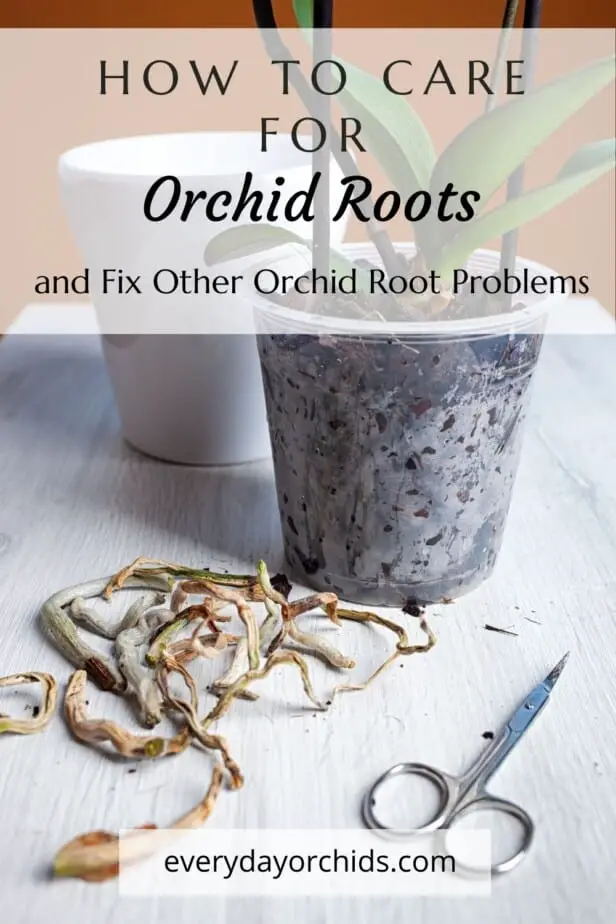
Trim or cut off your orchid’s roots only if they are dry or rotted and you are certain that they are dead. When cutting, use a sterilized pair of scissors or gardening shears. If the rest of the root is still viable and healthy, only cut off the dead sections, rather than the entire root.
Before trimming your orchid’s roots, prepare your cutting tool. Make sure to sterilize or sanitize it before and after each use. Wipe the blades of your garden shears or scissors with rubbing alcohol or with a bleach solution or hydrogen peroxide and water.
Start by gently removing your orchid from its pot and the surrounding potting media. There will be potting media stuck in between intertwining roots. You may want to use a slim stick to dislodge these pieces of potting media.
Alternatively, you could place the orchid roots in a bucket of lukewarm water and gently dislodge the potting media under the water. Personally, I find this to be the best way, as there is less trauma to the roots and they get hydrated at the same time.
Next, rinse the roots under slow-flowing water to make sure all potting media debris has been washed off.
Cut off any roots that are mushy and soft, as well as any diseased or dead leaves and flower spikes. Make sure not to trim off any white or green and firm roots as these roots are still healthy. Be careful not to leave wounds when you cut off dead portions. Always cut below the scar.
You may also want to spray the roots and the rest of the orchid with a diluted fungicide to deter fungi and bacteria growth. You can use a commercial fungicide such as Physan 20. Just be sure to follow the product dilution instructions (2 teaspoons Physan per 1 gallon of water).
Plant your orchid in a clean pot with fresh potting media. Do not pack the potting media in too tightly. Make sure there is enough space for air to circulate and water to drain.
What To Do With Overgrown Orchid Roots
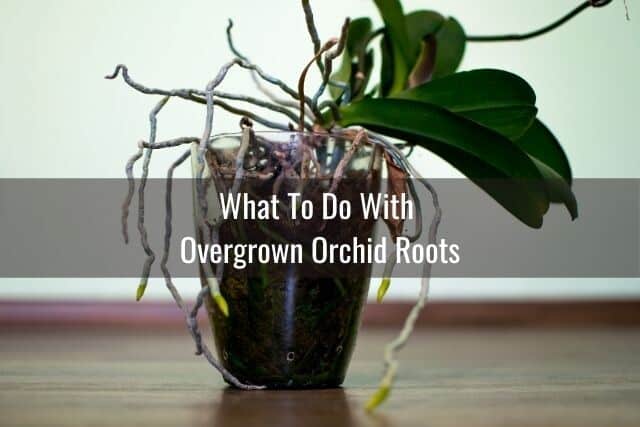
You will know that your orchid’s roots are overgrown because your plant will be pushed out of its pot. It might even be growing up and to one side. While the roots may be overgrown, overall, your orchid plant is thriving, so take the root growth as a good sign. When this happens, it is time to repot your orchid in a larger container.
Even if your orchid does not have any issues and you are merely upsizing to a bigger pot, you should still follow all the proper steps for repotting. Do not take shortcuts and just place your plant in a bigger pot. You will still need to perform routine maintenance such as removing rotted or dead roots.
Depending on how many roots remain, you can pick a slightly bigger pot or something a couple sizes larger. Just remember that orchids do not like too much extra space. A general rule of thumb when upsizing pots is to go up by 1-inch (ie upsize to a 5-inch pot from a 4-inch pot). For more information, read this guide to how to choose the right pot for your orchid.
As for the aerial roots that have grown too long and unruly, it is still best to let them be. Do not cut or trim these aerial roots. When they grow, it means the orchid plant is healthy. Aerial roots are there to serve a purpose. The only safe time to cut them off is when they have totally dried out and are dead.
Final Thoughts
All orchids roots are technically aerial roots since most orchids are epiphytes. However, orchids have adapted to be grown in containers and pots. Since this is the case, you can think of orchid roots as having two types: potted roots, which grow in the potting media, and aerial roots, which grow outside the potting media.
You can care for potted orchid roots by giving them adequate amounts of water, light, humidity, and fertilizer, as well as good air circulation. Keep them safe from pests and diseases by doing regular inspections of your orchid plant and potting media. Meanwhile, aerial roots are very adaptable, so, for the most part, you can just leave these roots alone, aside from the occasional misting.
If you enjoyed this article, please pin it and share!
Recent Posts
Fusarium wilt in orchids is, unfortunately, a problem that you may encounter at one point or another. It is caused by the Fusarium pathogen and this kind of infection can be hard to identify at...
When it comes to choosing an orchid potting mix and knowing what kind of orchid soil is best, the decision can feel daunting. After all, there is a huge variety of options out there, from orchid bark...
