
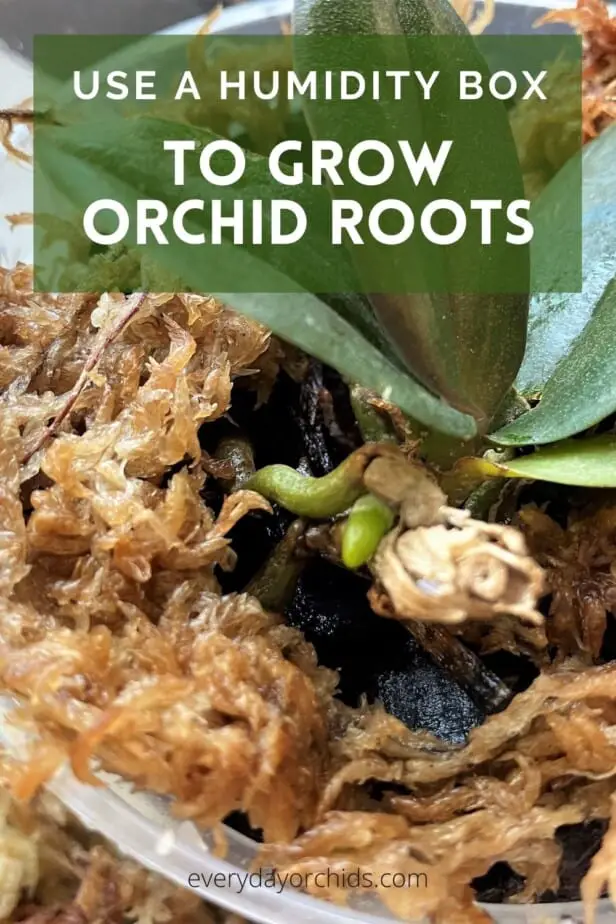
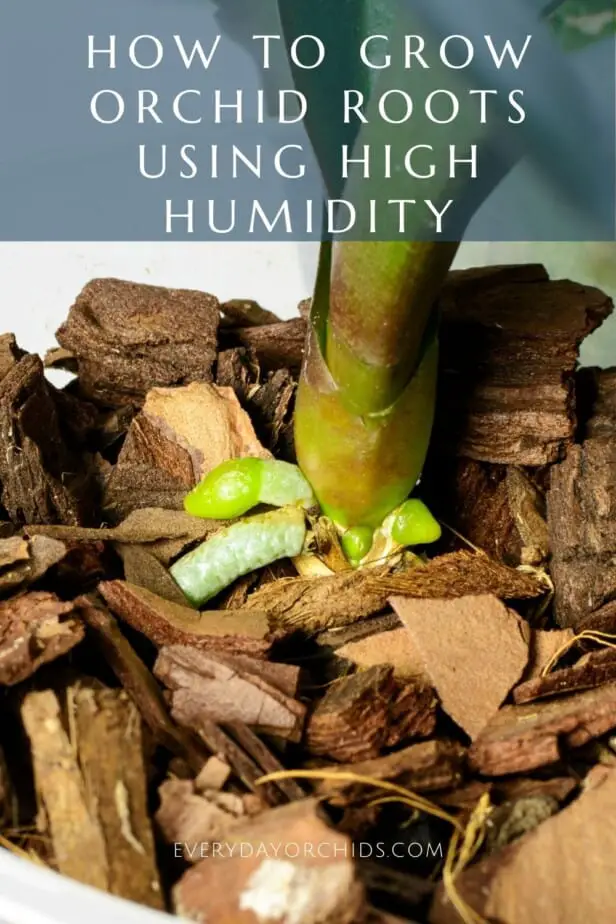
Are you looking for a fast and easy way to grow orchid roots? A humidity box is easy to put together and can be very effective in helping orchids regrow their roots. It simulates a greenhouse environment and creates a high humidity micro-environment right around the orchid plant.
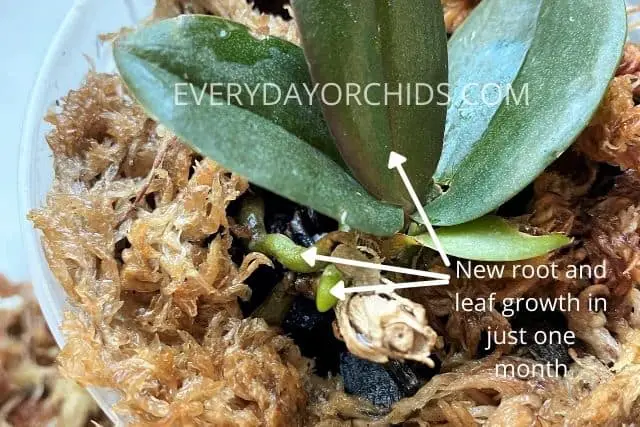
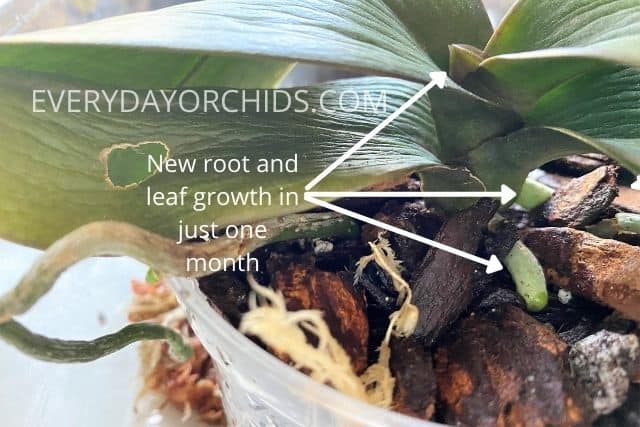
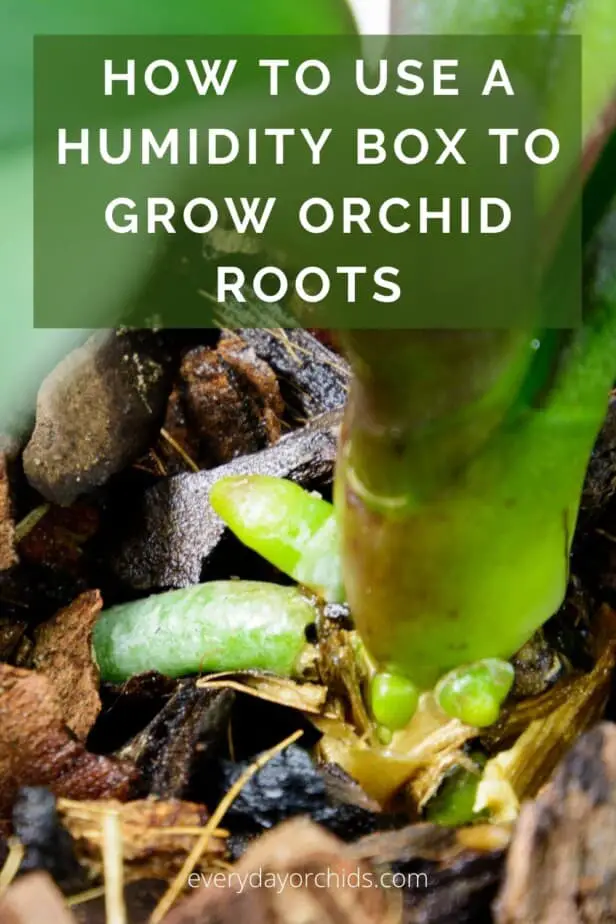
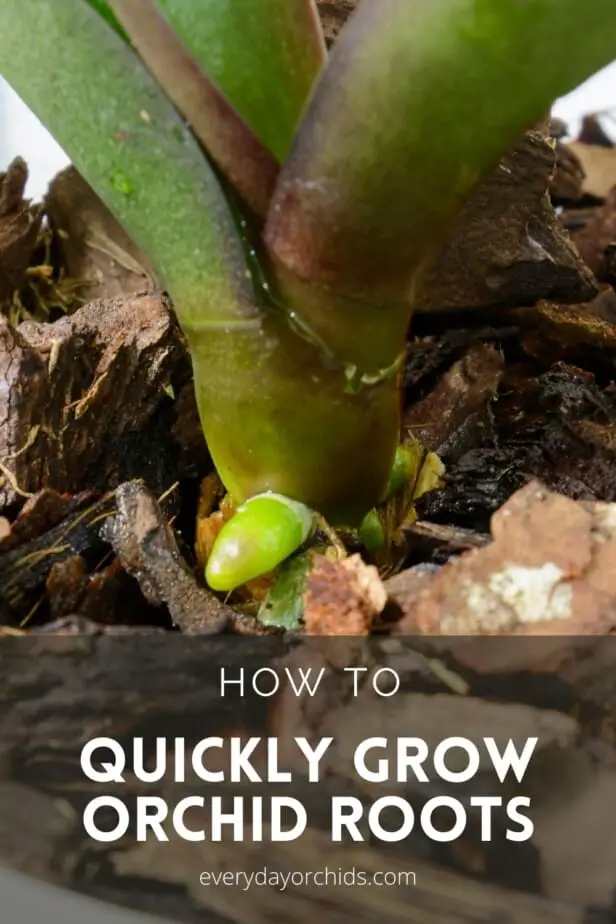
I have been using humidity boxes for some orchids that I am trying to save. In just one month, both of the orchids have sprouted multiple new root buds and grown new leaves. The quick progress they have made is impressive, and I want to share this simple method with you.
A humidity box takes just minutes to prepare and is a very effective way to accelerate orchid root growth. It simulates a mini-greenhouse environment and provides high humidity for the orchid. All you need is a clear storage container, damp sphagnum moss and lots of bright, indirect light.
Perhaps your orchid has lost its roots due to root rot. Or maybe you had under-watered your orchids, causing the orchid roots to dry and shrivel up. Either way, your orchid has lost its roots, and you want to help your orchid regrow its roots as quickly as possible. Let me show you a simple way to make this happen. Keep reading to learn more.
Please note that these links are affiliate links and as an Amazon Associate, I earn from qualifying purchases. Purchases made through affiliate links in this post may generate commissions at no additional cost to you. Use this link for a discounted Amazon Prime trial. Thank you for your support!
Table of Contents
How to Make a Humidity Box for Your Orchid

In another article, I have talked extensively about how to save an orchid without roots. There, I talked about how you can use sphagnum moss, a humidity tray, and a plastic bag to increase humidity around your orchid.
Using a humidity box is a spin off of that technique. The benefit is that it requires less materials. It also takes less time to put together while being just as effective.
Humidity is so important for orchid growth and general health. It can make the difference between an orchid that just gets by and an orchid that has strong growth and an abundance of blooms each year. To find out more, read this guide about why humidity is so important for orchids.
Once you have grown more orchid roots and leaves, don’t stop there. Use a humidifier, humidity tray or other methods to maintain adequate humidity levels around your orchid. This will help keep the orchid healthy and growing.
Now, let’s talk about how to make a humidity box for your orchid.
Prep Your Orchid First
First of all, you will need to prepare your orchid.
If your orchid has root rot, or dried, shriveled roots, you will need to do some pruning and repotting first. Make sure you have trimmed off all the dead and rotted, or dried up roots. Prune your orchid and remove all the dead or decaying growth. This is necessary in order to make room for new growth.
If you have any flower spikes remaining on your orchid, go ahead and cut those off as well. Make sure you use sterilized gardening shears to prevent infection.
Pruning off the flower spike will allow your orchid to focus its energy into growing new roots and leaves. Cutting off the flower spike will also allow your orchid to fit into the humidity box more easily.
Cover the cut end of the orchid stem with ground cinnamon powder. Since ground cinnamon is both a drying agent and an anti-fungal, this will seal off the end and protect your orchid from disease or infection. Here is some more information on how to use ground cinnamon on your orchid.
Finally, you will need to repot your orchid using fresh new orchid potting media. Throw away all the old potting media.
Use Clear Plastic Orchid Pots
When choosing your orchid pot, make sure you use a clear plastic orchid pot for this project. This is important because the clear plastic will allow light to shine through to any remaining roots.
Similar to orchid leaves, orchid roots can also perform photosynthesis, though to a lesser degree. Photosynthesis translates into energy for the plant. When you are trying to induce your orchid to grow more roots and leaves, every bit helps.
I personally use these clear orchid pots because they come in a variety of sizes. This offers me some flexibility in choosing the right sized pot for my orchid after I’m done pruning off dead roots.
The clear nature of the orchid pots also allows you to see the potting media. You can easily gauge how moist or damp it is within the pot by looking for condensation on the inside of the pot.
You can also easily lift up your orchid pot and, based on its weight, be able to tell if it needs more water or not. A lightweight pot will likely have dry potting media and need water. Meanwhile, a heavier pot will likely still have enough moisture within the potting media and not need watering.
Properly watering your orchid is always important, but when you are trying to regrow orchid roots, you want to make sure you are providing your orchid with enough water, light, humidity and airflow. The clear plastic pots make it easier to achieve this.
Supplies Needed To Make a Humidity Box For Your Orchid
- Clear storage container with a lid
- Sphagnum moss
- Your orchid
That’s all the supplies you need! The size of the clear storage container you use will really depend on the size of your orchid. Choose a container that will leave enough space around the orchid leaves so that they do not touch the sides of the box. Don’t let the orchid leaves get bent or squished against the sides of the box.
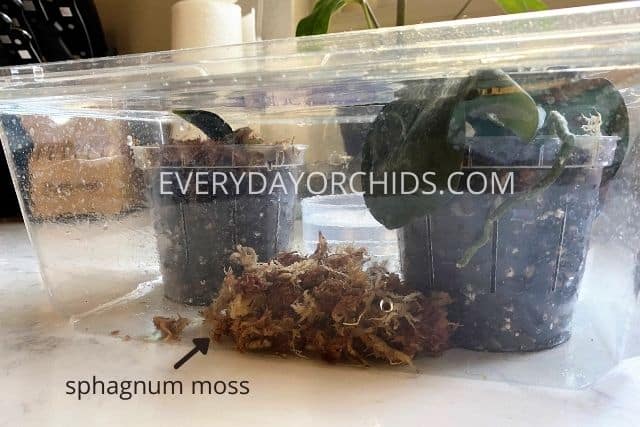
For example, for my smaller orchids, I was able to use a leftover salad mix container (16 ounce). This fit two of my 3-inch orchid pots with room to spare. For my medium-sized orchid that is in a 4-inch pot, I used a larger 12-quart storage container, placed on its side. (Since then, I’ve upgraded the salad mix container to a clear storage container that I bought at Costco and its working very well. Even more roots and leaves have grown in the last month!)
To be totally honest, I came up with the idea for this humidity box after it didn’t work out with the sphag and bag method didn’t work out the way I envisioned. You heard it here first on Everyday Orchids.
That’s also why you see this random salad mix container and some assorted plastic containers–I used what I had. You can get creative and use what you have at home too. Or, if you are planning to buy a clear storage container, be sure to get one that is large enough for your orchid and its leaves.
Making the Humidity Box for Your Orchid
You will find this shockingly easy, but that’s the point. Anyone can do this and regrow orchid roots with this method. It takes just a few minutes to prepare, which makes it a great option if you are short on time.
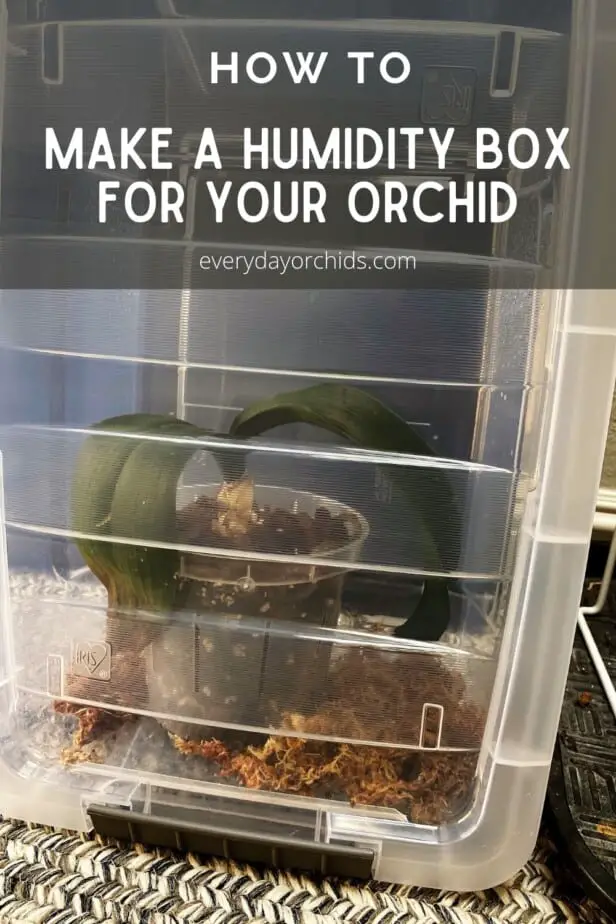
- After repotting your orchid into its new clear plastic orchid pot, place it into the clear storage container AKA the humidity box.
- Soak some sphagnum moss in a cup of water for at least a few minutes.
- Then, wring out the sphagnum moss as you would with a sponge. You want it to be damp, not dripping. The sphagnum moss will work to add humidity to the box.
- Place the sphagnum moss into the clear storage container next to the orchid pot (not under the pot, but around the pot). If you like, you can use enough sphagnum moss to cover the bottom of the box, but you don’t need to. I usually use just a couple handfuls of sphagnum moss. See my picture above for an example of what I did.
- Place the lid loosely on the box.
- Place the box (with the orchid and moss) in a location where your orchid can receive lots of bright, indirect sunlight.
Orchid Care Considerations for a Humidity Box
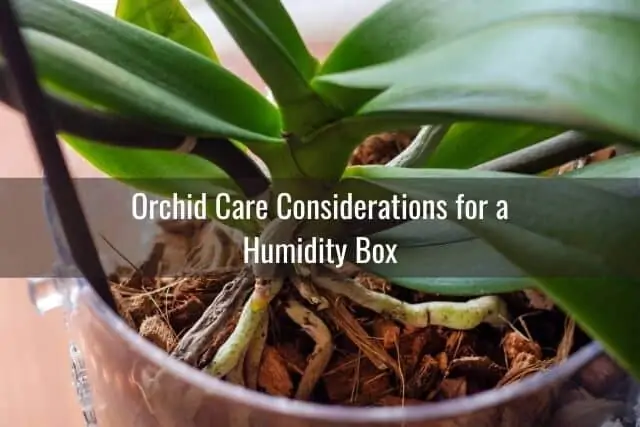
Since the orchid is in an enclosed container, the humidity is “trapped.” In essence, this humidity box is a mini-greenhouse for your orchid, creating a high humidity micro-environment.
The moisture in the moss, instead of evaporating into the room, will remain around the orchid longer. The increased humidity levels, along with bright light, are what promotes root growth in the orchid.
However, without good air circulation, high humidity and warm temperatures can lead to mold, fungus and bacteria growth. Mold could grow on the sides of the humidity box, on the sphagnum moss, or even on the orchid and its potting media.
To prevent this from happening, make sure you open your humidity box each day to allow for fresh air exchange to occur. I usually do this anyway because I like taking my orchids out and looking for any new root or leaf growth.
If you don’t want to do this and have a bigger humidity box, you can leave the box lid open a little, as I do, or use a mini fan.
The mini fan will circulate air in the humidity box, which will help prevent mold and fungus growth and lower temperatures. If you do use a fan, don’t point it directly at the orchids and put it on the lowest setting.
Just Enough Humidity
To provide adequate humidity for your orchid, make sure the sphagnum moss is just slightly damp, like a wrung out sponge would be, rather than soaking wet. This will help prevent the box from becoming overly wet and humid inside.
As the water evaporates from the moss, it will create some humidity around the orchid. If the moss is bone dry, though, this won’t do anything for your orchid. So just keep an eye on the moss and rehydrate it as needed.
Lastly, make sure that your humidity box is not too humid. You can monitor humidity levels using a hygrometer. Just place it in the box next to your orchid.
Signs that humidity levels are too high include condensation on the sides of the box and water droplets collecting on the underside of the lid.
If you see this happening, open up your humidity box and wipe down the sides and lid to get rid of the excess moisture. Make sure your sphagnum moss is not too wet. You might also need to reduce the amount of sphagnum moss you are using.
What is an Ideal Humidity Level for Orchids

The majority of orchids will do well in with a humidity level between 40% to 70%. Phalaenopsis orchids do better with humidity levels from 50-80%. If you are curious what the humidity levels in your humidity box are, you can find out easily using a hygrometer.
A hygrometer is a simple and inexpensive device you can use to measure the humidity levels around your orchid. Some hygrometers, such as this one, will measure both temperature and humidity levels. This is useful since closing up the humidity box will increase humidity around your orchid, but also raise temperatures.
While bright, indirect sunlight is necessary for orchid roots to grow, it will also warm up the environment inside the box, especially if the box is closed or nearly closed. This is in large part due to the enclosed space and minimal airflow. Very high temperatures can cause your orchid to wilt and exhibit signs of stress.
Try to keep an eye on both humidity and temperature levels inside your humidity box. Make sure temperatures within the box stay under 80 degrees Fahrenheit.
Using a mini fan or leaving the box open just a crack will help with this. Occasionally opening up the box to allow for fresh air will also keep temperatures from becoming too high.
Why Use a Humidity Box for Your Orchid

There are many ways to regrow orchid roots. You can use sphagnum moss, a humidity tray and a plastic bag to regrow orchid roots. You can also try the sphag and bag method to grow orchid roots. Or you can make a humidity box, as I outlined above. At the core of each of these methods, you are just trying to raise the humidity level around your orchids.
Why use a humidity box specifically? The humidity box, similar to the sphag and bag method, is incredibly simple. In comparison to the humidity tray and plastic bag method, it does not require much in terms of supplies.
I also prefer it to the sphag and bag method because the storage container doesn’t crowd the orchid and allows for more airflow around the plant. In the sphag and bag method, the sides of the bag were constantly collapsing and touching the orchid leaves, allowing moisture to stay on the leaves. This had the potential to lead to brown rot, fungal infections, and other orchid problems.
In addition, when I tried the sphag and bag method, the top of the ziploc bag kept collapsing and caused the bag stay closed. I had tried to leave it partially open to allow for some airflow, but found it was very difficult due to the structure and nature of the bag. It is much easier to keep the lid of a storage container or box slightly open or ajar.
Plus, the nice thing about using a humidity box for your orchid is that the orchid is already in an orchid pot with potting media. As new roots and leaves grow, you can just enjoy the progress. You don’t have to worry about potting your orchid later on because it’s already done.
Final Thoughts
Creating a humidity box to regrow orchid roots is an easy and quick solution if your orchid has lost its roots. All you need is a clear container with a lid and some sphagnum moss. In my experience, using a humidity box has helped my orchids regrow roots and leaves quickly. The high humidity micro-environment created by a humidity box, combined with bright, indirect sunlight, provides an optimal growth environment for the orchid.
If you enjoyed this article, please pin it and share!
Recent Posts
Fusarium wilt in orchids is, unfortunately, a problem that you may encounter at one point or another. It is caused by the Fusarium pathogen and this kind of infection can be hard to identify at...
When it comes to choosing an orchid potting mix and knowing what kind of orchid soil is best, the decision can feel daunting. After all, there is a huge variety of options out there, from orchid bark...
