
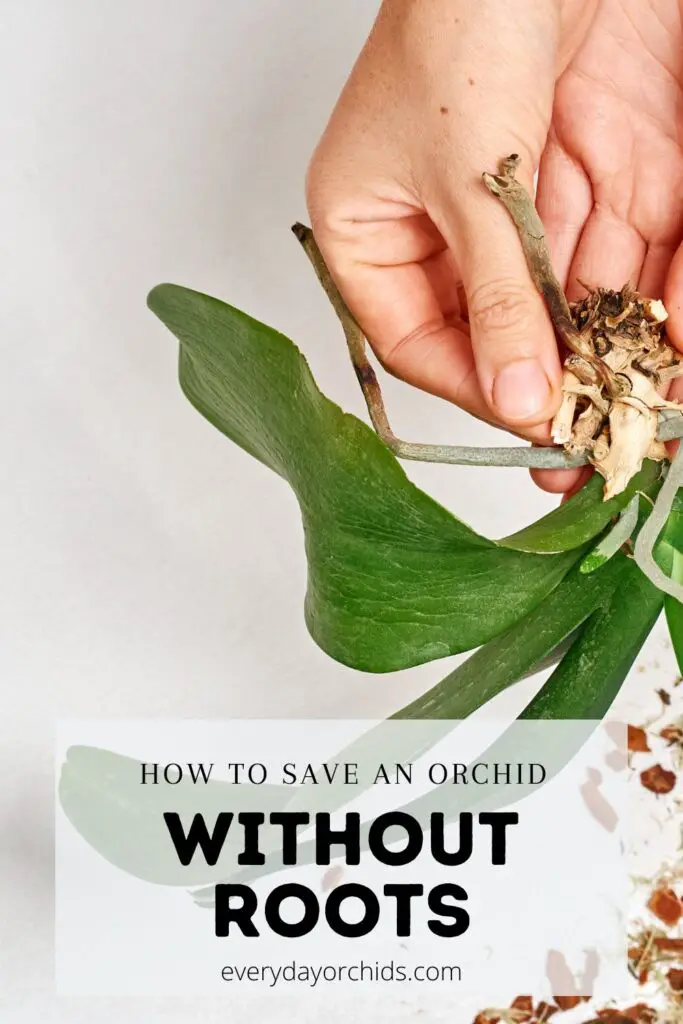
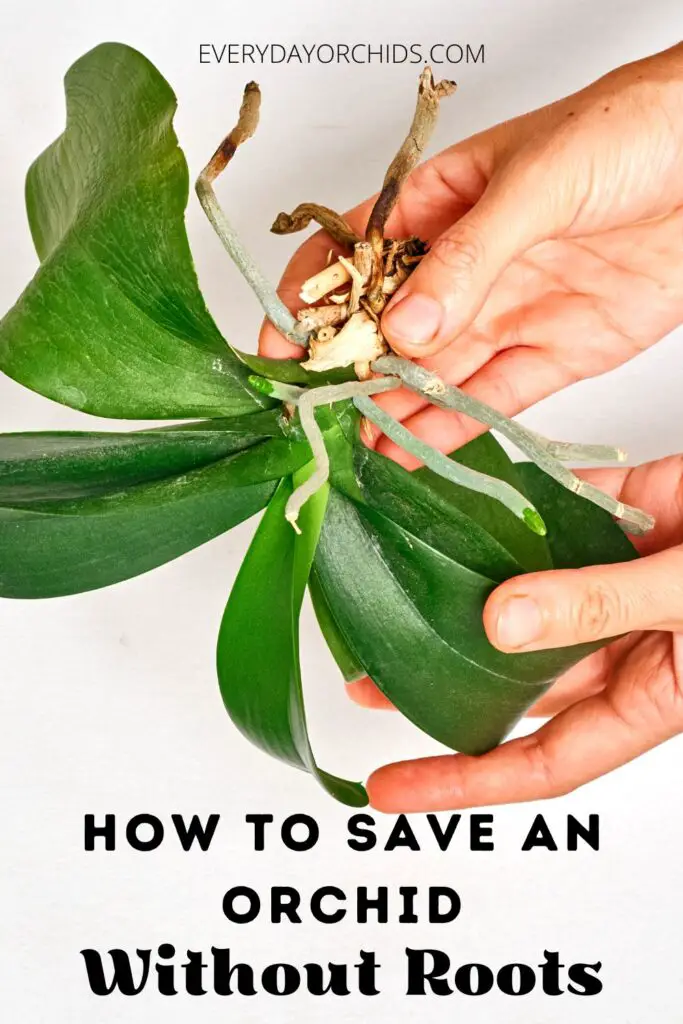
Many orchid growers will find themselves, at one point or another, with an orchid without roots. This may happen for a variety of reasons, including rot, disease, dehydration, or pests.
Orchids have very sensitive roots that are susceptible to damage or rot when exposed to unfavorable conditions. As a result, it is not uncommon to find yourself with an orchid without roots.
The question is, how do you save an orchid without roots?
To save an orchid without roots, you must take some necessary steps and prune your orchid. Using a sterilized pair of scissors, carefully cut off all the orchid’s dead roots. Proceed to spray the plant with a fungicide to eliminate rot or fungus. Then repot your orchid using using fresh orchid potting media and sphagnum moss.
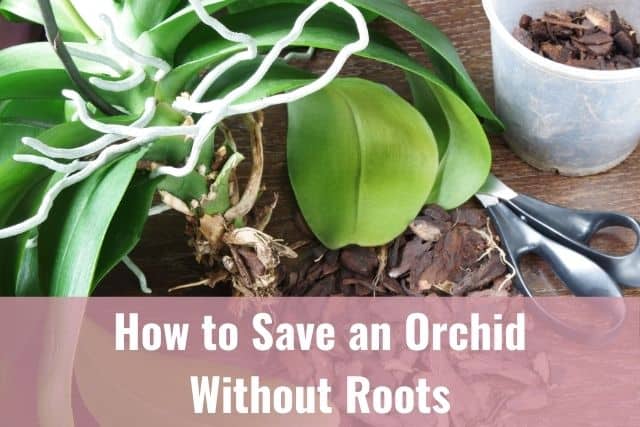
Are you curious to learn more about orchids and how to save one without roots? If so, then you couldn’t be in a better place. In this guide, I’ll walk you through, step-by-step, on how to save an orchid that has lost its roots. Keep reading for an in-depth guide on orchid care.
Please note that these links are affiliate links and as an Amazon Associate, I earn from qualifying purchases. Purchases made through affiliate links in this post may generate commissions at no additional cost to you. Use this link for a free or discounted Amazon Prime trial. Thank you for your support!
Table of Contents
Why Orchids Might Not Have Roots
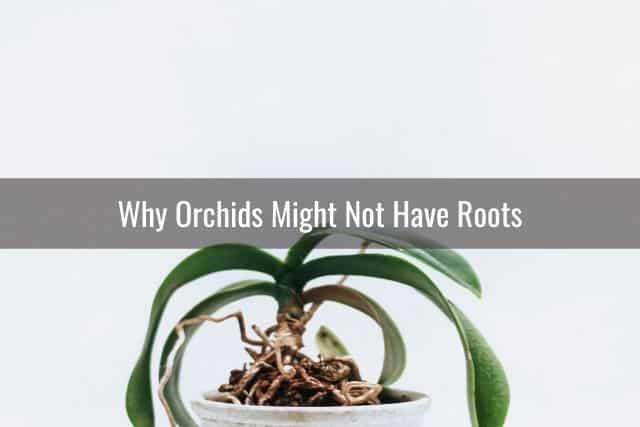
Healthy orchid roots translate to a healthy orchid. Orchid roots are covered in velamen. This is a porous root covering that helps the orchid absorb water and nutrients into the root system. Needless to say, healthy orchid roots are vital to an orchid’s survival.
Root Rot
When this spongy velamen covering stays wet for too long, it can no longer function properly. Think of a sponge, which when waterlogged can no longer absorb more water, and overtime, becomes moldy. Likewise, prolonged exposure to excess water can lead to root rot in orchids. This will eventually kill your orchid if you do not address it in a timely manner.
Decomposing potting media is another cause of root rot in orchids. This is because the media turns acidic when it decomposes, thus forcing the roots to grow in unfavorable conditions.
Over time, when orchid media decomposes and breaks down, it becomes more like potting soil and less like the orchid potting media you began with. As this happens, there is less aeration around the roots. The potting media stays wet longer, leading to root rot. Such environment-related stresses are known to damage orchid roots. It can even kill the orchid, if the situation is not resolved early enough.
Orchid Potting Media
The type of potting media used also plays a huge role in the loss of orchid roots. Many orchids are epiphytes. They need properly ventilated media for their roots to thrive and perform their functions.
Orchid media often contains components such as bark, perlite, coconut fibers or other plant fibers. It also contains charcoal or lava rock to help facilitate drainage. You will need to use special orchid potting media for your orchids, such as this one by Perfect Plants. Do not use the same garden soil or potting soil you might use for your vegetable and herb garden.
Improper Watering Technique
Watering your orchid too frequently, or not watering it enough, can also lead to root loss in orchids.
As mentioned above, frequent watering can lead to the potting media staying wet and lead to root rot. Orchid potting media should be allowed to nearly dry out between each watering to avoid root rot and other problems.
However, the plant should not stay in a dry environment for too long lest it starts to die slowly. Some orchid growers don’t water their orchids often enough, for fear of root rot and overwatering.
The problem is, if the potting media is too dry, you could end up with dried, shriveled roots on your orchid. It’s a fine balance trying to keep the potting media from being too wet or too dry, isn’t it? You can learn more about how to correctly water an orchid here.
During summer, the potting media tends to dry out faster. This means you will need to water your orchid more frequently in the summer than in the winter months.
Since orchids can only absorb a minimal amount of moisture through their leaves, healthy orchid roots are of the utmost importance to your orchid’s health and survival. Gradual root damage due to overwatering or underwatering can kill orchid roots, thus leaving the plant without roots. Most times, if no interventions are taken, the orchid will eventually die.
Over-Fertilization
Over-fertilizing orchids is another major cause of root loss. Over-fertilizing can happen if you fertilize your orchids too frequently. It can also happen if you use too concentrated of a fertilizer. Both of these actions would result in burning the delicate orchid roots. If you are interested in learning more, check out this resource on how to properly fertilize orchids.
Extreme root burn cases, more often than not, can end up killing the roots. To try to save your plant, you will need to cut off the non-viable roots from your orchid.
How Long Can An Orchid Survive Without Roots?
Orchids are unique plants in that their storage organs can hold water and food for long periods, even in drought. This explains why an orchid’s leaves might still appear green and healthy despite having no roots.
In fact, you may not even be aware that your orchid’s roots are damaged until the later stages, when you see changes in the leaves or flowers. After all, the roots are often hidden in the potting media. Unless you unpot your orchid, you won’t be able to see root changes. So, it might be weeks until you discover root damage or root loss in your orchid.
Wilted, wrinkled orchid leaves are one of the key indicators that something is wrong with your orchid. Oftentimes, you’ll find that changes in leaf texture are related to root problems. Orchid flowers falling off too early are another indicator that something may be wrong with the orchid’s roots.
An orchid’s ability to stay alive without roots depends mainly on the species. For instance, orchids such as Cattlyeas have pseudobulbs which can store water. Therefore, orchids with pseudobulbs can survive longer without roots compared to those without pseudobulbs. Shriveled pseudobulbs or pleated orchid leaves will indicate problems with the roots and water uptake.
Phalaenopsis orchids do not have pseudobulbs and rely more heavily on their roots for consistent water and nutrient supply. You will likely see changes in the leaves and flowers earlier on than in other orchid species.
To increase the chances of saving your orchid, it is best to know which orchid species you have. This will help you determine the correct steps and the urgency needed in terms of repotting the plant.
Can You Save an Orchid Without Roots?
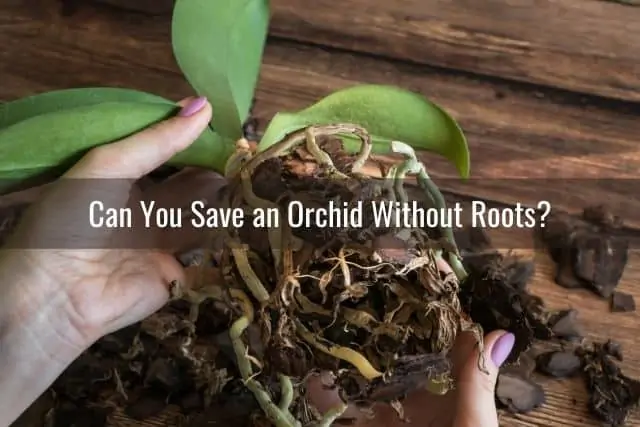
Yes, it is possible to save an orchid without roots. It will take some effort and involve unpotting and repotting your orchid. You will need to prepare new potting media, sterilized gardening shears or scissors, and, if you are dealing with rot, an antifungal spray.
In addition, you will need sphagnum moss and a sterilized orchid pot. I like to use a humidity box to quickly grow orchid roots (my homemade method), but you can also do the sphag and bag method or use one of the methods I outline below. I suggest reading all the way through first and then decide on your next steps.
Unpot Your Orchid
Now that you have determined that something is wrong with your orchid, you will need to unpot it in order to investigate further. Usually, I’ll unpot my orchid outdoors, over a layer of newspaper, carefully removing all the potting media and bark chips from between the roots. Discard all the old potting media.
Gently rinse off the roots to remove all the residual potting media debris, being careful not to get water on the leaves or in the orchid crown. This will help you avoid other problems down the line, such as crown rot, stem rot, or brown spots and rot on the orchid leaves.
Once you have removed your orchid from the pot and cleaned off the orchid roots, you are ready to visually inspect it.
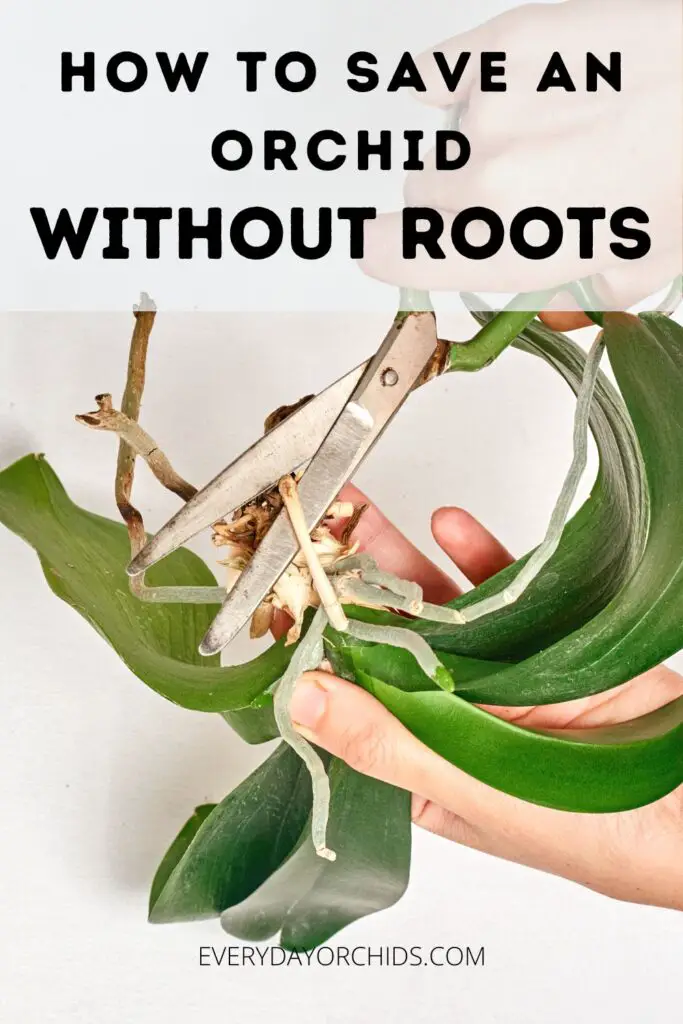
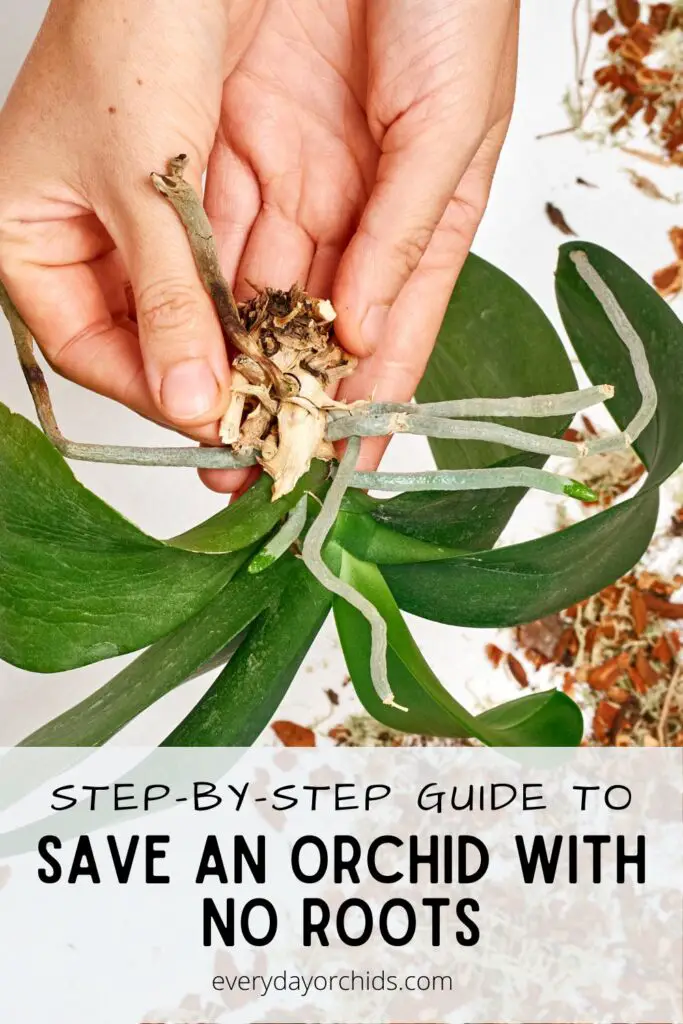
Trim Off Your Orchid’s Damaged Roots
The first step towards saving an orchid without roots is to examine its physical structure. Take a close look at its root system to determine the extent of damage. Look to see if the damage extends to the stem. If the damage encompasses the root and the stem, you will be better off cutting from the stem on down.
Use sterilized scissors or gardening shears to prune the orchid. Try as much as possible to avoid cutting or damaging the aerial roots. Aerial roots play an integral role in moisture and nutrient absorption, more so when the main roots become dysfunctional.
Treat With A Fungicide
After cutting off the dead roots, you can spray the remaining parts of the orchid with a fungicide such as Physan 20. When using Physan 20 on orchids, you want to be sure to dilute it first according to the product instructions. Per their website, dilute 2 teaspoons Physan 20 in 1 gallon of water for orchid use. Spraying the orchid with a fungicide will help eliminate fungal spores, rot, and potentially harmful microorganisms.
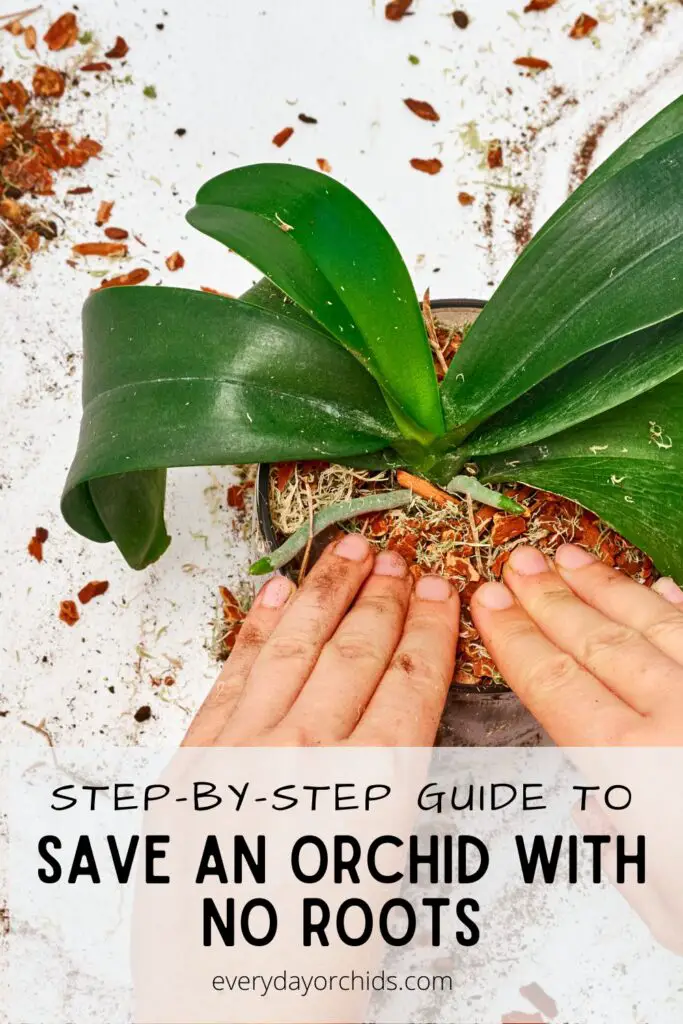
Once you are done preparing the orchid, it is time to repot your orchid and use new orchid potting media or sphagnum moss. Be sure you dispose of the old potting media and do not reuse it.
How to Use Sphagnum Moss to Rescue an Orchid With No Roots
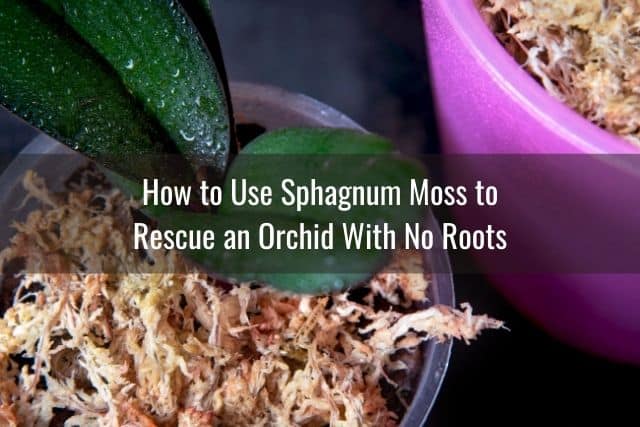
In addition to removing dead or rotted roots from your orchid, you’ll also want to use sphagnum moss to help grow new roots.
What Is Sphagnum Moss?
Sphagnum moss is widely used as a media for orchids due to its unique properties. Sphagnum moss has sponge-like qualities as it is compact when dry and will expand when watered. It is also lightweight enough to allow for the free circulation of air around the orchid’s roots.
Due to its moisture-absorbing qualities, sphagnum moss will ensure your orchid remains well-hydrated. This reduces the need for excessive watering. Here is a guide for how to water your orchid potted in moss. Moreover, sphagnum moss is known to bind ammonium, which helps to slow down the rate of decomposition.
How Can Sphagnum Moss Be Used To Save My Orchid?
Sphagnum moss can retain water up to an impressive 20 times its normal weight. This allows for the gradual release of water, thereby creating a humid and highly favorable environment for your orchid. When choosing sphagnum moss, it is advisable to opt for thick, long, and dense moss fibers. These will have better absorption properties.
The importance of a hydrated environment cannot be overstated when looking to save an orchid without roots. This is why sphagnum moss is often used to rescue severely damaged orchids, more so those whose roots have died due to rot or dehydration.
Find the Right Type of Pot
Once you decide to use sphagnum moss as potting media for your rootless orchid, you will need to find the right type of pot. Ideally, the pot should be large enough to fit the moss and leave a little space for aeration.
When selecting your orchid pot, be sure you also use a pot with holes or slits on the side. Special orchid pots such as these are designed as such to promote airflow and circulation around the roots. They come in different colors, sizes and material, including plastic, wood or clay. Choose a pot size that is similar to the size your orchid had been using.
Sterilize your orchid pot
Before you start the actual repotting process, sterilize your orchid pot first. This is to ensure that any lingering bacteria or viruses will be killed and won’t infect your plant.
You can sterilize your orchid pot in a couple different ways. One method is by using your oven, which I will go into next. Please note that this method will only work for oven-safe material such as terracotta. Obviously you will not want to use this for your plastic or wooden pots!
Oven Sterilization Method
When using the oven sterilization method, you will first need to rinse out your terracotta pots. This is to get rid of any old dirt, cobwebs or plant matter. Set the oven to 220 degrees Fahrenheit. Place the clean terracotta pots on a baking sheet and place them in the oven for one hour.
Once the hour has passed, turn off the oven and leave the pots in the oven until completely cool. It is very important that you do not open the oven or remove the pots before they are completely cool. Otherwise you run the risk of the pots breaking or cracking with the sudden change in temperature.
If you have plastic or wooden containers that you want to sterilize, an alternative is to use bleach and water. You can soak the pots in a 10% bleach solution to kill any bacteria. I usually use this method, which I will explain how to do next.
10% Bleach Sterilization Method
In a 5-gallon bucket, mix 1 part chlorine bleach to 10 parts water. Place the pots inside the bucket and leave them to soak for 30 minutes to an hour. Once this time has passed, remove the pots from the bleach solution. Rinse them well and allow them to air dry.
Depending on the weather, it might take a few hours or a day for the pots to fully air dry and be ready for use. Keep this in mind as you are preparing to repot your orchid.
Prepare the Sphagnum Moss
Once you have identified the pot you want to use and have sterilized it, you can start preparing the sphagnum moss. It is highly advisable to soak the moss in water for a minimum of 10 minutes. The whole idea behind soaking the moss is to allow it to absorb water. It is usually sold dry to enhance its overall shelf-life.
Wear gloves when handling sphagnum moss. There may be little barbs in the moss that may cut your hands if you aren’t careful.
The initial soak will help to expand the moss strands, thus increasing the sphagnum moss’ potential for absorbing and releasing water. After the sphagnum moss is well soaked, squeeze it gently until it becomes medium wet. Skipping this step will almost certainly compromise the moss’ ability to absorb and release water. This will, in turn, increase the risk of root rot.
Wrap the Sphagnum Moss Around the Plant
The next step is wrapping the long sphagnum strands loosely around the plant. Since the orchid does not have roots right now, it is important to place the orchid strategically above the moss. Place the orchid so that its base is gently secured inside the damp medium.
The moisture in the surrounding air will promote the growth of tiny orchid roots. The small roots will then capitalize on the humid environment. They will keep growing their root tips as long as the surrounding air is humid and moist enough.
When placing your sphagnum moss in the pot, be mindful not to compact the sphagnum moss too much. If you do this, you will end up with fewer air spaces in the pot. This translates to decreased air circulation and increased water retention. As a result, this can cause root rot.
As you arrange the sphagnum moss in the orchid pot, the trick is to make it as airy as possible. Take a handful of damp sphagnum moss and fluff it out a little before you place it around your orchid plant.
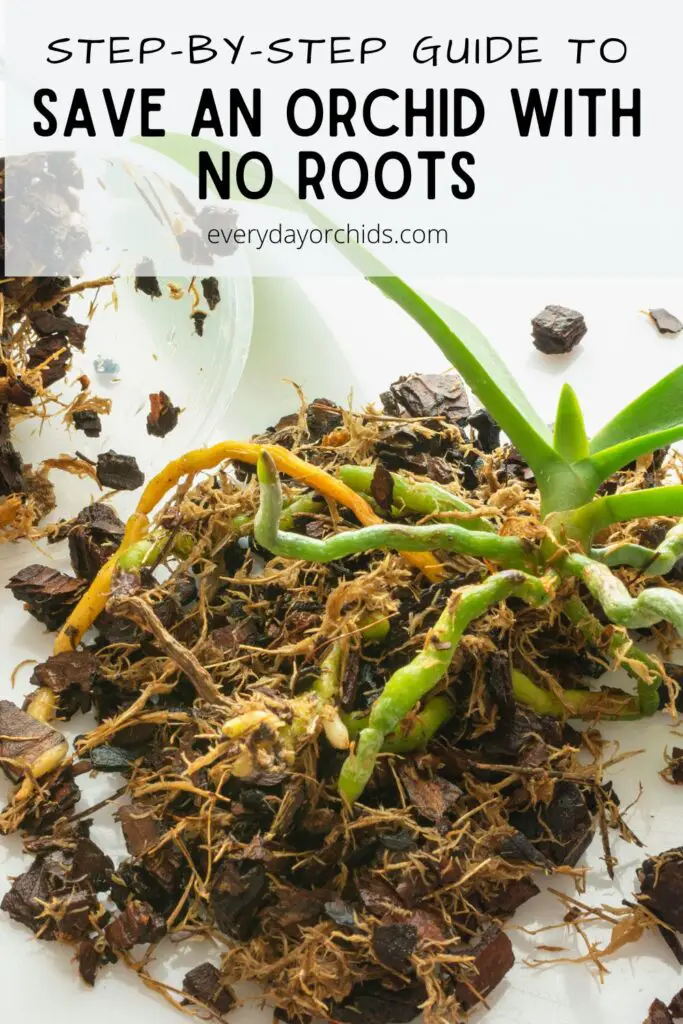
How to Grow New Roots on an Orchid
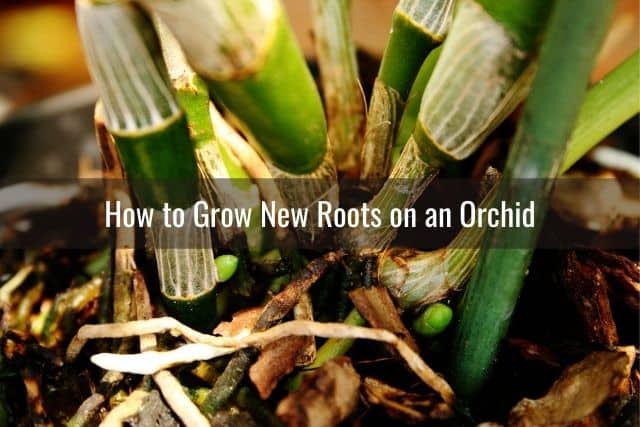
Although it is not as straightforward as most people perceive, growing new orchid roots is not too hard either. You will first need to prepare the orchid by cutting off the unhealthy stems and roots as we mentioned earlier.
Disclaimer: Also as mentioned earlier, it is highly important to disinfect the scissors or knife used to cut the plant. This is to prevent infections.
Once you have cut off the infected sections and have separated these from the healthy orchid, you can apply a fungicide such as Physan 20 to the remaining orchid parts. You are doing this to eliminate rot, potentially harmful microorganisms, and fungal spores.
The best way to grow new roots on an orchid is to keep the immediate environment as humid as possible. Luckily, there are many ways to keep the growing environment moist enough to stimulate root growth. One way is the method outlined above using sphagnum moss. Another method is to create a humid environment for your orchid using a humidity tray and a plastic bag.
Use a Plastic Bag to Create Humidity
Set Up an Ideal Environment
If you are dealing with an orchid without roots, you will need to put in extra work to stimulate root growth. While carefully planting the orchid in a moist enough media might work, orchids without roots will respond better to high-humid environments. This is why you will need to set up an environment that promotes root growth.
The first step to setting up an ideal (humid) environment is using a well-ventilated container. Using baskets for this step is highly recommended. Baskets have good ventilation and many holes for air circulation.
Place Rocks at the Bottom of the Basket/Pot
This technique relies on creating a humidity tray. Place rocks at the base of the basket or pot to trap moisture. Rocks or pebbles at the bottom of the pot will ensure that the orchid does not sit in moisture, which can significantly hamper the healthy growth of new roots. At the same time, the rocks will allow the water to remain nearby and evaporate, increasing humidity for your orchid.
If you prefer to buy a ready-to-go humidity tray with rocks, you can buy one online.
Place the Orchid in the Rocks
Take the orchid and carefully place it inside the pot or plastic basket. Ensure the orchid fits snugly inside the rocks (not too deep). Once you are satisfied with the stability and placement of the orchid, it is time to introduce sphagnum moss into the equation.
Since you will not be planting the orchid with orchid potting media until the roots develop, it is advisable to place sphagnum moss around the outside of the plastic basket. The sphagnum moss should be damp before being placed on the sides of the well-ventilated pot.
Placing the sphagnum moss on the sides of the plastic basket (or well-ventilated pot) helps to retain moisture in the air. This is especially important once a plastic bag is placed over the orchid.
Place the Pot or Basket in a Plastic Bag
Placing the pot or basket in a plastic bag will help trap as much moisture as possible. This is the sphag and bag method.
You can also use these domed growing trays to achieve a similar effect. This is more like the humidity box method I outline here.
As the water from the sphagnum moss and humidity tray evaporates, it will go up and get trapped into the plastic bag or lid around the orchid. This helps create a high humid environment for the orchid and promote root growth.
Make sure you use a clear plastic bag or a clear box to create the humid growing environment. This will allow light to pass through to the orchid, which is important for photosynthesis and growth.
Sometimes mold can be an issue when you have high humidity and an enclosed system, such as this one. To prevent mold, try to keep a balance between maintaining humidity and providing enough air circulation around the orchid. You can either keep the bag or box slightly open, though this will decrease the humidity, or open it occasionally to let in fresh air.
Keep an eye on your orchid bark and orchid to make sure that mold is not starting to grow. If it does, you can treat it using several methods, which are outlined in this article about how to treat mold and fungus in orchids.
Place the Bag in a Warm Well-Lit Location
It is important to place this entire set-up (orchid, pot, rocks, moss, plastic bag, etc) in an area with enough light. The orchid leaves will capitalize on the humidity and sunlight to stimulate the growth of new roots.
You can place your orchid with its bag near a bright sunny window, but not in direct sunlight. The warmth created by the sunlight will also help evaporate the water by the rocks. This will increase the humidity for your orchid.
Sphagnum moss plays a huge role in making this method work. The presence of sphagnum moss ensures the environment is humid enough but not too wet to the extent of damaging the plant.
The rocks at the bottom of the pot act as a humidity tray. They allow water to pass through and not stay in prolonged contact with the roots or orchid stem. Water can remain at the bottom to maintain the humid environment. This step is hugely important. Orchid roots tend to get damaged when exposed to too much or too little moisture.
Every few days or so, check to see if you need to add any water to your humidity tray. If the sphagnum moss has dried out, or is beginning to dry out, add some water to it so that it is damp. Try to maintain high humidity levels for your orchid while it grows new roots.
Plant the Orchid
While you could directly plant the orchid in your preferred media, the orchid will not absorb water and nutrients as well as it should. This is because it does not have roots.
Placing sphagnum moss at the top of the media will help retain moisture and, consequently, promote the growth of roots.
For this method to be successful, the pot used must be well ventilated. You need adequate air circulation in the potting media. Placing sphagnum moss close to the orchid also ensures enough moisture is retained at the root level.
How Long Does It Take for New Orchid Roots to Grow?
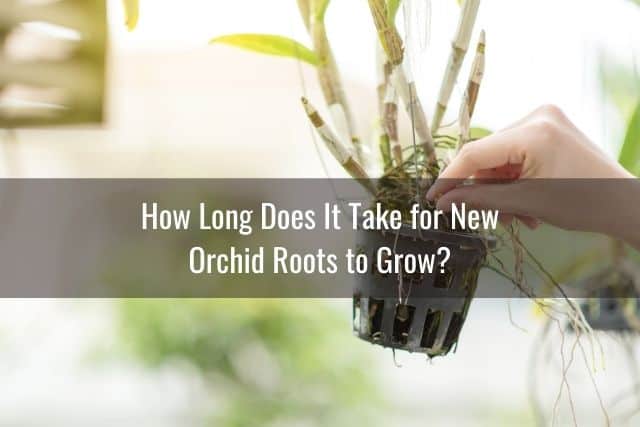
The time required to grow new orchid roots depends a lot on the species and the immediate environment. Some species take longer to grow new roots, while others can respond better to environmental stimuli. On average, it can take anywhere from 6 to 8 weeks for new orchid roots to grow. You can learn more about how fast orchids grow here.
The good thing with orchids is they can store food and water long after their roots are damaged or dead. This means the plant will not suffer much as it develops new roots, especially if placed in a humid enough environment.
Note: Placing orchids in extra wet environments does little to promote root growth. Instead, prolonged exposure to wet conditions increases the risk of root rot, which contributes to the plant’s gradual death. You need to maintain humidity for your orchid without making the environment overly wet. You can invest in a humidity monitor to try to keep the humidity around 60-70%.
How to Save an Orchid With Rotting Roots
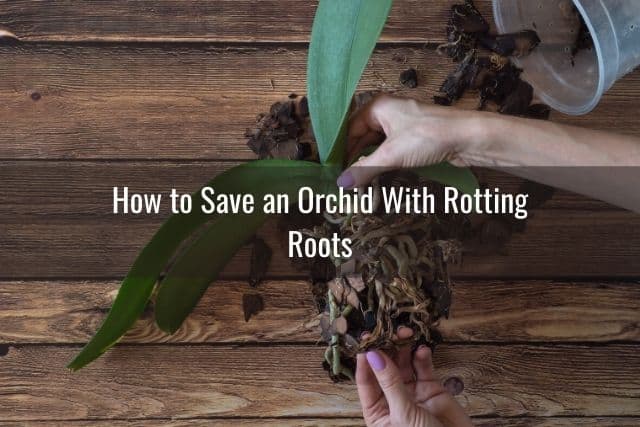
Saving an orchid with rotting roots is all about creating and maintaining a conducive environment for your orchid, as outlined above. Orchids are fairly sensitive plants in that they do not do well in extremely wet or dry conditions.
You should first determine what caused root rot in your orchid. It could be extreme exposure to wet conditions or decomposing potting media. If the roots are rotting due to water exposure, it is best to cut off the dead roots using sterilized scissors.
Once you have salvaged your orchid, proceed to place it in a humid environment. Preferably you should use one that has sphagnum moss as the potting medium, as outlined earlier in this article.
Another cause of rot could be unsuitable potting media. Due to constant exposure to moisture, orchid media will start breaking down over time and become acidic.
As the potting media decomposes and starts breaking down into smaller pieces, there will be less airflow around the orchid roots. There will also be increased exposure to moisture. The orchid’s delicate velamen covering the roots becomes damaged and the roots become rotted.
FAQs About Growing Orchids

How Should You Water Your Orchid?
The issue of watering orchids is among the most contentious for orchid enthusiasts. With several species of orchids available for home gardening, determining a particular species’ watering needs is fairly difficult. This is because each species comes with its unique needs. This highlights the need to know and understand the type of orchid you own.
Factors such as species, potting media, and the immediate environment are integral in determining the amount of moisture needed for an orchid.
In general, you should allow your orchid to nearly dry out between its waterings. Since orchids do not do well when overwatered, you should avoid watering them too frequently. This is especially true during winters and rainy seasons, when there is less opportunity for the potting media to fully dry out.
If you are curious about learning more, check out this resource about how to water orchids.
What Is the Ideal Potting Media for Orchids?
Orchids need plenty of oxygen to thrive, which explains why they naturally grow without soil. Epiphyte orchid plants grow in the wild by attaching to the barks of trees or nearby plants. Therefore, at home, they should be potted in a loose and open medium. Orchid potting media that is specially made of bark, coconut husk fibers, perlite, or charcoal, will provide plenty of drainage.
The potting media used for your orchids should always be kept fresh. This is why you need to change it and repot when you notice signs of decomposition.
Examples of frequently used orchid potting media include moss, fine-textured bark, and lava rock. Ideally, moss is preferred for thirstier orchid species such as Miltoniopsis orchids. This is due to moss’ impressive water retention capabilities. However, bark and rock will work well for orchids that do well in semi-arid conditions.
No matter the potting media you prefer, you should always ensure it is well aerated. Air circulation is necessary to prevent the orchid roots from rotting.
How Often Should Orchids Be Repotted?
Repotting is a sensitive issue when it comes to orchids. While some orchids might respond well when repotted, others might start to die. This is in part due to the stress of a new environment or if the orchid is not repotted correctly. Either way, you will know it is time to repot your orchid when its roots are rotting or starting to outgrow the current pot.
Another indication that it is time to repot is when the potting mix starts to break down due to gradual decay. Orchid roots tend to rot when constantly exposed to wet and acidic conditions. It is vital to repot your orchid once your potting media starts decaying. On average, orchids may need to be repotted once every two years.
Remember to place orchids in orchid pots that are neither too large nor too small. Ideally, the space should be enough to retain as much moisture as possible without congesting the orchid’s roots.
Please check out my detailed article on repotting orchids. I also have an article about orchid pots. Reading both of these will help you figure out how to repot your orchid and what kind of pot to use.
Final Thoughts
Saving an orchid without roots starts with identifying the cause of root loss. On most occasions, orchids tend to lose their roots due to root rot, disease, or dehydration.
Root rot happens because the orchid was exposed to too much water. This, in turn, leads to the gradual decay of the roots. Reducing the frequency of watering your orchid can help prevent root rot.
Dehydration problems can be prevented by using media like sphagnum moss, which is known to retain moisture. Water your orchid on a weekly schedule or when you notice the potting media nearly dry. The potting should also be well ventilated to allow for the fast drying of the media.
Saving an orchid that has lost its roots due to rot or disease will take some extra effort. However, it can definitely be done. You can grow new orchid roots with the right conditions. Hope this article has helped you. As always, happy orchid growing!
If you enjoyed this article, please pin it and share!
Recent Posts
Fusarium wilt in orchids is, unfortunately, a problem that you may encounter at one point or another. It is caused by the Fusarium pathogen and this kind of infection can be hard to identify at...
When it comes to choosing an orchid potting mix and knowing what kind of orchid soil is best, the decision can feel daunting. After all, there is a huge variety of options out there, from orchid bark...
