
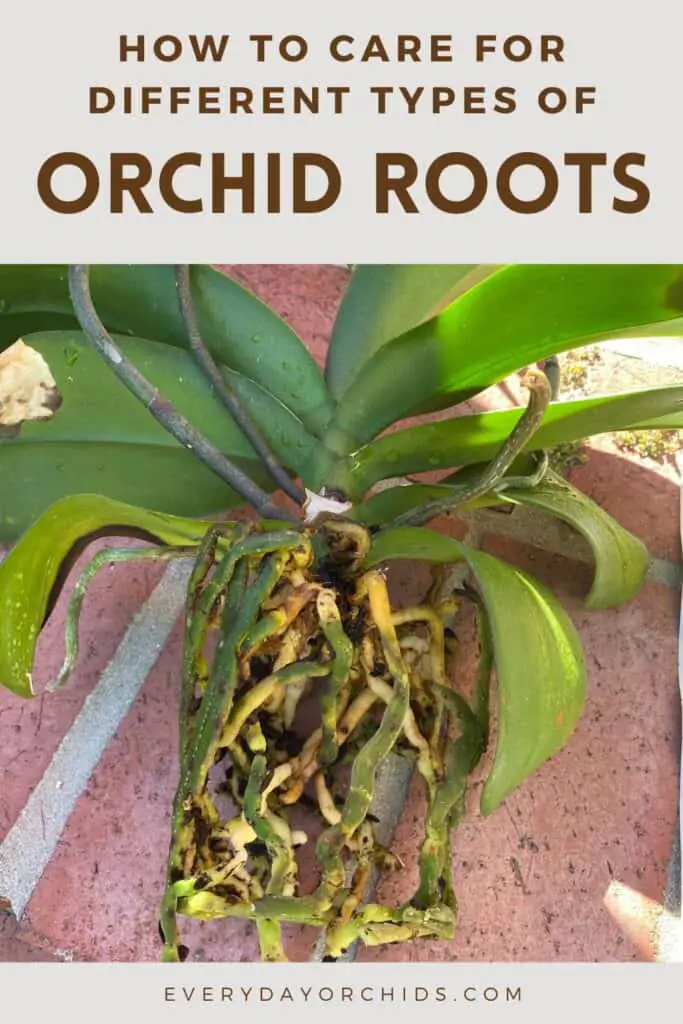
Orchid roots come in different shapes, textures and color. When growing orchids, you will inevitably encounter different types of orchid roots. You may notice these differences when you repot or when you prune your orchid plant.
You may be wondering if the orchid roots you see are normal or not. As with the quality and color of orchid leaves and the orchid spike color, the color and texture of the roots will tell you something about the orchid’s health.
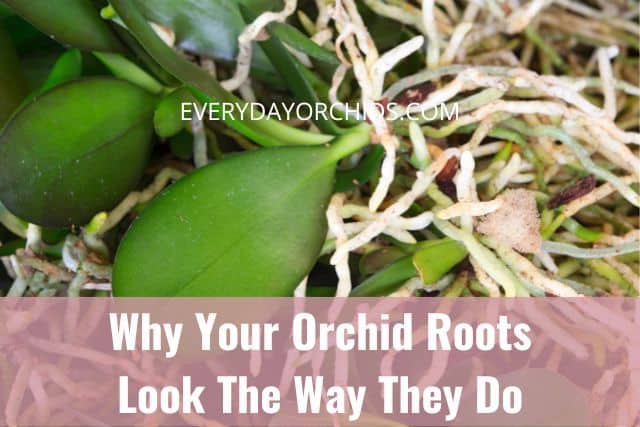
Healthy orchid roots will range from silvery white and green to yellow and white. Rotted orchid roots will look brown or black and have a mushy texture. Dried orchid roots will be light brown to tan and feel hard or brittle. Budding orchid roots will be bright green. Aerial roots grow above the potting media and are a normal sign of a healthy orchid plant.
In this article, I’ll go over the various types of orchid roots you may come across when repotting. You’ll learn what different root colors and textures mean for your orchid’s health. Keep reading to learn more.
Please note that these links are affiliate links and as an Amazon Associate, I earn from qualifying purchases. Purchases made through affiliate links in this post may generate commissions at no additional cost to you. Use this link for a discounted Amazon Prime trial. Thank you for your support!
Table of Contents
Healthy Orchid Roots
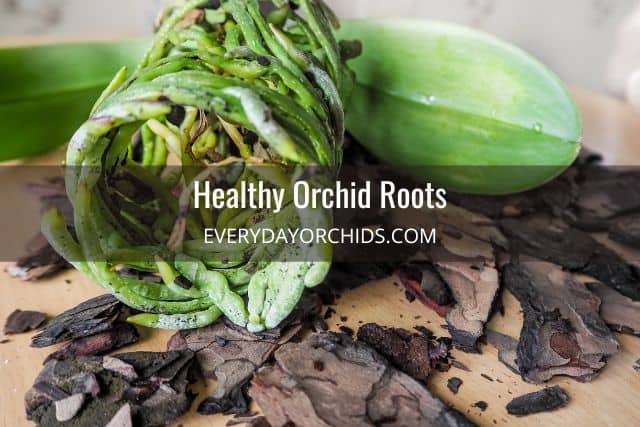
I recently repotted six of my orchid plants and came across a wide range of orchid root situations. First, let’s talk about what healthy orchid roots should look like.
Healthy orchid roots will be thick, plump, and when dry, appear silvery white. This is due to the delicate velamen covering the orchid roots.
Velamen is a spongy layer that absorbs water and nutrients from the surrounding environment. It then transfers the water and nutrients to the roots, which then gets carried up to the orchid plant.
Each time the orchid roots are watered, the velamen becomes transparent. As a result, healthy orchid roots will change colors, turning from a silvery gray color to bright green.
If you see these type of roots on your orchid, give yourself a pat on the back. These roots are a sign of a healthy orchid plant. There is nothing you need to change in your orchid care practices. If you would like to learn more, check out this article about orchid roots and orchid root care.
Healthy orchid roots may grow up and out of the pot. Some of these may be aerial roots, which I will talk about later. Orchid roots may also grow sideways, straight down, or curve around the pot.
Typically, orchid roots don’t mind being crowded in the pot. However, if you notice that there are more orchid roots than potting media, then you may want to consider repotting. When trying to figure out how to choose your next orchid pot, use a slightly larger pot to give the roots more room to grow.
Rotted Orchid Roots
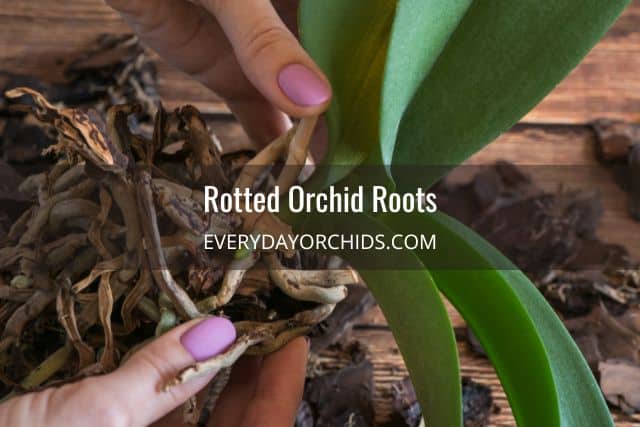
Root rot and over watering is the primary cause of rotted orchid roots. Rotted roots will be mushy and brown or black in color.
If you find a root with the tip of the root slightly mushy and turning black or brown, this means the root is starting to rot. If you aren’t sure if your orchid has root rot, read this guide on how to spot root rot.
Severely rotted roots will have lost the velamen and outer protective layer of the root. When you encounter the severely rotted root, you may find a thin, flat, slimy or slippery outer covering around a thin, stringy orchid root. It will practically disintegrate in your fingers when you touch it.
This will all need to be cut off with sterilized scissors or gardening shears. The orchid root is no longer viable and will not absorb any water.
After cutting off the rotted roots, treat any remaining cut ends with ground cinnamon powder. This will seal off the ends and protect the orchid from further infection. To learn more, read this guide on how to treat root rot in orchids.
Root rot is a common reason why you will see orchid leaves wilting or drooping. If you are regularly watering your orchid but do not see the orchid leaves recovering, check the roots. Most likely, there is an underlying issue such as root rot which is preventing the uptake of water to the plant.
Repot The Orchid
If you think root rot may be the cause of your orchid’s decline, repot your orchid as soon as possible. Although you may be tempted to wait until after the orchid’s blooming period is over, the reality is that the rot will continue to worsen if left unchecked.
Repotting when the orchid is in bloom may cause some of the blooms to fall off early due to the stress caused to the orchid. This does not always happen, but it is a possibility. However, this may be a sacrifice that you have to make in order to save the orchid as a whole.
Also, keep in mind that some varieties, such as Phalaenopsis orchids, can bloom for up to 3 months at a time. This is a long time to wait to repot when you have root rot.
Change Your Watering Practices
Moving forward, you will want to make some changes to your watering practices to avoid this scenario from happening again. Here’s a helpful guide covering the basics of how to water your orchid.
In the future, water your orchid when the top 2-inches of potting media are dry. The best way to tell if this is the case is to actually put your finger in the potting media and feel how damp or dry it is. Don’t just eyeball it. If the potting media is still damp, wait a couple more days. Then, check it again before you water.
The risk for overwatering and root rot is part of the reason why I like using transparent lightweight plastic orchid pots like these for growing orchids. I can easily visualize the orchid root color and potting media.
In addition, once you become more familiar with your orchid, you can also pick up the orchid pot and tell just based on the weight of the pot if your orchid needs to be watered or not.
A lightweight pot generally indicates dry potting media and that the orchid needs to be watered. A heavier pot means that the potting media is still damp and watering is not needed at this time.
Of course, don’t just rely on how the roots look or how heavy the pot is when determining when to water your orchid. Always check the potting media first and tailor your watering practices to your specific orchid’s growing needs.
Gray Orchid Roots

Generally, gray orchid roots may look a little wrinkled and dry. Gray orchid roots may be a sign that your orchid is getting dehydrated and needs more water.
To address these dry roots, you can soak your orchid roots or orchid pot in a basin of water for at least 10 minutes. Doing a soak rather than watering overhead gives the roots a chance to really absorb the water before it drains back out.
After soaking your orchid roots, drain the orchid pots of excess water to prevent root rot. Empty any standing water from the saucers or trays under the orchid pot.
Removing water from the saucer or tray under the pot will prevent bacterial or fungal infections. It will also prevent the potting media from staying wet.
Constantly damp potting media leads to a whole host of other problems, including root rot, fungus gnat infestations, and mold growth.
If the aerial roots are gray and wrinkled, check your humidity levels. You can use a hygrometer to do this. Chances are, you may need to increase humidity levels in your orchid’s growing area as well.
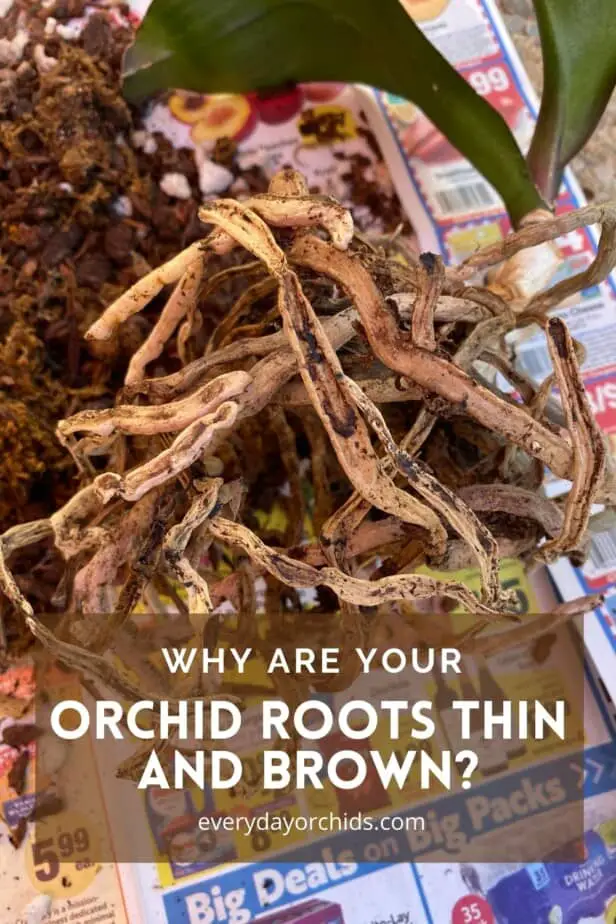
Dried Orchid Roots
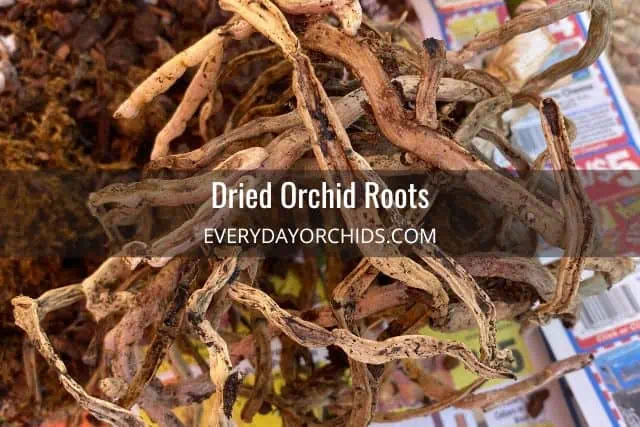
Dried orchid roots are another cause for orchid leaves to wilt and droop. The reason for this is the same as for rotted roots. Namely, the orchid is unable to absorb water.
Dried orchid roots will be light brown to tan in color. These roots are thin, wrinkled, and dry. They are often brittle to touch.
Soak the Roots
Mildly dried orchid roots will be slightly wrinkled and dry. These roots are not yet at the point of no return. You can rehydrate your orchid by soaking your orchid roots in a basin of water for at least 10-20 minutes.
When you do this, take care to keep the orchid crown above the water and just soak the roots only. Keeping the orchid crown from getting wet will help prevent crown rot.
Along the same lines, try to avoid getting water in the space between the leaves and main stem. If water gets in here and isn’t dried off, you run the risk of your orchid getting stem rot.
If your orchid is fairly dehydrated, you can also try soaking your orchid roots in an Epsom salt solution.
It is fine to leave your orchids in their pot when you do these soaks. Go ahead and soak the entire pot in the water or Epsom salt solution. Just be careful not to submerge the entire orchid. Again, keep the orchid leaves and crown above water to avoid crown rot and stem rot.
Remove Dry, Dead Roots
Severely dried orchid roots will be thin, brittle, and have a “crispy” texture. They will generally break if you try to move them, or if they are movable, you will find that there is no substance to the root. It will feel like a papery, empty, hollow root.
These dead roots will need to be removed so that your orchid has a chance to grow new roots.
Using sterilized scissors or gardening shears, cut off all the dried, dead roots. If your orchid is left with almost no roots, you can help your orchid regrow roots using sphagnum moss and high humidity levels.
I’ve outlined elsewhere on Everyday Orchids how to I’ve been able to quickly grow orchid roots using a humidity box. Using a few simple techniques, you can learn how to save an orchid without roots. If you like, you can also try the sphag and bag method to regrow orchid roots. It is similar and uses less supplies.
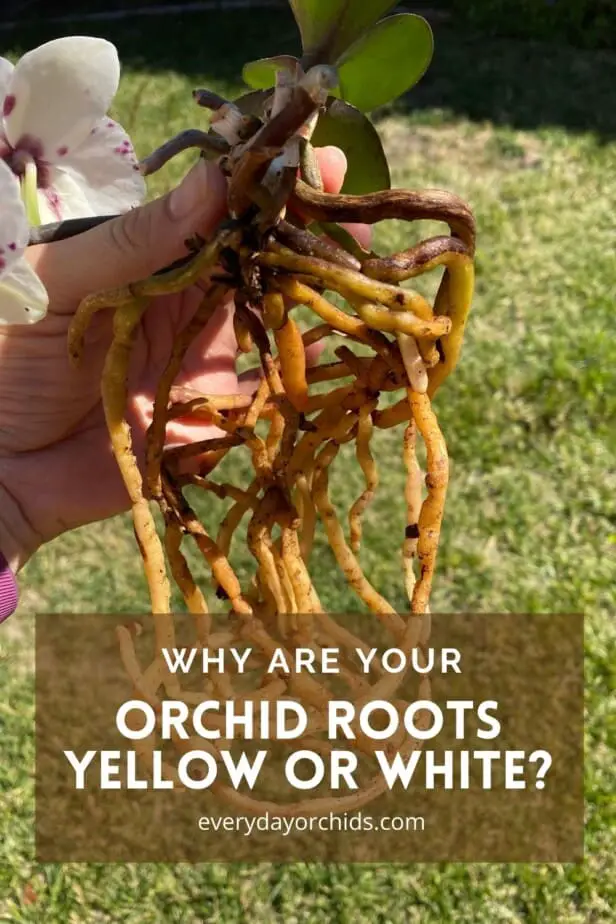
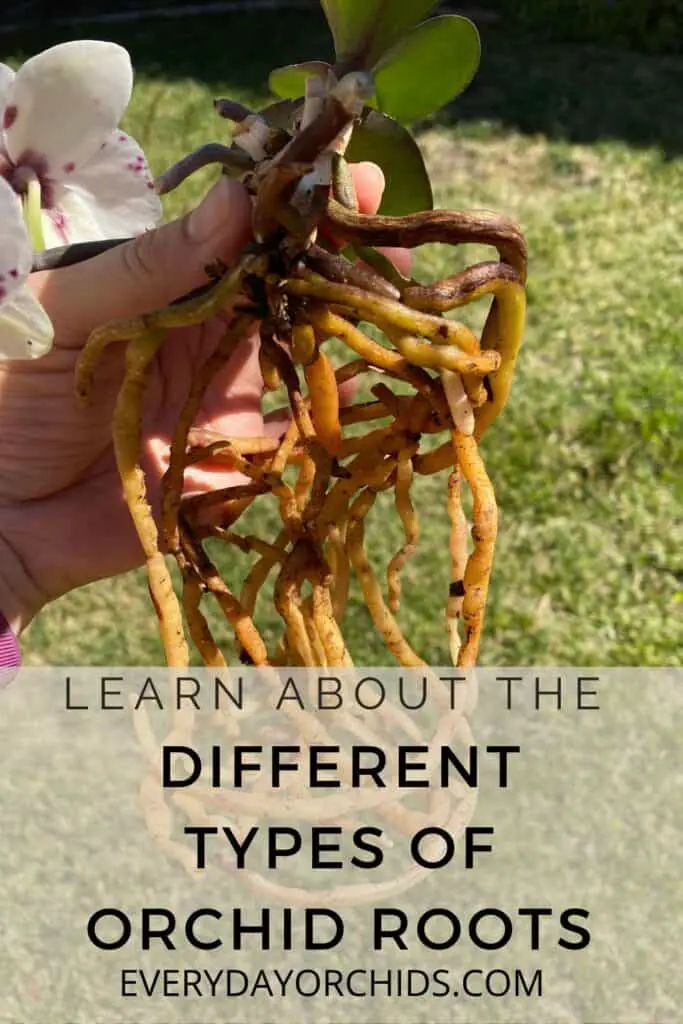
Yellow or White Orchid Roots
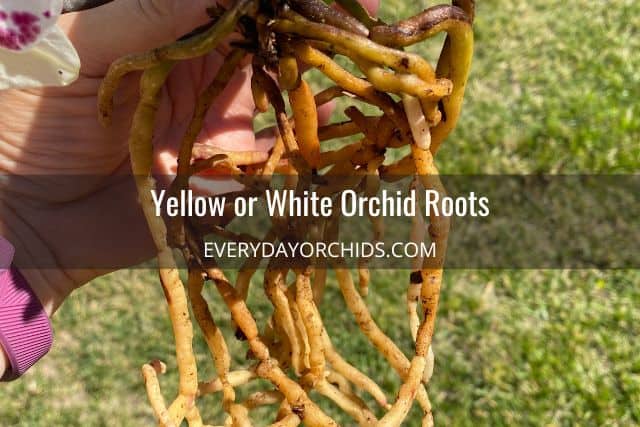
Now I will have to admit, it has been a long time since I’ve seen white or yellow orchid roots. Seeing almost all white roots on one of my orchids threw me for a loop when I was repotting the other day (see above). However, upon inspection, the roots appeared healthy. They were thick, plump, and did not show any signs of rot or disease.
Orchid roots may appear yellow or white due to the lack of sunlight in the middle of the pot.
You may notice that the orchid roots along the sides of the pot are green or silvery white. This will be the case only if your orchid is housed in a transparent plastic pot. These outer roots have the benefit of exposure to sunlight. Their chlorophyll and ability to perform photosynthesis is what gives these outer roots their green color.
The inner roots, in the middle of the pot, lack the chlorophyll needed to perform photosynthesis. They are white or yellow due to lack of sun exposure.
If your orchid is in a clay terracotta orchid pot, like mine was, the roots will not be exposed to sunlight. These roots will be yellow or white.
There is nothing inherently wrong with white or yellow orchid roots. Do not cut them off. As long as they appear healthy in every other way, leave the yellow or white roots on the orchid plant. These roots may look odd, but they are still able to absorb water and nutrients for your plant.
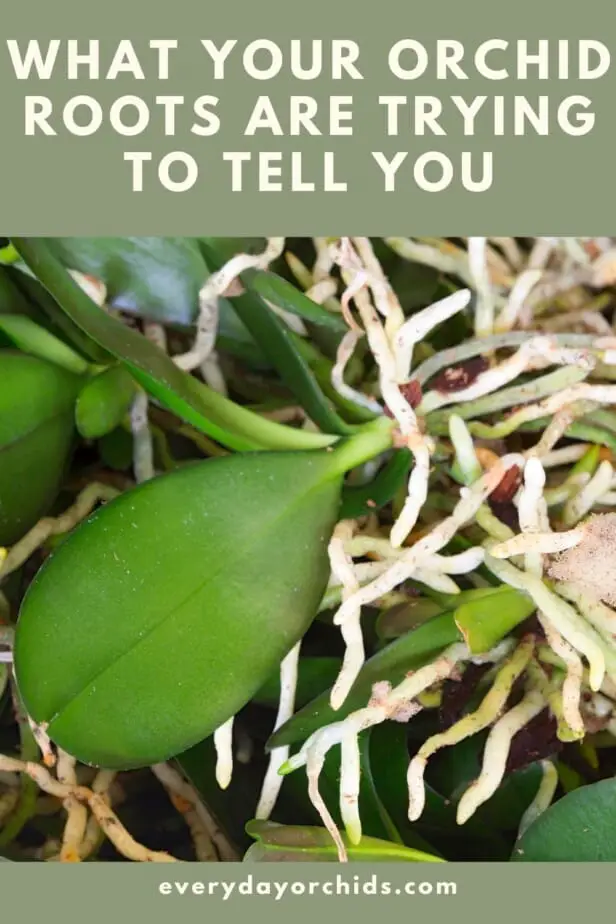
Budding Orchid Roots

These new roots will initially appear as little nubs or bumps on the side of the main orchid stem.
Initially, budding orchid roots will be bright green. As they grow, they will develop the silvery velamen coating that we are accustomed to seeing.
New orchid roots are a great sign. If you see new orchid roots developing, give a little cheer and congratulate yourself that you are doing things right. Your orchid is happy, healthy and growing. Continue to care for your orchid as you have been.
To learn more, check out this guide on how to tell a new orchid root bud apart from a new orchid flower spike. Once you learn the differences, you’ll be able to easily tell root buds apart from beginning flower spikes in the future.
Aerial Roots
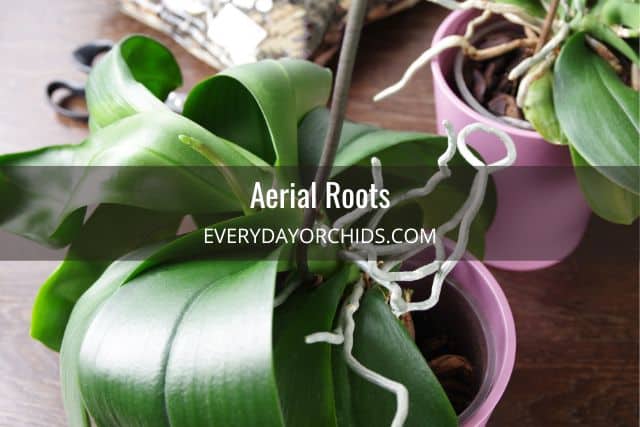
Many orchids will develop aerial roots at some point in time. These are typically roots that grow above the potting media and seem to twist and spread out around the orchid pot. Some aerial roots may look like tentacles around your orchid plant.
Healthy aerial roots are typically grayish-white and firm. Aerial roots help the orchid plant absorb water and nutrients from the air.
If they are wrinkled, you may need to increase humidity levels in your home. Use a hygrometer to track your home’s humidity levels. I use this one by ThermoPro. If your humidity levels are low, you may need to add a humidifier or humidity tray to your orchid’s growing area.
Should You Cut Off Aerial Roots On An Orchid?
No, do not cut off your orchid’s aerial roots! Aerial roots are completely normal and you want to leave these roots alone.
Remember, many orchids are epiphytes that normally grow on trees in the wild. In their natural setting, their roots would spread out around the plant just like this.
I repeat, do not remove aerial roots or cut them off. When repotting your orchid, leave the aerial roots as they were, above the pot. Avoid trying to place aerial roots down into the pot along with the other roots. If you still aren’t sure to handle aerial roots, read this guide to repotting your orchid with aerial roots.
These aerial roots are a key part of the orchid plant. They may be what ends up saving your orchid when you have lost all the potted roots to rot or dehydration.
What To Do About Shriveled Or Brown Aerial Orchid Roots
If you notice that your orchid’s aerial roots are starting to shrivel or turn yellowish-brown, this is a sign of low humidity in your home.
Basically, the aerial roots are starting to dry up. Do what you can to increase the humidity levels in your home. This will help save the aerial roots from drying up any further.
If the aerial roots are too shriveled up and appear dead, they are likely no longer absorbing moisture or nutrients. Once you’ve confirmed that the roots in question are truly dried up, dead, and no longer viable, use a sterilized pair of scissors or gardening shears to remove them.
Repotting and Selecting an Orchid Pot
If you notice a large number of aerial roots starting to grow up and out of your pot, it may be a sign that your orchid is ready for a new, larger pot.
Generally, most orchids need to be repotted every 1-2 years. This is because the potting media breaks down over time and starts to decompose. Another reason for repotting is when the orchid roots outgrow their pot.
When choosing an orchid pot, you may need to upsize your pot by 1-inch in diameter. For example, if you have a 4-inch pot now, choose a 5-inch pot for when you repot your orchid. Be sure to sterilize your pot before use. If you are interested in learning more, check out my article on how to choose an orchid pot.
Final Thoughts
As you can see, orchid roots can be a range of colors, from green and silvery white, to yellow, to brown and black. Likewise, orchid roots can have a variety of textures, from plump and firm, to soft and mushy. Not all of these indicate a healthy orchid.
Understanding the differences between normal, healthy orchid roots and unhealthy orchid roots is key to basic orchid care. You can learn a lot about your orchid, how it is doing, and what it needs based on the health of its roots.
I’ve touched on the most common types of orchid roots you will encounter while growing orchids. I’ve also provided some solutions for common orchid root problems. There are links within this post for further reading if you want to learn more about each root type. Thank you for reading and I hope this has helped you. As always, happy orchid growing!
If you enjoyed this article, please pin it and share!
Recent Posts
Fusarium wilt in orchids is, unfortunately, a problem that you may encounter at one point or another. It is caused by the Fusarium pathogen and this kind of infection can be hard to identify at...
When it comes to choosing an orchid potting mix and knowing what kind of orchid soil is best, the decision can feel daunting. After all, there is a huge variety of options out there, from orchid bark...
