
Are you curious about how you can care for and propagate vanilla orchids at home? Vanilla orchids are not just for commercial growers. Many experienced orchid growers, with the right growing conditions, are able to care for vanilla orchid plants.
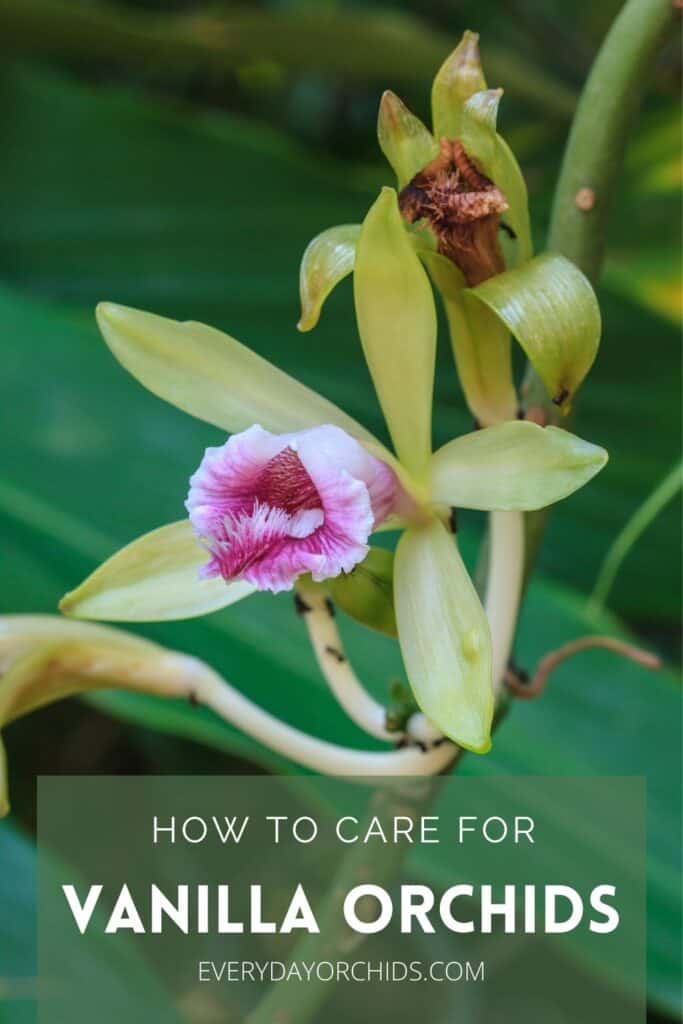
Vanilla orchids are also known as vanilla planifolia and are a flowering orchid vine. These orchids require daytime temperatures around 80 to 90 degrees Fahrenheit, nighttime temps around 60 degrees, and high humidity levels. They prefer partially shaded conditions and regular fertilization. Their particular care requirements makes growing vanilla orchids a bit challenging, but it is not impossible to learn.

In this article, you’ll learn all about vanilla orchids and how to care for them. You’ll learn how fast vanilla orchids grow, which orchid pests and problems you need to watch out for, and more.
I’ll also give you step-by-step instructions on how to propagate vanilla orchid plants. This way, you can add to your collection or share with friends. Keep reading to learn more.
Please note that these links are affiliate links and as an Amazon Associate, I earn from qualifying purchases. Purchases made through affiliate links in this post may generate commissions at no additional cost to you. Use this link for a discounted Amazon Prime trial. Thank you for your support!
Table of Contents
Can You Grow Vanilla Orchids At Home?
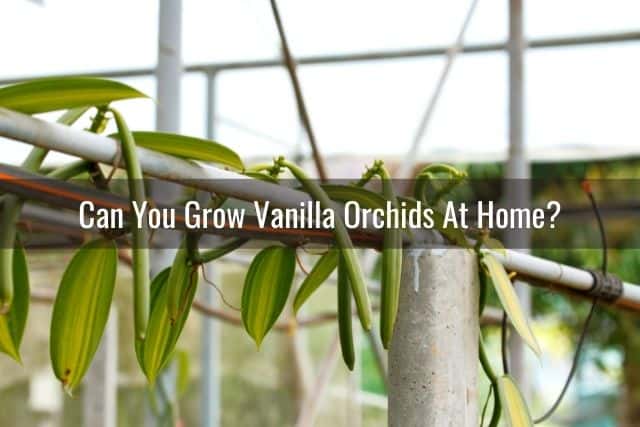
Yes, you can definitely grow vanilla orchids at home. However, I would caution you to learn as much as you can before jumping in.
These orchids can be fairly difficult and high maintenance to care for, due to their particular growing needs. The most challenging part is getting these orchids to bloom and then getting those flowers to produce a seed pod. For these reasons, I would recommend these orchids for more experienced orchid growers rather than beginners.
If you are interested in growing vanilla orchids at home, you will have the best chances for success if you use a greenhouse where you can better control the orchid’s growing environment. You also have a higher chance for success if you live in a tropical climate that already mimics the vanilla orchid’s natural habitat.
However, don’t get discouraged. Growing vanilla orchids can be challenging but it is definitely not impossible. You just need the right growing conditions, which I will go over in greater detail below.
How Fast Do Vanilla Orchids Grow?
Vanilla orchids grow slowly. If you are starting with a vanilla orchid cutting, it can take 2-3 years for the orchid to root and grow big enough to be potted on its own.
After that, it might take another 3-4 years for the orchid to mature enough to the point where it can develop flowers.
So, if you are looking to grow vanilla orchids, particularly from a cutting or propagated plant, you will need to be patient. You won’t see the fruits of your labor for many years, so temper your expectations accordingly.
Fun Facts About The Vanilla Orchid
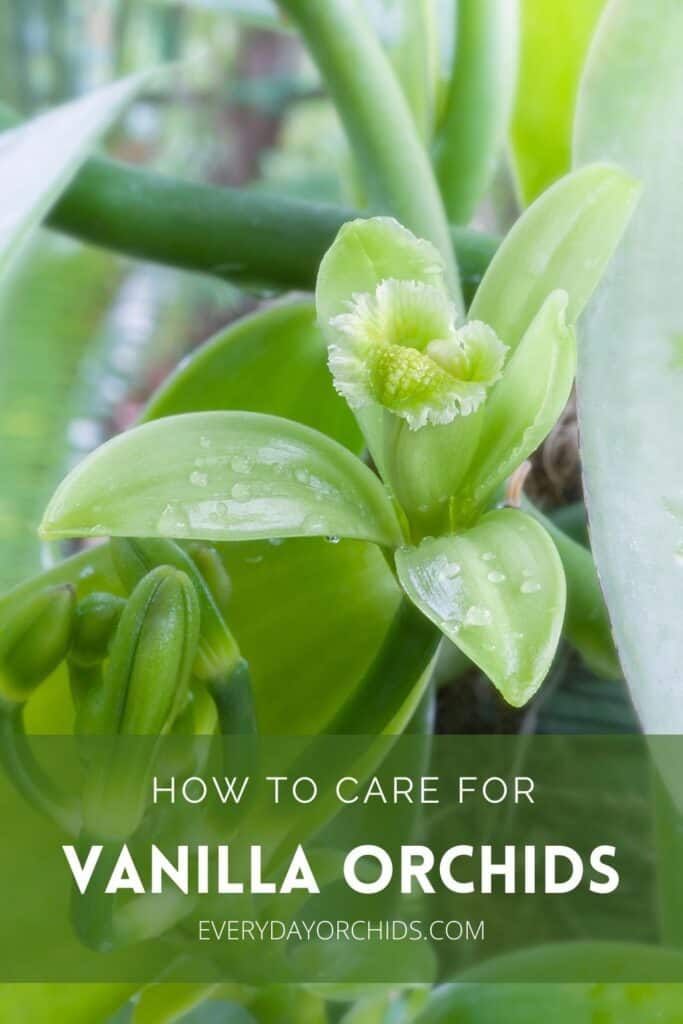
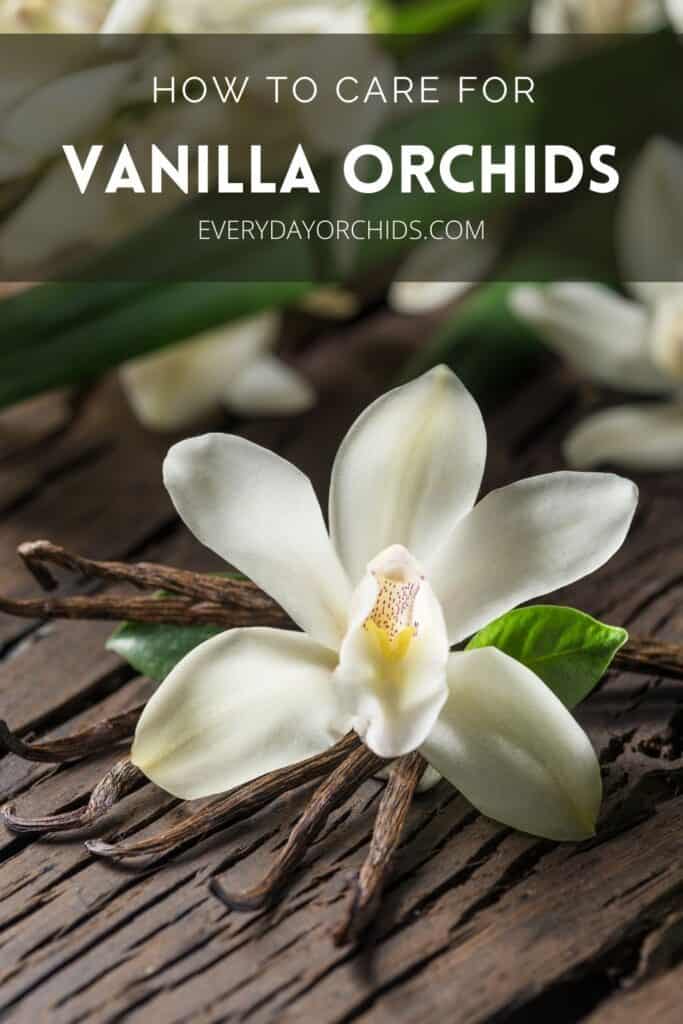
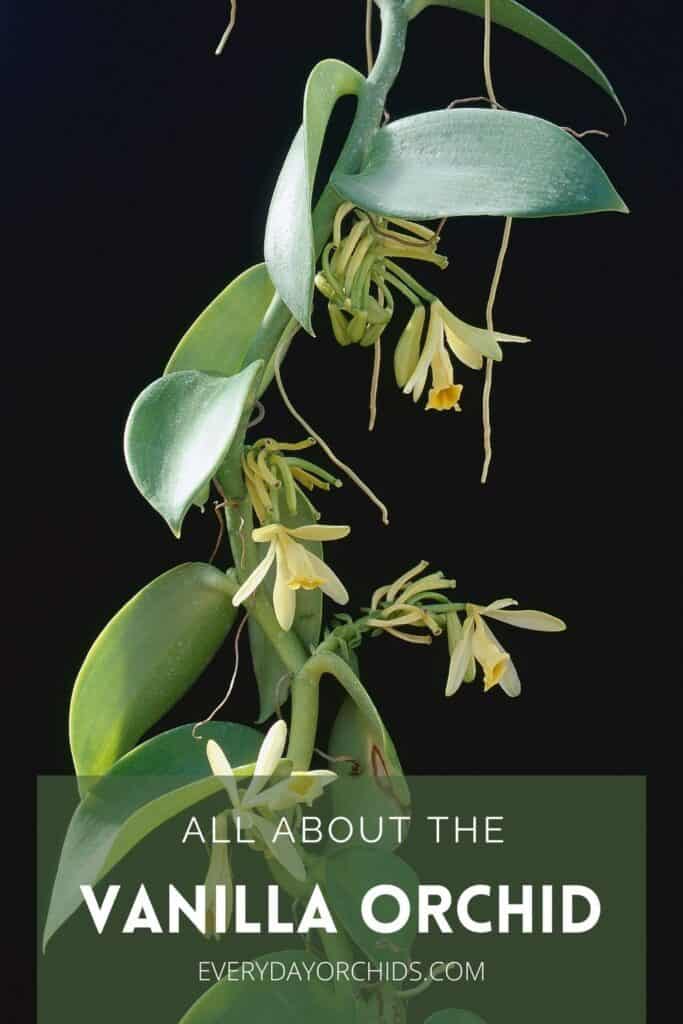
One unique feature that sets the vanilla planifolia apart from other orchids is that it bears fruit in the form of a vanilla seed-pod.
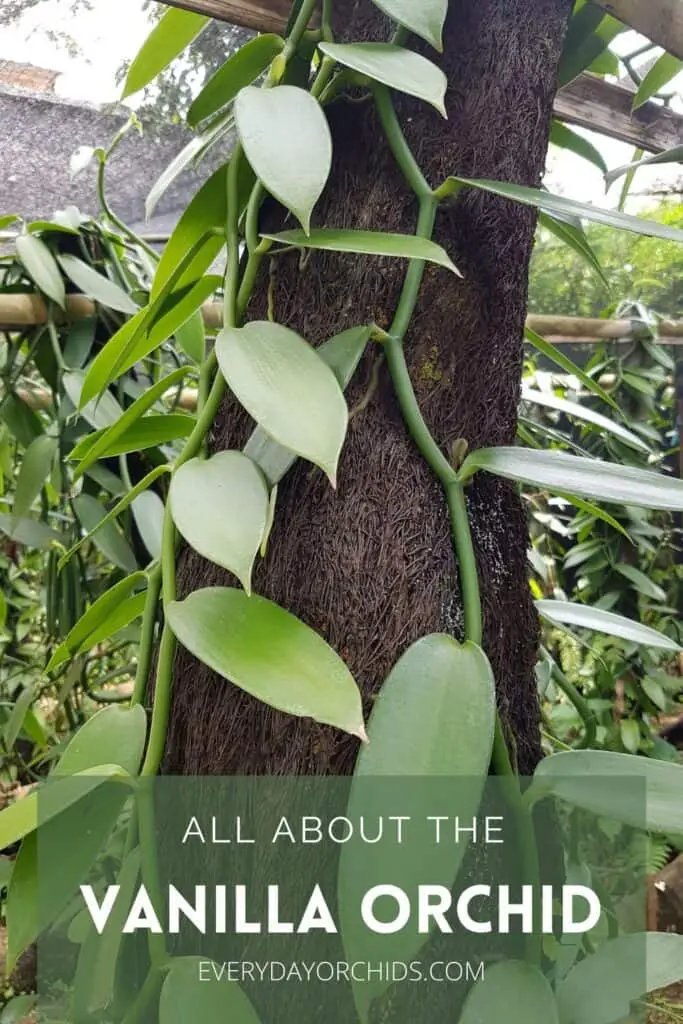
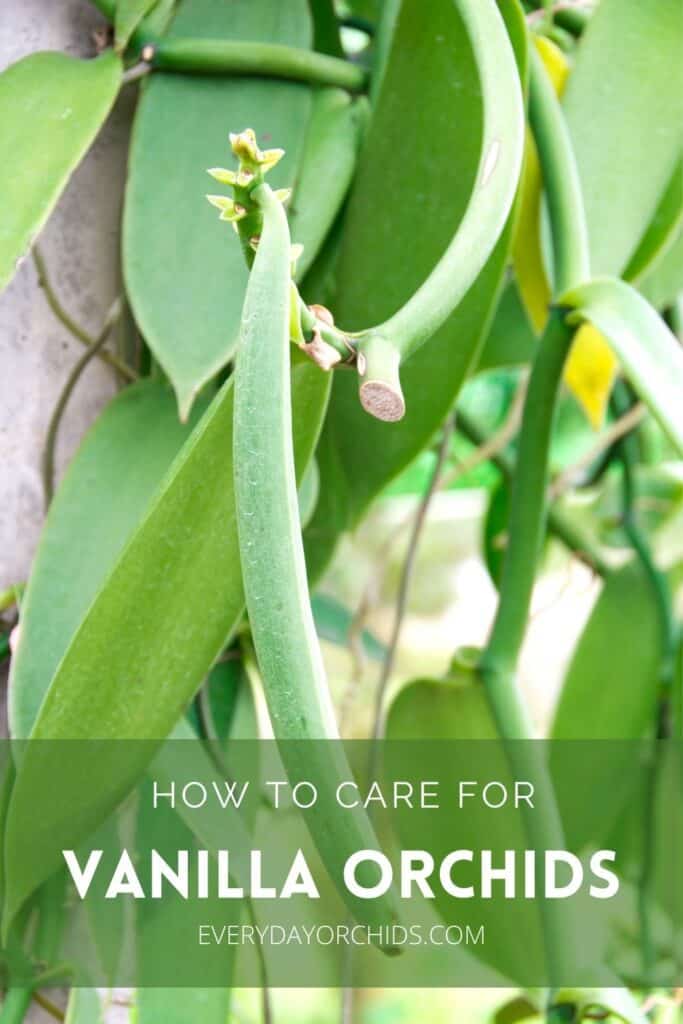
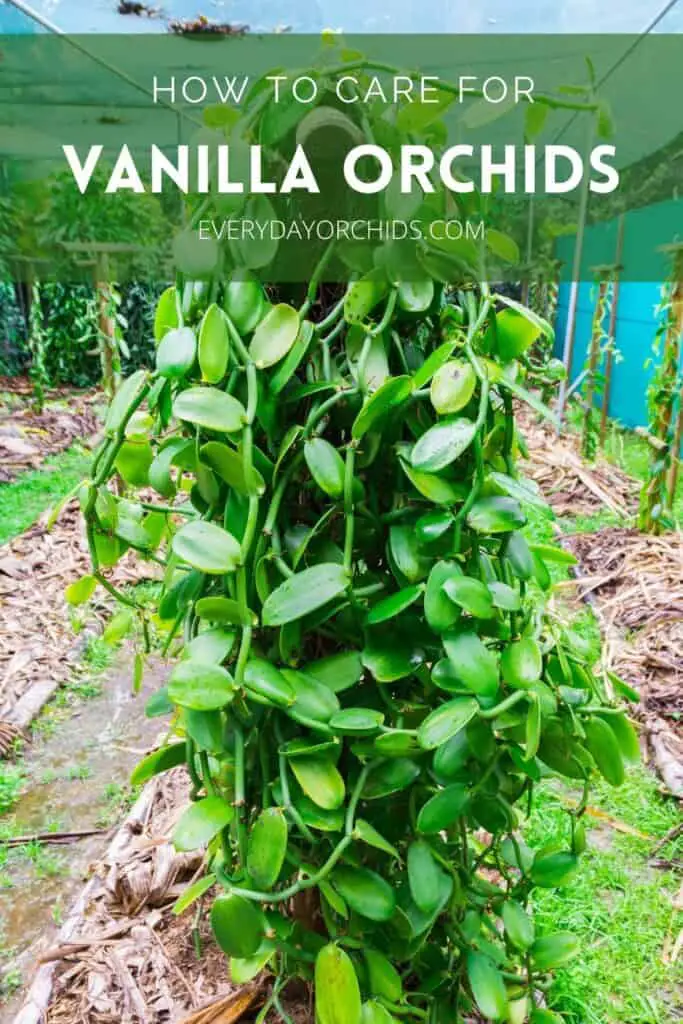
Another fun fact is that this orchid is actually a vine. In its native habitat, this epiphyte orchid climbs up a host tree and uses the tree for support. Even without flowers, the vanilla orchid plant is a beautiful vine, with deep green glossy leaves.
Vanilla orchids are edible orchids. As mentioned earlier, these are the only orchids that produce a fruit in the form of a vanilla seed-pod. You can read more about edible orchids here!
The vanilla bean orchid also goes by the scientific name vanilla planifolia. Vanilla planifolia orchids are native to Mexico, but are now grown in Madagascar, Indonesia and other parts of the world.
If you have some experience with orchids, you can learn to care for this orchid as well. Let’s talk about the care requirements next.
Vanilla Orchid Care Requirements
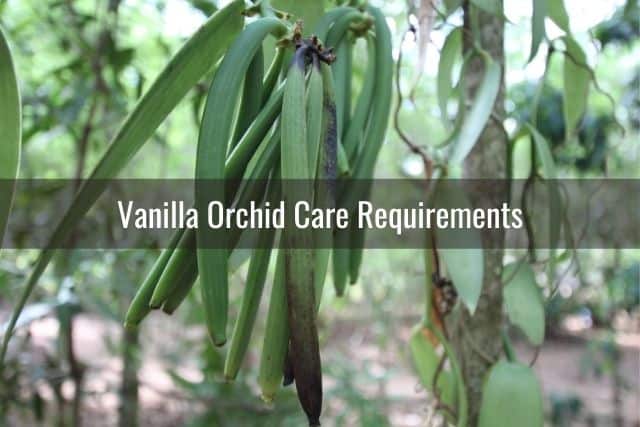
Vanilla orchids can be grown at home, but I would recommend using a greenhouse to better provide the right growing conditions. In fact, a greenhouse is a must if your area is prone to frost in fall and winter. On the other hand, if you live in a tropical climate, you may be able to get away with simply growing these orchids outdoors.
However, remember that this orchid is a vine and will need a lot of room to grow. When grown in its native habitat, the vine can grow up to 100 feet long when mature.
While you can initially keep these orchids inside the home when it is small and young, you will need to consider what to do as it grows and starts to produce vine branches. While the vine length won’t reach 100 feet in a greenhouse, it can still get fairly lengthy, up to 10 feet across.
You’ll also need to provide some support for the vine, whether in the form of a trellis or support pole. Support poles covered in moss are most ideal for this type of orchid.
Vanilla orchids are also best suited for certain climates. The vanilla orchid has specific growing requirements, particularly in terms of temperature and humidity. This is a tropical plant, so in general, it needs warm temperatures and high humidity in order to thrive. However, it’s not as simple as that. Let’s talk about each of the required growing conditions next.
Temperature
As I mentioned, vanilla orchids will grow best in a greenhouse or in an environment where you can control the temperatures. Do your best to keep temperatures within the orchid’s preferred range.
During the daytime, aim to keep temperatures between 80-90 degrees Fahrenheit. Allow nighttime temperatures to drop down the low 60s Fahrenheit.
This temperature difference between day and night mimics the rise and fall of temperatures in the orchid’s natural habitat. In addition, the significant difference between day and night temperatures helps trigger blooming in the orchid. This is key and is a necessary step in producing those coveted vanilla bean seed pods.
The easiest thing to do to keep track of day and night temperatures and know if your orchid is in the right range is to place a hygrometer in your orchid’s growing area. A hygrometer is primarily used to measure and track humidity levels in a given area. However, many hygrometers also come with the ability to measure temperature.
I have this particular hygrometer near my orchids. It tracks both humidity and temperature levels. It also gives me a 24-hour high and low for both. This is perfect and helps me know if I need to make any adjustments or not.
Speaking of hygrometers, let’s talk about humidity requirements next.
Humidity
Providing the right amount of humidity to your vanilla orchid is essential. I would say providing your vanilla orchid with the right temperature and humidity range are the two most important things you can do. Good lighting and watering comes in a close second.
You don’t want high daytime temperatures to be accompanied by low humidity. This would dry out your orchid and lead to dried, shriveled orchid roots and wilted orchid leaves.
Instead, aim for a humidity range around 80%. This humidity level is much higher than what naturally occurs in most homes. Most people’s homes have a humidity level closer to 30%.
You will need to invest in a humidifier or keep your orchid in a greenhouse (or both) in order to maintain those high humidity levels. Use a hygrometer to keep track of humidity levels and make sure you stay within the ideal range.
If your vanilla orchid is growing outdoors on a tree or using vine support, you may also want to set up some outdoor misting equipment nearby. This will help add humidity and moisture to your orchids.
You may also opt to use a moss-covered support pole and water the moss when you water your orchid. This will help add some humidity as well.
Without the right levels of humidity, you will find that your orchid’s growth will slow. In addition, the leaves may become pleated, and the roots may start to dry up.
You can read more about why humidity is so important to orchids here, as well as five easy ways to increase humidity in your orchid’s growing area. To maximize your chances for success, do your best to create an orchid growing area that mimics the vanilla orchid’s natural habitat.
On the other hand, keep in mind that high humidity conditions can be a breeding ground for mold and fungal growth. To combat this, use a circulating fan to maintain airflow around your orchid’s growing area. I go over this more in the section below about pests and disease.
Lighting
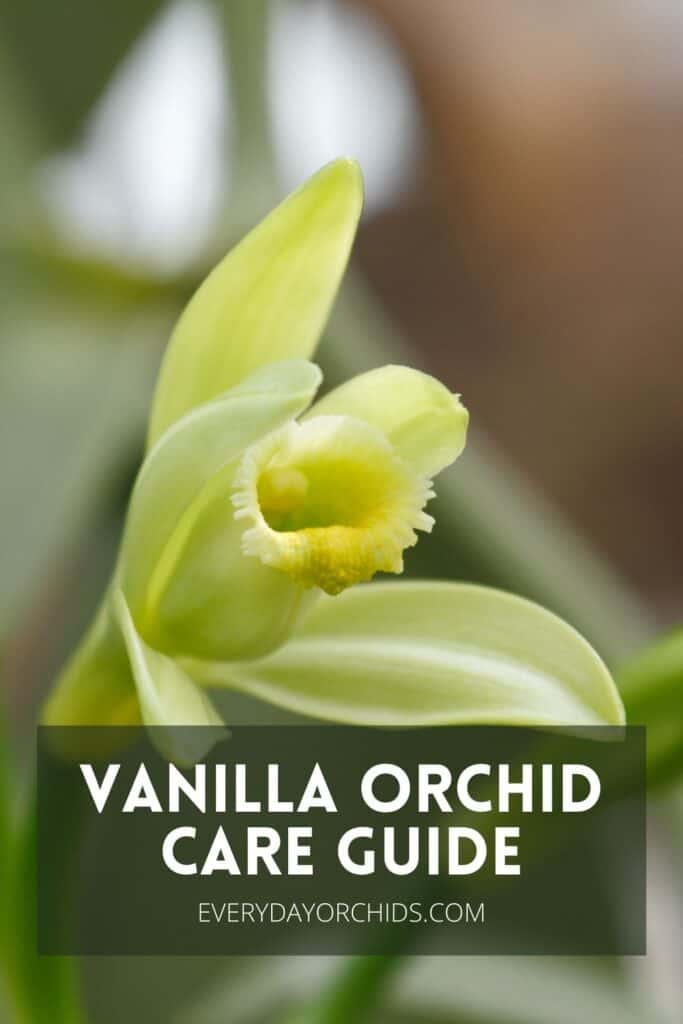
Vanilla planifolia orchids grow best in partially shaded conditions. However, this does not mean that they should be in the dark.
On the contrary, they like exposure to bright, indirect light. They need at least 12-14 hours of light each day. Inside the home, place your vanilla orchid near an east-facing window.
If you keep your orchids outdoors, be sure to provide a shade cloth over the orchids. Protect them from direct light, especially in the afternoons. Direct sunlight will cause the leaves to burn and change color.
Orchids mounted to a tree will have some natural protection from the sun by means of the tree’s branches and leaves. However, before mounting your orchid to the tree, observe the location for a few days. See where the light hits the tree during different parts of the day. Make sure your orchid will be partially shaded at all times, but still have be exposed to bright, indirect sunlight throughout the day.
Watering
Before watering your vanilla orchid plant, check to see if the top 2-inches of potting media is dry or nearly dry. If it is, go ahead and water your orchid. Allow the water to run through the pot.
The aim is for the orchid to be evenly moist but not remain wet. Overly wet potting media or too frequent watering will easily lead to root rot.
If your vanilla orchid is growing on a vine pole or a tree, dampen the vine pole or tree when you water your orchid. This will allow your vanilla orchid to absorb water through the air roots. It will also add some ambient humidity to the orchid’s growing area.
Fertilization
As with all orchids, the vanilla orchid will need to be fertilized with orchid fertilizer on a weekly or semi-weekly basis.
Use a balanced orchid fertilizer and dilute it according to the package instructions. Then, dilute it further to achieve a quarter-strength orchid fertilizer. Use this to feed your vanilla orchid.
Depending on the season, you will need to fertilize your orchid more or less. During the growing period, when the orchid is actively putting out new leaves and roots, feed your orchid once a week with the diluted orchid fertilizer. When growth slows during colder weather, also slow down fertilization to once every other week or once a month.
You can find a step-by-step guide on how to fertilize orchids here.
Potting Media
Vanilla planifolia orchids are semi-epiphytes and semi-terrestrial plants. This means that similar to Phalaenopsis orchids and other epiphytes, they like to be potted in well-draining orchid potting media. However, they can also tolerate a moister potting media than pure epiphytes.
A mix of medium-grade orchid bark for epiphytes and fine-grade orchid bark or coconut coir mix for terrestrial orchids would be ideal.
Depending on your potting preferences, you can also use sphagnum moss to pot these orchids. Read about how to water an orchid potted in moss here.
Many orchid growers also opt to mount these orchids to wooden boards. These boards are then attached to trees.
In it’s natural habitat, this vine orchid attaches itself to trees and climbs up and around the trunk and branches. Overtime, as the orchid grows, the roots eventually reach downwards and grow into the ground. It still has many air roots working to gather moisture and nutrients from the surrounding environment. This is what makes the vanilla orchid a semi-terrestrial, semi-epiphyte orchid.
Other orchid growers grow their vanilla orchids outdoors on vine supports, similar to what you may see for grapevines. Depending on your climate, this may work well for you. It eliminates the risk for root rot as well as the need for regular repotting.
Repotting
If your vanilla orchid is mounted to a tree, pole, or some sort of vine support, you will not need to repot it. It can remain in it’s location undisturbed, as the roots are all aerial roots at this point.
However, if your vanilla orchid is potted in a mix of medium and fine-grade bark mix, you will need to regularly repot the orchid and check the roots for rot.
This combo mix of potting media suggested above will naturally retain more moisture due to the smaller pieces of bark. This, along with the high humidity levels, makes vanilla orchids prone to root rot.
If your orchid is potted, aim to repot your vanilla orchid yearly. Don’t go more than two years without repotting.
Each repotting session, inspect the orchid roots and remove any mushy, rotted roots. Make sure you use sterilized gardening shears to prune off these dead roots. Always disinfect your gardening tools after use to prevent the spread of disease.
Repotting will also give you an opportunity to evaluate your watering practices. If you find that many roots have died from rot, you may need to adjust your watering frequency to water less often. On the flip side, if you find many dried, shriveled roots, you may need to water more frequently or increase humidity levels.
Alternatively, you may want to switch to a different potting media or pot that would be easier to manage. I always like potting my orchids in clear plastic pots, as it allows me to easily and quickly tell if my orchids need more water.
Vanilla Orchid Pests And Disease
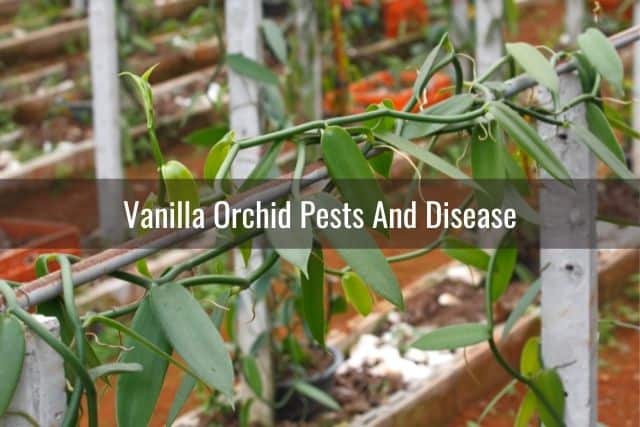
Orchid pests are a problem for any orchid grower, and no orchid is immune to these pests. If you are growing your orchids outdoors or in a greenhouse near other plants, you will come across orchid pests at some point, sooner or later.
The two orchid pests that the vanilla planifolia is most susceptible to are spider mites and mealybugs. I’ve written a couple of extensive guides about these bothersome orchid pests and I’ll link to those below. There’s information on how to identify them as well as how to get rid of them.
If growing these orchids outdoors in a semi-terrestrial setting, watch out for snails and slugs. To prevent snails and slugs from attacking your orchids, sprinkle snail and slug bait on the ground around your orchids.
The high humidity and hot temperatures that this orchid requires can also create a breeding ground for mold and fungus. Bacteria, viruses and other pathogens tend to replicate more quickly in warm, humid environments, creating the potential for a host of orchid problems.
To address problems with mold and fungus, regularly inspect your orchid. Pay close attention to the leaves and roots.
When watering your orchid, water early in the morning and avoid splashing the leaves. If contaminated water gets on the leaves, it can easily lead to brown spot and brown rot. Standing water can also lead to fungal growth and disease.
Wherever you keep your orchid, make sure you have good air circulation set up. You can do this either by keeping a nearby window open or using a circulating fan to maintain airflow.
Good air movement around your orchids will help water evaporate more quickly. This in turn will help prevent issues with standing water, which would otherwise lead to rot and disease.
How To Propagate Vanilla Orchids
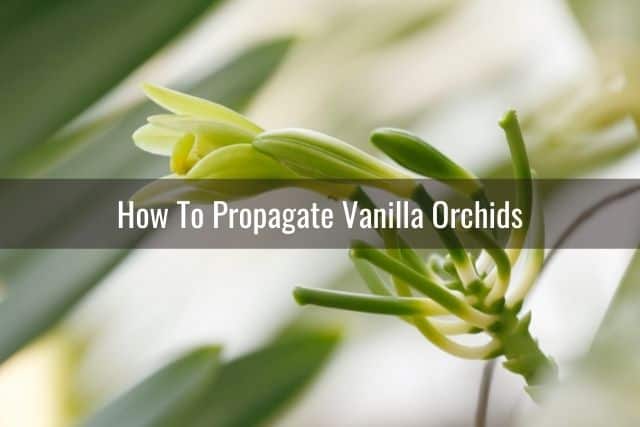
Vanilla orchids can be propagated from a cutting. You can obtain this plant cutting by pruning your orchid (instructions to follow).
While you don’t have to cut back or prune a vanilla orchid, especially if it is growing outdoors, routine pruning and removal of dead plant matter is essential to keeping the orchid healthy. You can also prune back your orchid to keep it from getting too large and use the cuttings to grow a new vanilla orchid plant.
I’ve covered orchid propagation and how to propagate orchids extensively elsewhere on Everyday Orchids. Propagating a vanilla orchid uses similar techniques, but is also slightly different because this orchid is a vine.
Supplies
- A pair of sterilized gardening shears
- Orchid potting media of your choice, either sphagnum moss or a mix of medium grade and fine grade orchid bark
- A clean, ideally sterilized, orchid pot
- An orchid stake and at least two support clips
- Gloves (especially if you are handling sphagnum moss)
Step-By-Step Guide To Propagating A Vanilla Orchid
- Locate a branch on your vanilla orchid vine that has at least 6 or 7 nodes on it. These nodes may look like triangular-shaped bumps along the vine.
- Using your pair of sterilized gardening shears, cut the vine between nodes, making sure that your cutting has at least 6 nodes.
- Gently remove the bottom 2 leaves from this cutting. This part where the leaves were removed will be the section you cover with potting media in the next step.
- Pot your vanilla orchid cutting in an orchid pot. Use your potting media of choice, either sphagnum moss or a mix of medium and fine-grade orchid potting media. For a refresher, read this guide on how to pot an orchid.
- Place an orchid stake in the pot, positioning it next to your cutting. Use a couple of clips or ties to secure the cutting to the stake. This is just like staking an orchid, but easier, since you don’t have to worry about damaging any orchid roots.
- If you had soaked your potting mix in water prior to potting, or are using damp sphagnum moss, you will not need to water your orchid immediately after potting. Instead, in a few days or a week, when the potting media is nearly dry, start watering your orchid regularly.
Newly propagated orchids also appreciate humidity in the growing area. Use a cool-mist humidifier to maintain high humidity levels. This will help the orchid cutting develop roots more quickly.
Keep track of humidity levels using a hygrometer. Adjust the humidifier settings accordingly to meet the vanilla orchid’s high humidity needs.
Your orchid cutting will take at least several weeks to develop root buds. In the meantime, it’s leaves will be able to absorb moisture from the surrounding air, so humidification is key in this early stage.
Where Can You Buy Vanilla Orchids?

If you are fortunate to have a friend or know someone with a mature vanilla orchid plant, ask for a cutting. Then to pot it, following the steps in the section above about propagating vanilla orchids. This way, you’ll be able to have your own vanilla orchid plant for little to no cost.
If you are unable to ask for an orchid cutting, you’ll need to buy your vanilla orchid from a grower. However, most flower shops and flower marts do not carry vanilla orchids. This is a less commonly sold plant, and you will have better luck with online sellers. Here are some suggestions:
- Vanilla Planifolia Orchid from The Orchid Gallery: This is sold as a young starter orchid, usually about 5 or 6 inches tall. This orchid is sold potted.
- Vanilla Planifolia from Bloomify: Also a young starter orchid, this one is sold mounted to a small wooden board. This is a good choice if you are planning to mount your orchid to a tree, post, or vine support. You can simply secure the wooden plank to the location of choice and continue to care for it as is, without the worries about repotting.
- Vanilla Orchid sold by Gray-Gardens: This is a young orchid, sold in a 2 or 3-inch pot.
In pretty much all cases, vanilla orchids sold online will be young orchids, propagated from a vine cutting. They will likely have rooted and be several months old, but nowhere near the flowering age.
Once you receive your vanilla orchid, you will need to take care of it for several more years before it is old enough to flower. All that is to say, don’t expect much when you first buy your vanilla orchid. Remember it will be a “baby orchid” and on top of that, this particular orchid takes a long time to grow.
Final Thoughts
It takes some work, but if you are looking to branch out from the ubiquitous Phalaenopsis moth orchid, you may want to consider giving the vanilla orchid a try. These beautiful orchids are a great option for experienced orchid growers.
If your climate isn’t conducive to keeping the vanilla orchid outdoors year-round, it is best to use a large greenhouse to house these orchids, as they can get quite big. To get your vanilla orchid to thrive and flower, follow the care guide outlined in this article. Do your best to provide your vanilla planifolia with the required growing conditions and be patient.
Once you see those flowers start to form, be ready to hand-pollinate them. I go over how to do this in a separate article. With luck, some effort and a lot of patience, your orchid will start to develop those coveted vanilla seed-pods. Getting your vanilla planifolia to produce those “vanilla beans” is quite an accomplishment and definitely a reward for all your work.
I hope this guide to vanilla orchids has helped you. Even if you decide not to grow your own vanilla orchid, I hope you have learned something new and interesting today! Thank you for reading and as always, happy orchid growing!
If you enjoyed this article, please pin it and share!
Recent Posts
Fusarium wilt in orchids is, unfortunately, a problem that you may encounter at one point or another. It is caused by the Fusarium pathogen and this kind of infection can be hard to identify at...
When it comes to choosing an orchid potting mix and knowing what kind of orchid soil is best, the decision can feel daunting. After all, there is a huge variety of options out there, from orchid bark...
