
Root rot is a common problem in orchids. You may encounter this at some point, especially if you are new to orchids. If you aren’t familiar with what root rot is, or how to spot it, you’ve come to the right place. I’ll go over a few telltale signs of root rot in orchids.
One of the top signs of root rot in orchids is brown, mushy roots. You may also see wilted, wrinkled orchid leaves and a lack of recovery despite your best efforts at watering. Among other things, orchid root rot is often accompanied by fungus gnats, yellowing orchid leaves, and slower growth.
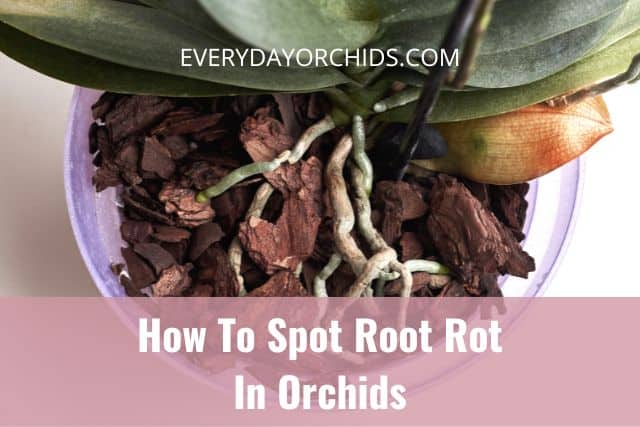
In this article, I’ll go over orchid root rot in more detail. You’ll learn more about how to spot the “above ground” signs of root rot, along with the “below ground” signs of root rot. You’ll learn how to identify root rot in orchids and how to treat it.
If it turns out that your orchid does have root rot, don’t worry. Orchids can recover from root rot. You just have to know how to identify and treat it. Keep reading to learn more.
Please note that these links are affiliate links and as an Amazon Associate, I earn from qualifying purchases. Purchases made through affiliate links in this post may generate commissions at no additional cost to you. Use this link for a discounted Amazon Prime trial. Thank you for your support!
Table of Contents
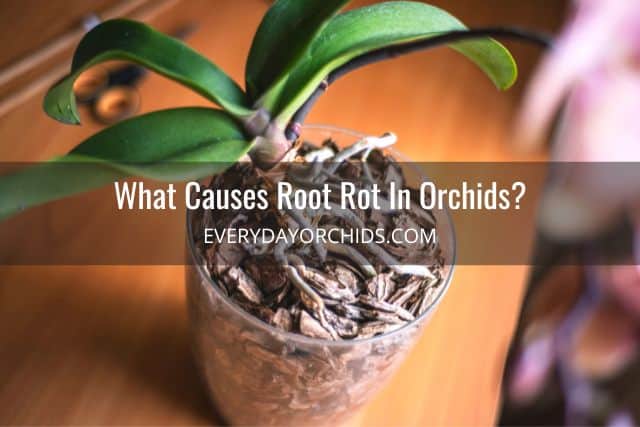
What Causes Root Rot In Orchids?
Root rot in orchids is primarily caused by overwatering and poor watering routines. It can also be caused by poor air circulation in the pot and several other factors.
Tightly Packed Potting Media
One factor that can lead to root rot in orchids is tightly packed orchid potting media. This may happen if the orchid grower puts too much potting media in the pot during repotting. The orchid bark ends up tightly packed in and compresses the roots, leaving little room for airflow.
Packed-in potting media can also occur gradually over time. It naturally happens as the potting media ages and settles. As old potting media decomposes, it starts to break down into smaller pieces. This naturally leads to less gaps and space between the roots and orchid bark.
In either case, less open space around the orchid roots means there is less air circulation and the potting media stays damp longer.
This leaves the orchid roots exposed to moisture for longer periods of time, never fully being able to dry out. Eventually, you end up with root rot.
Fungal and Bacterial Pathogens
A dark, damp environment will also encourage the growth of fungal and bacterial pathogens.
Mold and fungal spores can multiply quickly in the orchid potting media if it is kept constantly wet. The presence of fungal and bacterial pathogens, combined with moisture and stagnant air, can lead to root rot.
Overwatering
The biggest, most common cause of root rot is overwatering. Overwatering an orchid is fairly easy to do, especially if you are new to orchids.
Oftentimes, people unfamiliar with orchid care treat them like any other houseplant. That is to say, they water their orchids on the same schedule as all their other houseplants. Often, this ends up being two or three times a week.
I’ve heard people say things like, “I just can’t keep my orchid alive,” and “I don’t know why my orchids keep dying…I water them at least twice a week.” This, right here, is where things went wrong. This watering frequency is too much for orchids.
To fully understand why orchids cannot tolerate frequent watering, you first have to understand that the structure of orchid roots is very different from any other plant.
Orchid Roots
In the wild, many orchids are epiphytes. They do not grow in the ground or soil. Instead, epiphyte orchids use their roots to cling to the sides of trees, rocks, or other surfaces. Examples of epiphyte orchids include Phalaenopsis orchids.
The roots of epiphyte orchids are specially designed to absorb water and nutrients from the air and surrounding environment.
This is made possible by the spongy layer of velamen which surrounds the orchid root. The actual orchid root underneath that layer of velamen is thin and string-like.
After the water and nutrients are absorbed by the velamen, they are then transported to the stele. This acts like the transport system in orchids. From there, water and nutrients absorbed by the orchid roots are distributed to rest of the orchid.
You can think of velamen like a sponge. It can only absorb so much water at a time. If it is constantly wet or exposed to moisture, it will start to break down and rot.
Once this happens, the orchid is no longer able to absorb water or nutrients. You will start to see physical changes in your orchid as a result, letting you know that something is wrong.
Next, let’s talk about signs of root rot in an orchid and how to recognize it in your plant.
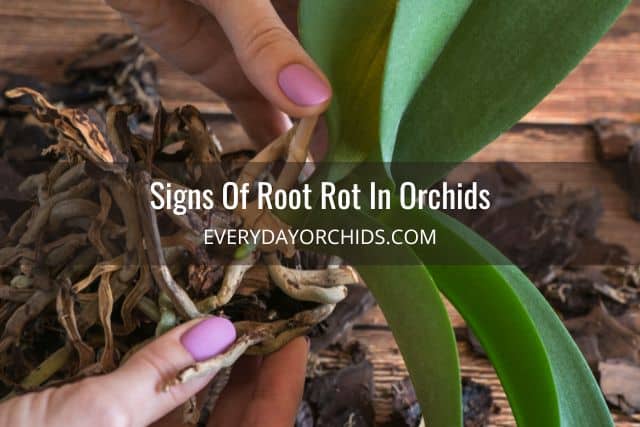
Signs Of Root Rot In Orchids
Most noticeable changes associated with root rot will be seen “above ground” in orchids. I will go over these soon. But first, what you find “below ground” is what actually tells you, once and for all, whether your orchid has root rot or not. The “above ground” changes can indicate root rot or a plethora of other orchid problems, but looking at the roots will definitively tell you if your orchid has rot.
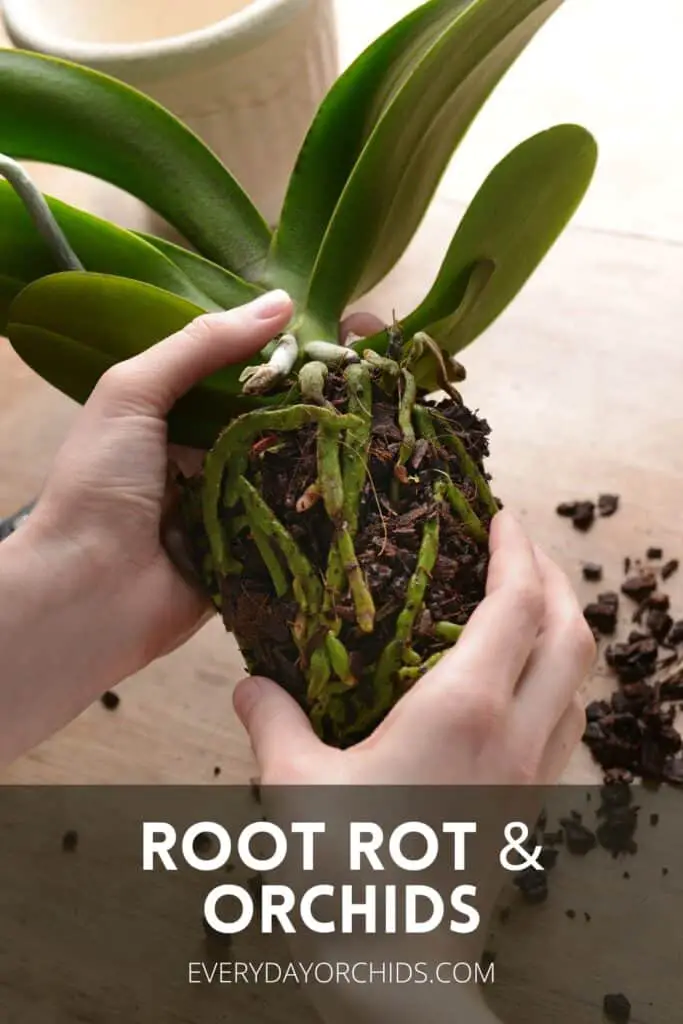
Changes In Orchid Root Structure
It seems obvious that you should look at the roots to find out if whether an orchid has root rot. But you wouldn’t think to unpot your orchid and inspect the roots unless something is wrong. Oftentimes, the roots aren’t readily visible and we don’t realize our orchid has root rot until it is too late.
Usually we are alerted to an orchid problem because of issues with the leaves, flowers, or growth. These other problems are what might ultimately lead us to unpot the orchid and inspect the roots.
Healthy Orchid Roots
Ideally, what you’d like to see when you unpot your orchid are healthy orchid roots.
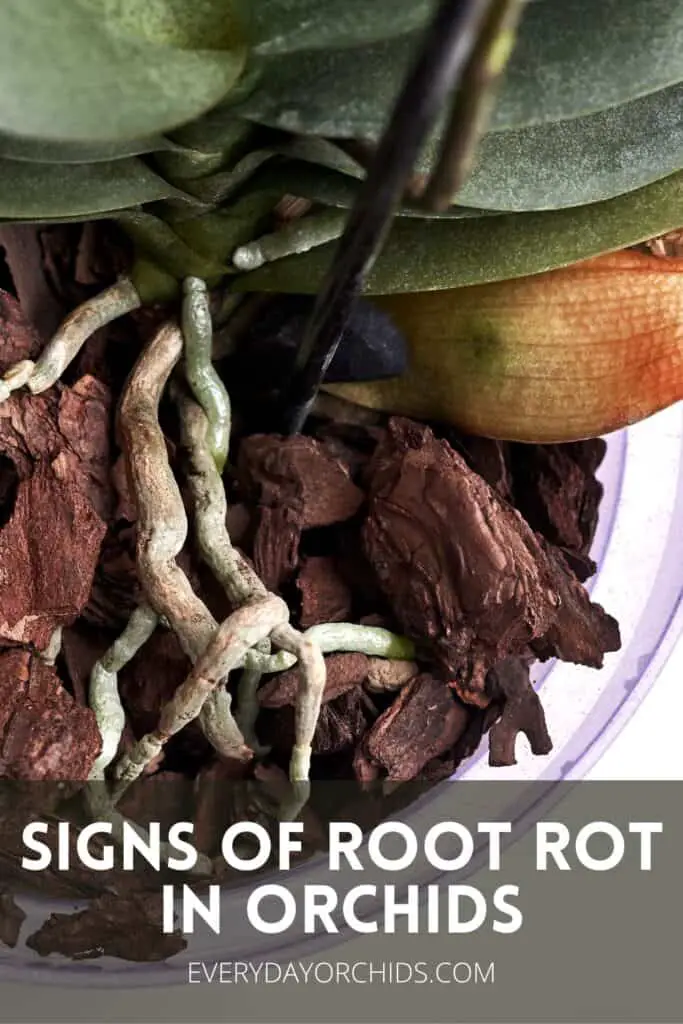
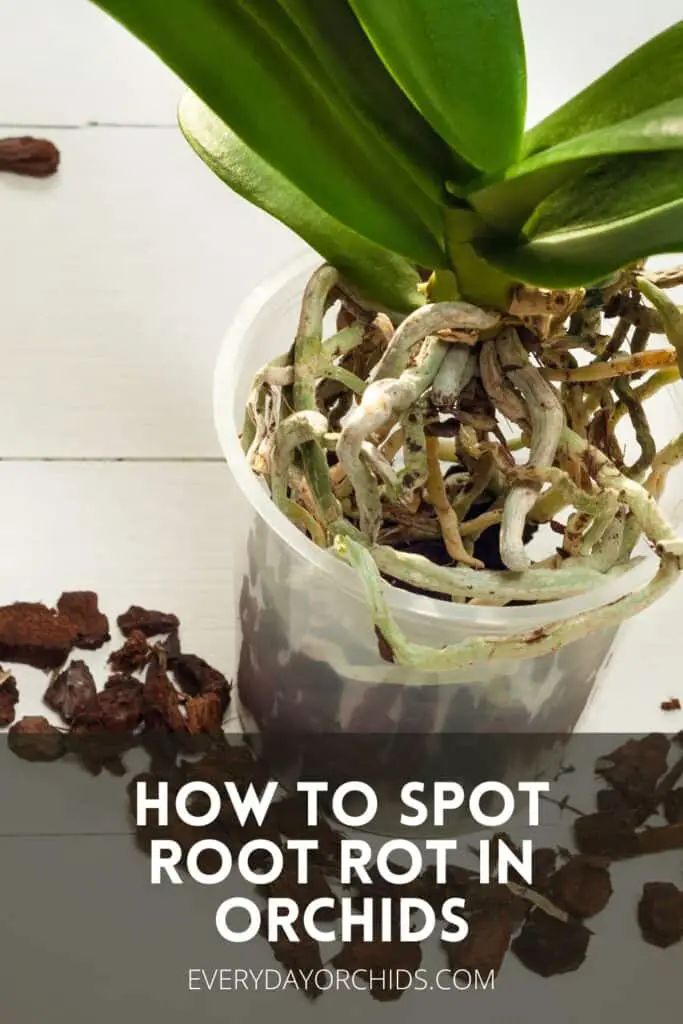
Healthy orchid roots are silvery gray and are plump and firm to the touch. They may change from gray to green when the orchid is watered.
Some orchid species may have silvery gray roots with reddish tips due to genetics. This is normal.
Roots that are not exposed to light may be white or yellow in color, but still firm. These are all different colors of healthy orchid roots and what you would want to see.
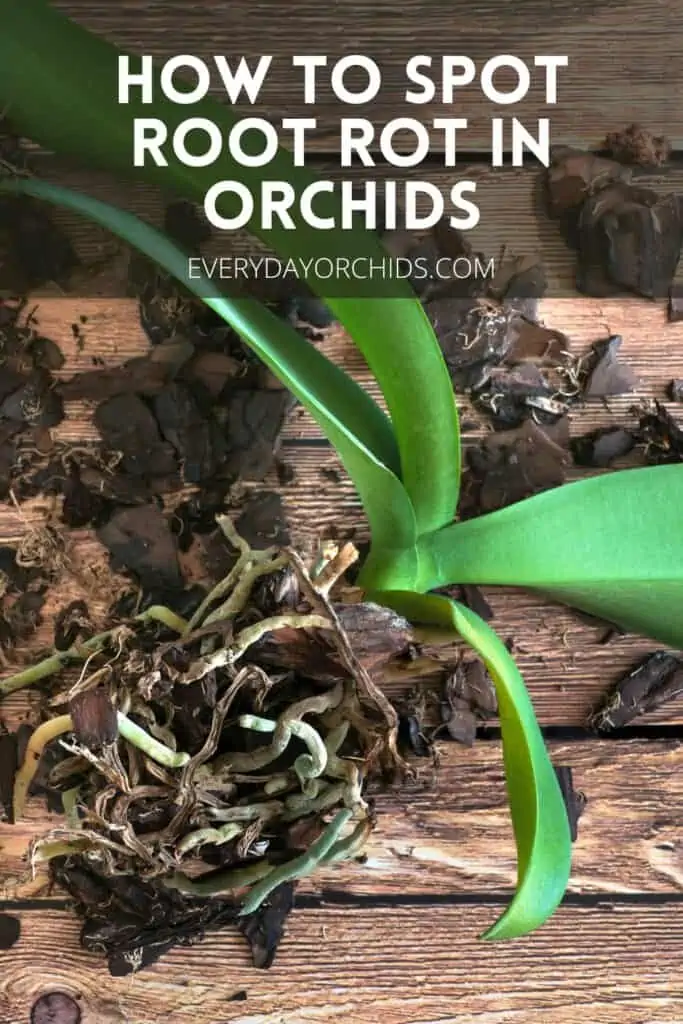
Orchid Roots With Root Rot
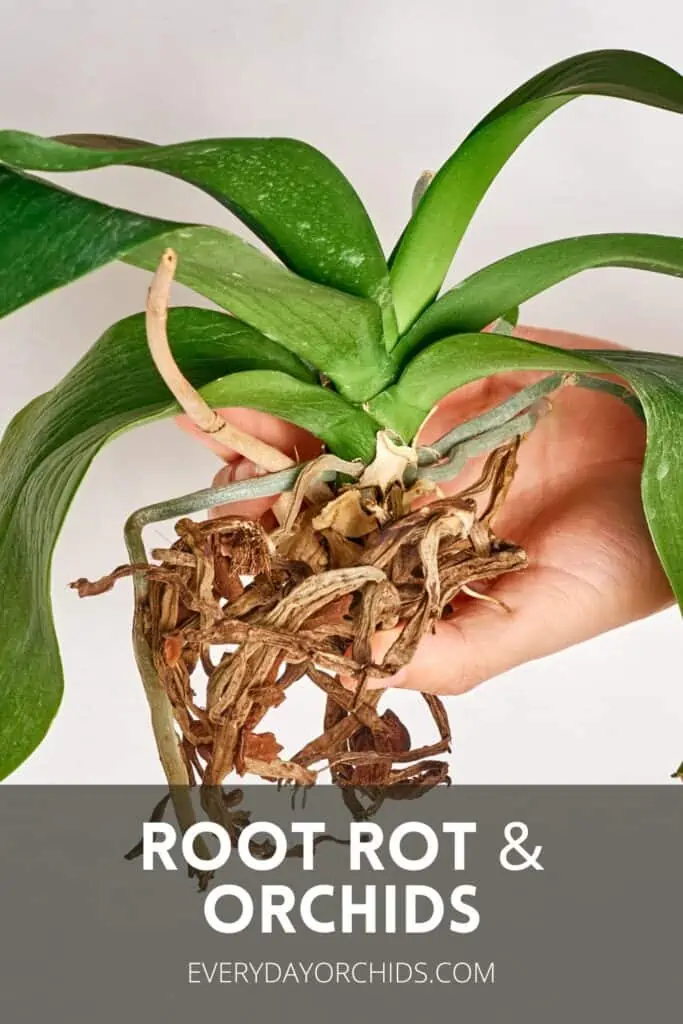
On the other hand, if your orchid is suffering from root rot, you may be disappointed to find brown, mushy roots.
Orchid roots that have root rot are generally brown or black in color with a soft, mushy texture. You may be able to bend the orchid root easily.
The roots may also feel slimy or fall apart when handled. In some cases, you may only find a hollow, brown shell of a root where there was formally a healthy, plump orchid root.
These brown, black, mushy roots are dead roots. They are not able to absorb any water or nutrients and need to be removed. Otherwise, if the rotted roots are left on the orchid, the rot will continue to spread along the root system until the whole orchid dies.
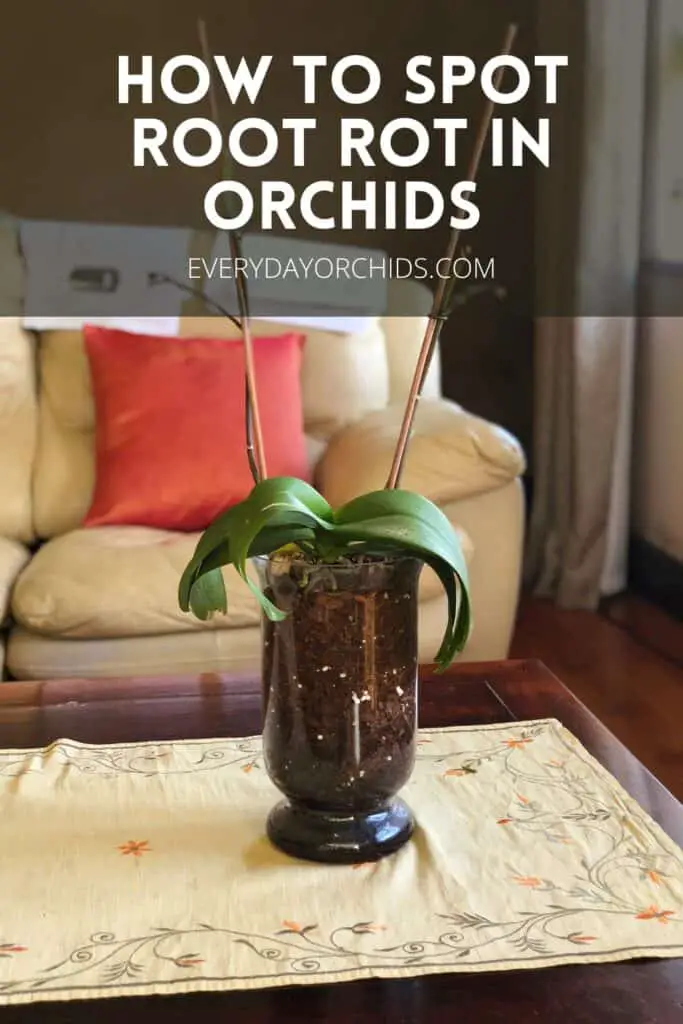
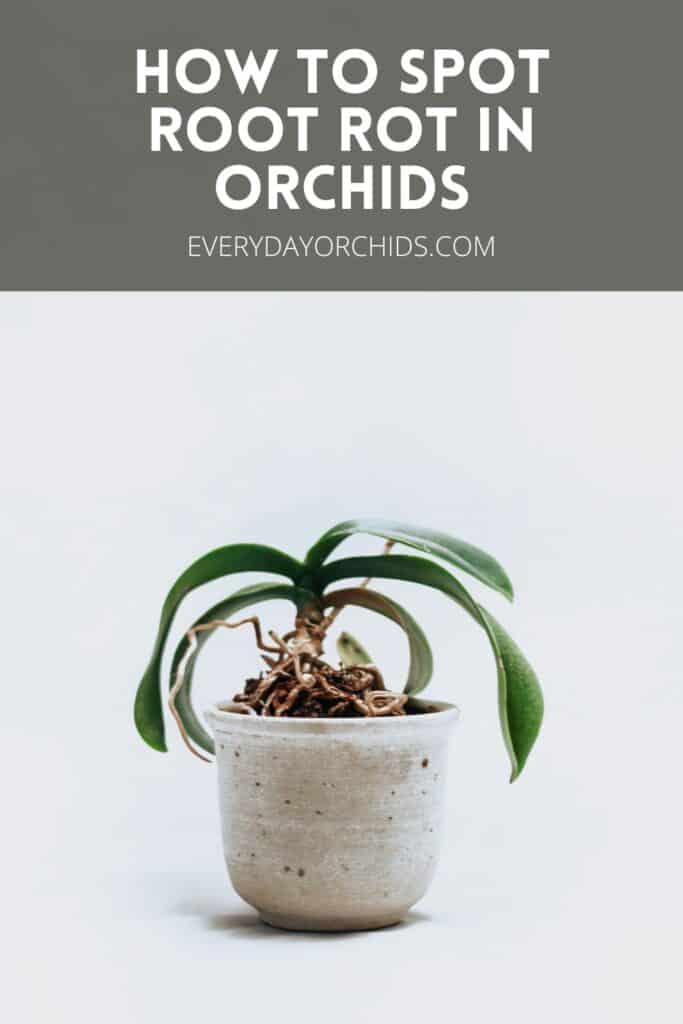
Wilted, Wrinkled, Limp Orchid Leaves
Oftentimes, you may not realize that something is wrong with your orchid until you start to see changes in your orchid’s leaves.
When an orchid has root rot, the leaves will start to wilt and turn limp.
While there is more than one reason why an orchid leaf may change color, this is one of the “above ground” signs of root rot you can count on.
Normal orchid leaves are firm, unwrinkled, and do not bend easily. They are also bright green and shiny.
However, wilted, wrinkled orchid leaves are usually limp, soft, and pliable. They are easily bent or folded and have lost their luster. These wilted leaves are usually a dull green or yellow color.
When you see wilted, limp leaves in an orchid, this is typically a symptom of a bigger problem. The roots may be dried and shriveled or rotted. In many cases, this root problem likely has been going on for a while.
Either way, when you see these kind of leaves in an orchid, it is a sign that the orchid roots are not absorbing enough water. If you are regularly watering your orchid and still have wilted orchid leaves, there is actually a good chance that you have root rot.
Yellowing Orchid Leaves
Yellowing orchid leaves are another “above ground” sign of root rot in orchids.
Wilted, wrinkled orchid leaves will start to turn yellow as the leaf dies. You may notice your orchid leaves turning yellow and falling off in quick succession.
This often happens if nothing is done to address the root rot and the orchid starts to die. Generally, the bottom leaves will turn yellow and fall off first, soon followed by the upper leaves.
Yellowing Of Leaves Due To Old Age
I do want to say that orchid leaves turning yellow and falling off is not always a sign of root rot. Sometimes orchid leaves can turn yellow and fall off due to old age, and this is perfectly normal.
When old age is the cause, the orchid’s bottom leaves gradually turn yellow and fall off, one at a time. This happens slowly, over a period of weeks.
In addition, when old age is the cause of yellow leaves, the remainder of the leaves stay green, firm and healthy in appearance.
Yellowing Orchid Leaves Due To Root Rot
However, when orchid leaves turn yellow due to root rot, the orchid loses its leaves in quick succession. This is one difference. Another key difference is that with root rot, all the leaves are wilted and limp, not just the bottom leaf.
If your orchid’s leaves start to turn yellow and quickly fall off despite your continued efforts at watering, you likely have root rot. The orchid is losing its leaves because it is unable to absorb water from its roots and is slowly dying.
Stunted Growth In Your Orchid
When your orchid has root rot, orchid growth more or less stops, or at least slows down considerably. You may not see any new root buds or new leaves forming. You certainly will not see new flower spikes or flower buds either.
This stalled growth happens because your orchid is focused on surviving. Rather than expending efforts on growth, it is focused on conserving it’s energy and nutrients.
Orchid growth will not be able to pick up again until after the orchid root rot has been dealt with.
Orchid Flowers Falling Off Early
One of the other things that happens with root rot is that the orchid flowers will start to fall off early.
If the orchid is unable to absorb water from the roots, it will start to take water and nutrients where it can get it, starting with the flowers and flower buds. This is part of the orchid’s survival response.
If your orchid has root rot, fully open orchid blooms may fall off the orchid spike early. Unopened flower buds will shrivel and fall off the flower spike without ever blooming. The orchid flower spike itself will start to turn yellow, then brown, as it slowly dries up and dies.
Again, this usually happens because an orchid with root rot is unable to absorb enough water to meet its basic needs. In an effort to survive, it will start cutting off all “unnecessary” or “nonessential” processes, including bloom production.
Orchid Pest Infestations Due To Root Rot
Orchid root rot doesn’t directly cause a pest infestation, but an infestation can happen due to the damp orchid potting media and weakened condition of the orchid.
One of the more notable orchid pests associated with root rot are fungus gnats. As you know, root rot in orchids is often associated with overwatering. As a result, the potting media never gets a chance to fully dry out.
Unfortunately, the decaying, wet organic material tends to attract fungus gnats. It is the perfect breeding ground for these orchid pests and they will oftentimes lay their eggs in the potting media.
The fungus gnats are also attracted to the root rot, biting and feasting on both rotted and healthy orchid roots. This is why a fungus gnat infestation may accompany root rot in orchids.
Decaying Orchid Potting Media
Keeping the potting media constantly moist accelerates the decomposition and breaking down of the orchid bark.
Note: I am referring to orchid bark or orchid potting media that is bark-based when I talk about decaying orchid potting media.
Overtime, you may start to notice that your orchid bark chunks are not as big as they initially were when you first potted your orchid. They may have started to break down into smaller chunks and may also look darker due to constantly being wet.
Decomposition causes the potting media to break down into many smaller pieces. As a result, there is less airflow within the orchid pot and between the orchid roots. This further exacerbates the problem, making it more difficult for the orchid roots to dry out. In turn, this worsens the root rot.
Presence Of Orchid Mold And Disease Due To Root Rot
In extreme cases, you may even start to see mold develop on the orchid potting media. This can happen if you have pathogens in the air or water, combined with high humidity, poor airflow and warm temperatures. Root rot aside, the presence of mold spores puts your orchid at high risk for disease.
If there is a fungal or bacterial infection brewing, you may notice a foul odor coming from your orchid pot. Usually the presence of bad smells is due to an infection of some sort, as the dying, decaying material becomes infected. This may be from the root rot, but most likely, the odor is due to the bacteria in the potting media.
Untreated Root Rot: Orchid Dies
Finally, if you ignore all the different signals for help that your orchid is sending out to you, your orchid will die. Untreated root rot can definitely kill the orchid.
So, if your orchid appears to be dying despite your best watering efforts, unpot the orchid and take a look at the roots.
Caught early and treated, an orchid can and will recover from root rot.
Trust me. I know this from experience. Root rot is a common problem for orchid growers. Many new orchid growers struggle with knowing when and how often to water their orchids, and there is a learning curve when you first start out.
If you want to learn more about how to water your orchid, please read these guides on Everyday Orchids:
Also, root rot is preventable. If you have a new orchid, first find out the species it is and what the specific care needs are. Each orchid species has slightly different needs for watering, lighting, humidity and fertilization, as well as the type of pot and potting media.
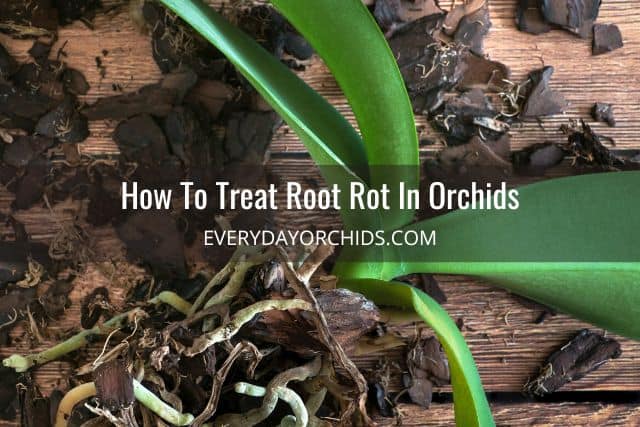
How To Treat Root Rot In Orchids
If you do notice any signs of root rot in your orchid, don’t despair. I’ve actually dealt with root rot many times, especially when I was new to orchid growing, and it’s worked out fine. Many of those orchids are still with me to this day.
Orchids are resilient. Just because an orchid has root rot doesn’t mean that the orchid will die.
With the right care, orchids can recover from root rot, especially if you were able to catch it early.
Here are some steps you can take to treat root rot in your orchid.
Unpot The Orchid
First, unpot your orchid and clean off all the old potting media from the orchid roots.
Then, take all the old potting media, put it in a plastic bag and throw it away. Do not reuse it.
Any fungal pathogens or mold spores are in the potting media and you risk spreading it to other plants. What’s more, the old potting media is likely broken down, half-decomposed and no longer usable.
Then you’ll want to prepare new orchid potting media, as outlined in my Everyday Orchids guide on how to repot an orchid. Make sure it is free of bugs and mold. Let it soak in a bucket of clean water while you take care of your orchid roots.
Clean The Orchid Roots
Fill a second bucket with clean water. You’ll use this to wash the orchid roots. Holding your orchid’s main stem and leaves above the water, place the orchid roots into the water. Gently clean off all the old potting media. I find it easiest to use my fingers to work off any old potting media stuck to the roots.
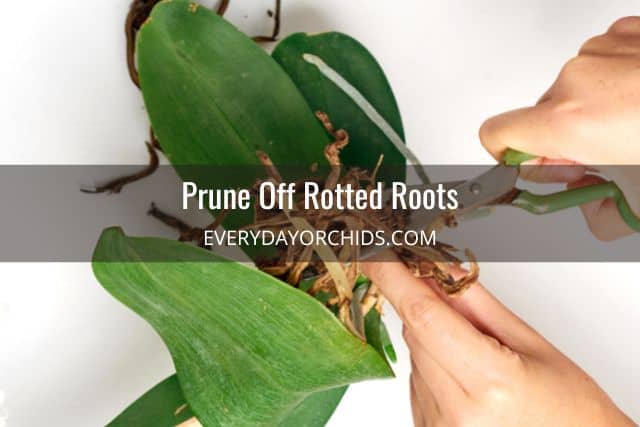
Prune Away Rotted Orchid Roots
Once the orchid roots are clean of any old potting media, take the orchid out of the water.
Using a pair of sharp, sterilized gardening shears, prune off all the rotted roots. Cut off any soft, brown or black roots, any dead roots or hollow roots.
When dealing with root rot, I generally try to cut off all the areas of rot plus a little bit of the healthy root just above the rot. This is to ensure all the rot is removed.
After you’ve done this, sterilize your gardening shears again before putting them away.
Antifungal Treatment
This is optional, but I recommend doing some sort of antifungal treatment on the roots before you repot it.
I like to dab a little bit of ground cinnamon powder onto the cut ends. Cinnamon powder has anti-fungal properties and is a dessicant. I use the ground cinnamon to both seal the cut root and keep it from becoming infected again.
You can also dust a powdered fungicide over the roots, focusing on the areas where there was previously rot.
Repot The Orchid
Once that is all done, you are ready to repot your orchid. Use a clean, sterilized orchid pot for this. I’ve gone over how to choose and sterilize an orchid pot here.
You’ll also use the new orchid potting media that has been soaking in water during this time. In this guide, I am assuming you are using bark-based orchid potting media to repot your orchid.
For orchids that have completely lost all their roots to rot, read this Everyday Orchids guide on how to save an orchid without roots. In this scenario, you may want to use sphagnum moss to regrow your orchid roots. I give detailed instructions on how to do that in the guide above, as well as in this guide to using a homemade humidity box to quickly regrow orchid roots.
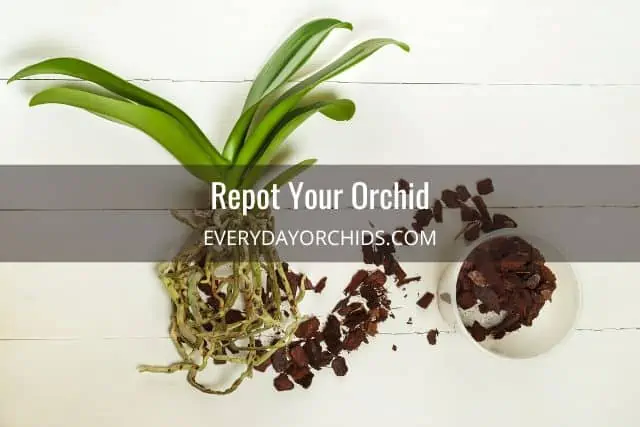
To repot your orchid, place a handful of potting media at the bottom of your orchid pot, squeezing out any excess water from the orchid potting media.
Center your orchid roots in the pot, keeping the bottom of the orchid’s main stem level with the rim of the pot.
Then, carefully fill the rest of the orchid pot with potting media. Make sure you have potting media lightly packed in between and around the orchid roots to keep the orchid upright and stable.
Ideally, the orchid should be secure and snug in the orchid pot and not move, but still have enough room between the roots for airflow and evaporation.
Watering Your Orchid After Repotting
After repotting your orchid, avoid watering your orchid for the next few days.
Remember, the orchid potting media you used had been soaked in water, so it is still damp. This will provide your orchid roots with enough moisture for the next few days.
Give your orchid some time to rest and recover from the stress of repotting and pruning rotted roots. Then, after a few days, do the finger test. Stick your finger one or two-inches into the orchid potting media.
If it is dry or nearly dry, go ahead and water your orchid following this watering guide. Going forward, only water your orchid when the potting media is nearly dry.
The number one way to prevent root rot in your orchids is to water the orchid when the potting media is nearly dry.
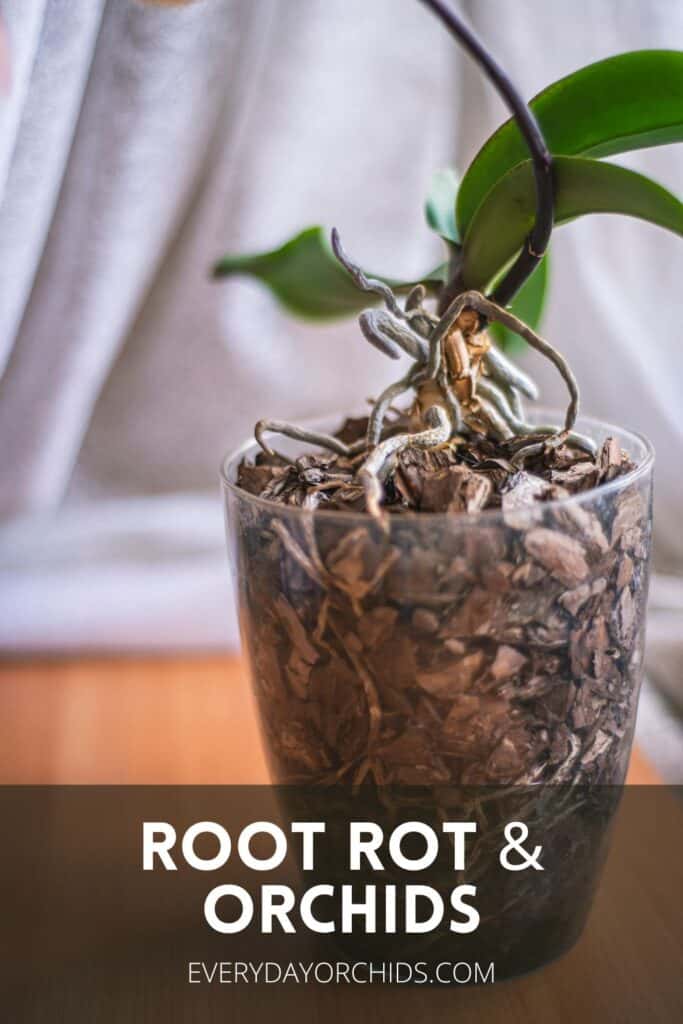
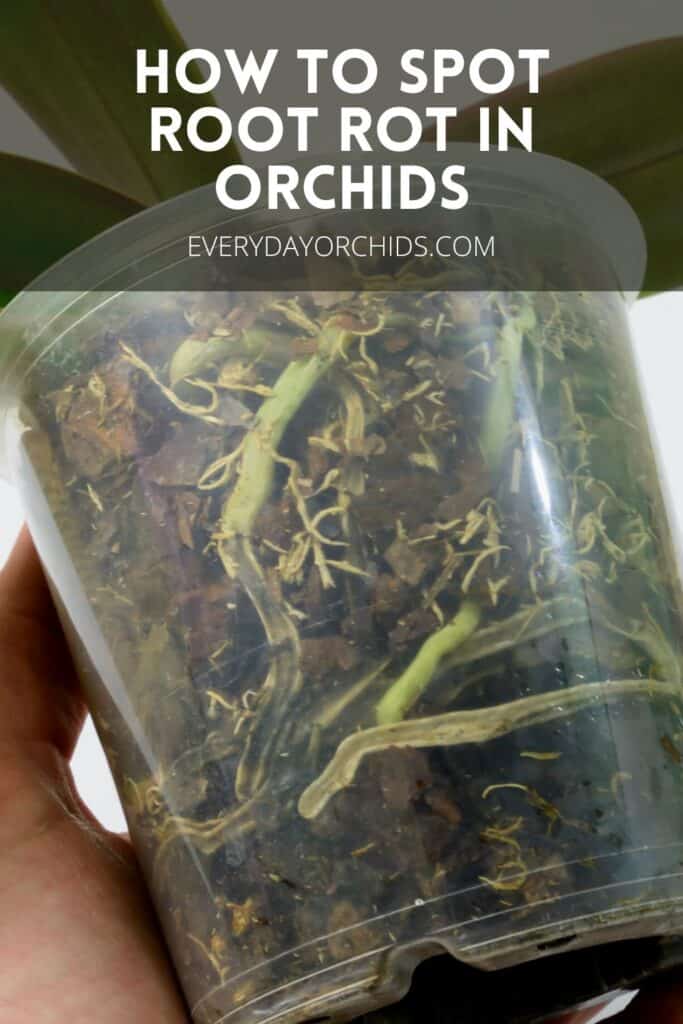
If your orchid is planted in a clear plastic orchid pot, this makes it easier to keep an eye on the orchid roots. Water only when the potting media is nearly dry and the orchid roots are silvery gray.
Final Thoughts
Your orchid will need some time to recover after being treated for root rot. There is a chance that it may skip the next year’s flowering season because it is focused on regrowing new roots and leaves. This is totally fine and expected. Be patient.
With the right care, your orchid will flower again. It will grow new roots. The old, wilted wrinkled leaves will recover to some degree and new, healthy orchid leaves will grow.
With time, the orchid root rot incident will be a distant memory and your orchid will be growing and flourishing. I know it can happen because I’ve dealt with root rot with my own orchids and have confidence that you can get through this too.
If you need any other help with growing your orchids, check out the Basic Orchid Care section of Everyday Orchids. There is a wealth of information there to help get you started. Best of luck, and as always, happy orchid growing!
Recent Posts
Fusarium wilt in orchids is, unfortunately, a problem that you may encounter at one point or another. It is caused by the Fusarium pathogen and this kind of infection can be hard to identify at...
When it comes to choosing an orchid potting mix and knowing what kind of orchid soil is best, the decision can feel daunting. After all, there is a huge variety of options out there, from orchid bark...
