
Mold on orchid roots and potting media can be a cause for panic among orchid growers, or at the very least, a cause for concern. Once you spot snow mold, black mold, white mold or any type of mold growing on your orchid, the first thing you may want to know is how to get rid of it.
To treat mold on orchid roots and potting media, first isolate your orchid. For mild cases, treat the affected areas with a fungicide weekly until the mold is gone. For more severe cases, you will need to repot your orchid in addition to using a fungicide.
In this article, I’ll go over different treatment methods for mold in orchids in more detail. You’ll learn how you can safely get rid of mold on orchid roots and potting media. I’ll lay out different options so you can choose what best fits your situation and your orchid’s needs. I’ll also talk about measures you can take to keep the mold from coming back in the future. Keep reading to learn more.
Please note that these links are affiliate links and as an Amazon Associate, I earn from qualifying purchases. Purchases made through affiliate links in this post may generate commissions at no additional cost to you. Use this link for a discounted Amazon Prime trial. Thank you for your support!
Table of Contents
How To Treat Mold On Orchid Roots And Potting Media
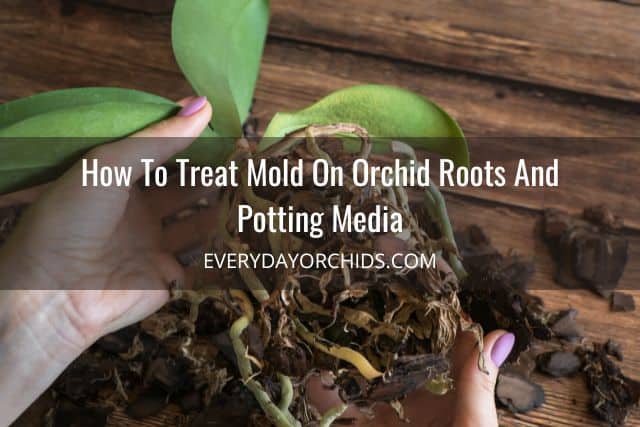
Once you’ve identified mold on your orchid roots or orchid bark, the next thing you may be wondering is what to do. How do you get rid of the mold safely?
There are a few options you can use to get rid of the mold on your orchid’s potting media, pot and roots. I’ll go over that next. But first, we need to talk about mealybugs.
Mold on orchid roots or orchid potting media is sometimes mistaken for mealybugs and vice versa. If you haven’t heard of mealybugs before, these are a type of orchid pest. They are white, fuzzy pests that can be mistaken for mold. Mealybugs often hide in the crevices of orchid leaves and stem joints, as well as the underside of orchid leaves.
Before beginning treatment, make sure what you are seeing is actually mold and not mealybugs. This is because the treatment guidelines will be very different.
You can read more about mealybugs and how to get rid of them here.
Also, in a previous article, I went over the different reasons why you might find mold on your orchid roots and potting media. Please check that out to get some insight on how your orchid became moldy in the first place.
How To Treat Mold On Orchids: Isolate Your Orchid
If you notice mold in your orchid’s pot, the first thing you will need to do is isolate your orchid. This is true whether the mold is on the orchid roots or on the potting media.
Move the orchid to a location away from your other orchids and houseplants.
Air currents from nearby windows can easily transfer mold spores among plants. By isolating the affected orchid, you can minimize the chances for cross-contamination and reduce the chances that your other orchids end up with mold.
How To Treat Mold On Orchids: Remove Contaminated Orchid Bark
If you only spot mold on a few pieces of orchid potting media, go ahead and remove these contaminated pieces of orchid bark. Throw them in the trash.
Improve the airflow around your orchid pot and reduce watering frequency. Only water your orchid when the potting media is nearly dry. This might be enough to stop the spread of mold.
Continue to isolate your orchid for at least a couple of weeks. Keep an eye on it. Before you put it back amongst your other orchids, make sure that the mold hasn’t reappeared.
How To Treat Snow Mold On Orchids: Use A Fungicide
If the mold is widespread or keeps coming back, you might need to resort to using a fungicide, repotting your orchid, or both.
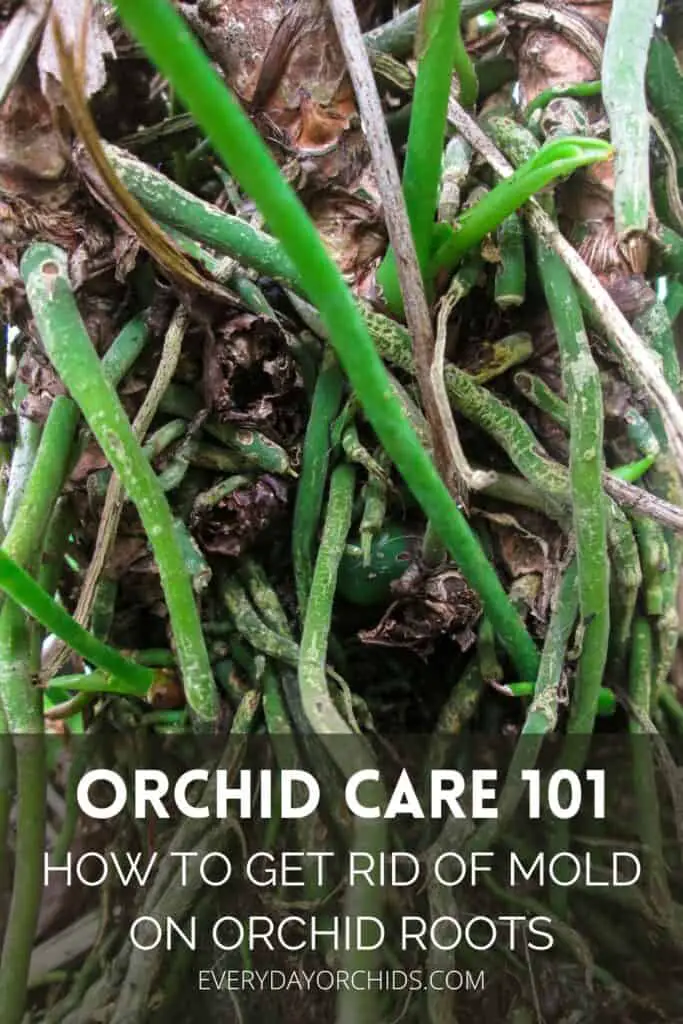
If you have something called snow mold on your orchid, a fungicide may be effective in treating this type of mold. Snow mold generally first appears on the orchid bark as a powdery white mold.
Left untreated, it can spread across the orchid bark to the orchid roots. Over time, snow mold will cover the orchid roots, rendering them unable to absorb water or nutrients, slowly killing the orchid.
If you can, use a fungicide with the active ingredient “alkyl dimethylbenzyl ammonium chloride” for best effect.
In many cases, you will need to use a fungicide in addition to repotting your orchid.
Even after you’ve repotted your orchid, you can continue to apply a diluted fungicide solution to your orchid once a month as needed. This will prevent mold from regrowing or coming back to infect your orchid.
Below are some recommended fungicides you can use on your orchid.
Best Fungicides For Orchids
Physan 20. To use this on your orchids, dilute 1 tablespoon of Physan 20 in 1 gallon of water. Treat your affected orchid by applying this solution to the areas of mold.
Captain Jack’s Copper Fungicide. Use this to spray the areas of mold on the orchid roots and potting media. Apply this in the morning, out of direct sunlight.
Daconil. This is another fungicide used to treat mold, fungus and other plant diseases. This particular product I’ve linked to is a ready-to-use spray, no dilution necessary. Note that if you do buy the concentrated Daconil, you will need to dilute it according to the product directions first.
Garden Safe Fungicide Spray. This spray is organic and contains neem oil. Spray it on your orchids in the morning, out of direct sunlight, to avoid leaf burn. Use this once a week until the mold is gone.
BioSafe Organic Disease Control. Some say this is better and more effective than Physan20. This spray kills mold spores on contact and prevents mold from coming back. It can be used on orchids, fruits, vegetables, and many other plants. Follow the product instructions for dilution and application. Make sure you wear gloves and eye protection with this and all other fungicides.
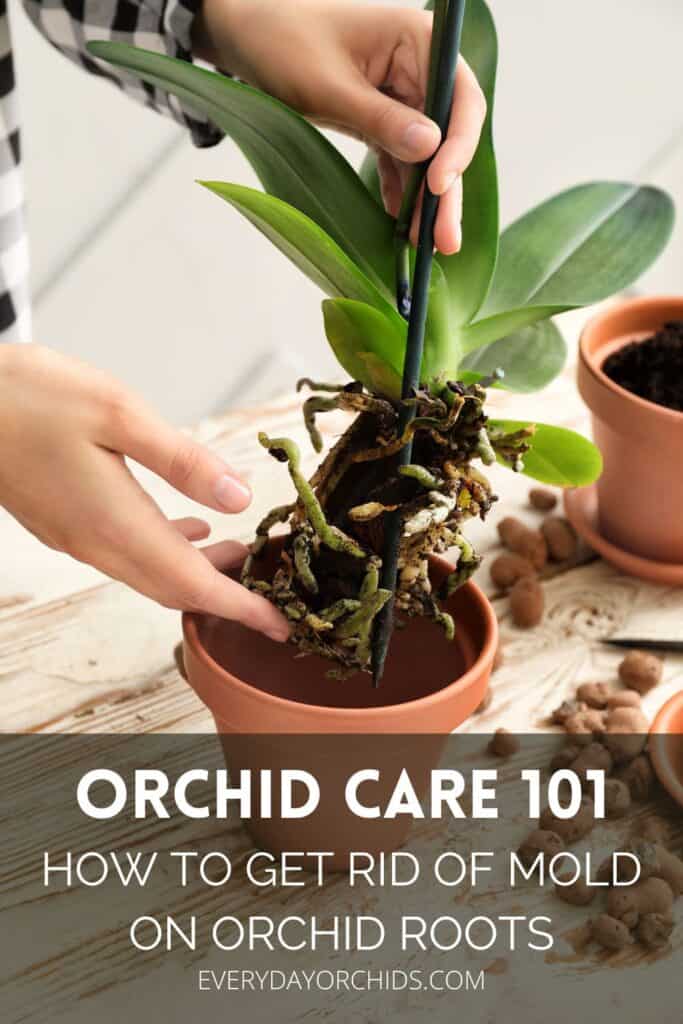
How To Treat Mold On Orchids: Repot Your Orchid
Mold spores can be persistent. The mold can keep coming back despite spot treatments with a fungicide. Repotting the orchid and using new potting media and sterilized pots allows you to “wipe the slate clean” and start over.
In cases where you have extensive amounts of mold covering the orchid roots or potting media, you will need to repot your orchid. This will be in addition to treating your orchid with one of the fungicides I listed above.
To repot an orchid infected with mold spores, follow these steps:
Use New Potting Mix
First things first, inspect your new orchid potting mix thoroughly before use.
I always check for orchid pests, signs of white mold or foul odors coming from the bag. Even if the bag of orchid potting media is sealed, it may not have been well-sanitized before packaging or it may have been poorly stored. This can result in the presence of pests and mold in the seemingly new bag of orchid bark.
There have been times where I’ve opened up a new bag of orchid bark and a swarm of whiteflies flew out. Other times, I found pieces of orchid bark in the new bag to be white with mold. In those cases, I’ve always thrown out the contaminated bag and gone back out to the store to buy new orchid potting media.
Clean And Sterilize The Orchid Pot
When you repot your orchid, use new orchid potting media and a clean, sterilized orchid pot.
Do not reuse the pot you just took your orchid out of, unless of course, you have cleaned and sanitized it already. This is to avoid transferring the mold and fungal spores to the newly repotted orchid.
Sometimes mold can be a problem for terracotta or clay pots. Mold can start to grow on the outside and inner edges of the pot if the pot is allowed to remain damp for extended periods of time.
If this happens, you will need to sterilize the pot by soaking it in a 10% bleach solution first. Let it soak for at least an hour, then rinse the pot well and allow to dry before use.
Repot The Orchid
Once you have confirmed that your new orchid potting media is clean, bug-free, and mold-free, go ahead and repot your orchid using this guide on how to repot orchids.
If you have a sympodial orchid with pseudobulbs that has outgrown its pot, you might as well divide it at the same time. If this is the case, please read how to divide and repot orchids on Everyday Orchids.
Wear gloves and place the old, moldy potting media into a bag. Dispose of it in the trash.
Using a pair of sharp, sterilized gardening shears or scissors, trim off all the rotted roots and moldy roots. Treat the remaining roots with a diluted fungicide spray. This is to kill off any lingering mold spores. Repot your orchid using clean, new orchid potting media.
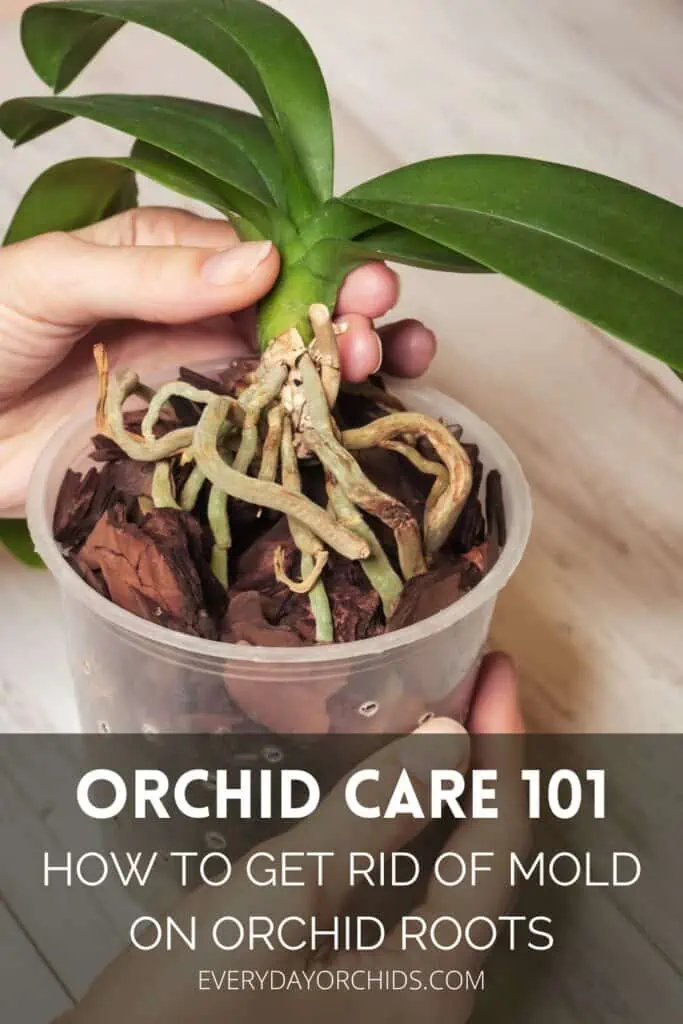
How To Treat Mold On Orchids: Bareroot The Orchids
In cases of extensive mold or root rot, another option is to bare root your orchids for a while before repotting them. This will give them a chance to recover while also keeping the mold from coming back, since the roots will be open to air and have a chance to dry out each day.
To bare root your orchid, follow these steps:
After you’ve removed the rotted roots and mold-covered roots, treat the remaining roots with a fungicide spray.
Instead of immediately repotting the orchid, place the orchid in a large, clear pot or container without any potting media. You can also place your orchid in a plastic basket. This is bare rooting the orchid.
Give the orchid some support so that its weight is not fully sitting on the orchid roots. By supporting the orchid, which tends to be top-heavy, you’ll avoid bending or breaking the remaining roots.
Each day, mist the orchid roots or run water over the roots to water them. Allow the roots to dry until the next day. If you keep your orchids outdoors in a shaded area, the breezes will naturally dry the remaining water within hours.
Make sure you are providing proper humidity levels around the orchid and lots of bright, indirect light.
Once you see new roots beginning to grow on your orchid, you can then pot it into orchid bark, sphagnum moss or the potting media of your choice.
Mold On Orchid Roots And Potting Media: What Not To Do
I’ve just gone over how to deal with mold on orchid roots and potting media. Now, here are some things you should avoid doing when you find mold on your orchid.
Don’t Try To Wash Away The Mold
While it may be tempting to rinse or wash away the mold on the orchid roots and orchid potting media, this won’t help get rid of the mold. This might only work if you grow your orchids in semi-hydroponics (more on this below).
In any other type of potting media, such as orchid bark, the act of washing the orchid roots and potting media will just end up spreading the mold spores further throughout the potting media.
Also, chances are, the mold is present and has continued to grow due to the damp potting media. Using water to try to rinse away the mold only leads to recolonization and spreading of the mold spores. Rinsing the potting media just gets it wet and extends the time that it remains damp. More mold may grow as a result.
Don’t Use Hydrogen Peroxide
Do not use hydrogen peroxide on your orchid roots. Repeat, do not spray hydrogen peroxide on the potting media or roots to try to get rid of the mold.
At best, hydrogen peroxide will do nothing and have no effect, besides bubbling up for a few seconds.
At worse, it can damage the healthy roots and destroy the velamen lining the roots. This will further exacerbate your problem.
Hydrogen peroxide does not kill mold or fungus. Instead, use one of the treatment methods I suggested above for best results.
Avoid The Sphag and Bag Method
While there is a time and place for using the sphag and bag method to save an orchid without roots, I hesitate to use it when you are trying to save an orchid with mold.
The reason for this is that the high humidity and the damp, enclosed conditions are precisely the type of environment that encourages mold growth.
In fact, when I experimented with sphag and bag in the past, I found that mold quickly grew in the bag and I had to abort the experiment.
When you are dealing with an orchid infected with mold, there is a chance that mold spores will persist and reinfect the orchid, even if you treat it with a fungicide. The sphag and bag method provides the perfect environment for mold to grow, so avoid it if you are already dealing with a mold situation on your orchid.
What If Your Orchid Is In Bloom And You Find Mold On The Orchid Roots Or Potting Media?
While you would generally avoid repotting an orchid in bloom, I would say that this, along with disease and severe pest infestations, is one of the times where you should repot the orchid and not wait.
Some orchids, such as Phalaenopsis orchids, can bloom for up to three or four months at a time. Mold can grow fast and the blooming season is quite long with these orchids. This allows too much time for the mold to grow and spread, possibly to other plants.
How To Prevent Mold On Your Orchid
Once you’ve gotten rid of the mold on your orchid roots and potting media, you’ll want to take steps to prevent it from coming back. I was going to say “ever coming back,” but mold spores are present in the air around us. Unfortunately there’s no guarantee that you can stop it from ever happening again. However, there are things you can do to minimize the chances of mold infecting your orchid again in the future.
Preventing Mold On Orchid Roots: Isolate New Orchids
First, isolate any new plant, including new orchids that you buy from the store or get as a gift.
I talked about this in more detail in my article about how to care for a new orchid. Essentially, you want to isolate any new plant, orchids included, when you first bring them into your home.
The purpose of this is to ensure that any diseases or pests that the new plant may be harboring doesn’t get passed on to your existing plants.
Sometimes an orchid may look great in the store and pass the visual inspection, but a couple of weeks later, pests, disease or mold may appear.
It wasn’t that these weren’t present to begin with. It’s more likely that they were present but not in large enough numbers to be noticeable.
To prevent the spread of pests and disease, keep new plants in a separate room than your other plants for at least the first few weeks. Regularly inspect them for pests and signs of disease. If the plants remain healthy after at least a month has past, you can feel free to place them with your other orchids and houseplants.
You can read more about how to spot and buy a healthy orchid here.
Preventing Mold On Orchid Roots: Change Your Watering Habits
Moving forward, water your orchid only when the potting media is nearly dry. Don’t put your orchids on a watering schedule.
Instead, do the finger test before watering your orchid. Actually put your finger a couple inches down into the potting media and see how dry or wet it is.
If the potting media is nearly dry then go ahead and water. If it is still fairly damp, then wait a day or two and then check again.
I go over this more in my guide to how to water orchids. You can also read about how to water orchids growing in moss here.
Oftentimes, mold growth appears on damp, decaying potting media and orchid roots.
Overwatering can result in constantly damp or wet orchid potting media, leading to root rot, fungus gnats and other problems like mold growth.
Frequently watering your orchid will accelerate the rate of decomposition and decay for the potting media, requiring you to repot your orchid more often than necessary.
Preventing Mold On Orchid Roots: Improve Air Flow
Air flow in your orchid pot and around your orchid pot is important.
Oftentimes, mold appears or grows due to a combination of stagnant air or poor air circulation and wet or damp potting media.
In warmer weather, such as summertime, simply open up the windows in the room to allow for airflow.
In colder weather, such as wintertime, you can use an oscillating fan to help circulate air around the room. Just avoid pointing the fan directly at your orchids.
If you have a ceiling fan in same room you keep your orchids, you can turn it on the lowest setting.
You can also help promote airflow by keeping your orchid pots and houseplants spaced apart. Crowding the plants and pots close together diminishes airflow and movement around the pots. This close proximity increases the chance for mold and fungal growth as well as transmission of pests, disease and fungal infections.
Final Thoughts
If you find mold on your orchid roots or potting media, don’t panic and don’t worry. There are ways to approach this systematically. You can deal with the mold before it gets worse. Follow the steps I outlined above, including isolating your orchid, treating with a fungicide and/or repotting your orchid with new potting media.
To prevent mold from colonizing your orchid, make sure you have good airflow in and around your orchid pots. Water only when the potting media is nearly dry. Don’t use hydrogen peroxide on your orchid or try to wash away the mold because this will likely make matters worse.
In most cases, your orchid can be saved. I hope this article has helped you! As always, happy orchid growing.
If you enjoyed this article, please pin it and share!
Recent Posts
Fusarium wilt in orchids is, unfortunately, a problem that you may encounter at one point or another. It is caused by the Fusarium pathogen and this kind of infection can be hard to identify at...
When it comes to choosing an orchid potting mix and knowing what kind of orchid soil is best, the decision can feel daunting. After all, there is a huge variety of options out there, from orchid bark...
